Substrate Tutorials Get started jump 开始接触Substrate基础内容 Build a local blockchain jump 前置条件 1. 有良好的互联网连接并可以访问本地计算机上的 shell 终端。 2. 您相当(generally)熟悉软件开发并使用命令行界面。 3. 相当熟悉区块链和智能合约平台。 4. 你已经安装了 Rust 并按照安装中的描述设置了你的开发环境。 目标内容 1. 下载链端模版和前端模版 - substrate-node-template - substrate-front-end-template 2. 启动节点、启动前端查看 3. 在前端进行转账操作 Simulate a network jump 本教程提供了有关如何使用一组认证 私有验证器启动私有区块链网络的基本介绍。 Substrate节点模板使用认证共识模型, 将块生产限制为授权账户轮换列表。 授权账户(认证机构)负责以循环方式创建区块。 在本教程中将通过使用两个预定义的帐户 作为认证机制,使节点能够生成块, 以此来了解权限共识模型在实践中的工作原理。 在这个模拟网络中,两个节点使用不同的 帐户和密钥启动,但在单台计算机上运行。 前置条件 完成上一节课 1. 安装Rust和Rust工具链,为Substrate 开发配置了环境。 2. 已完成构建本地区块链并在本地安装Substrate节点模板。 3. 熟悉软件开发和使用命令行界面。 4. 熟悉区块链和智能合约平台。 目标内容 1. 使用预定义的帐户启动区块链节点。 2. 了解用于启动节点的关键命令行选项。 3. 确定节点是否正在运行并产生块。 4. 将第二个节点连接到正在运行的网络。 5. 验证对等计算机(peer computers)产生并最终确定块。 Add trusted nodes jump 前置条件 完成上一节课 目标内容 1. 生成用作网络授权的密钥对。 2. 创建自定义链规范文件。 3. 启动一个私有的两节点区块链网络。 Authorize specific nodes jump 前置条件 1. 完成上一节课 2. 熟悉libp2p libp2p 目标内容 1. 检查并编译节点模板。 2. 将节点授权托盘(pallet)添加到节点模板运行时。 3. 启动多个节点并授权新节点加入。 monitor node metrics jump 前置条件 完成Build a local blockchain 完成Simulate a network 目标内容 1. 安装 Prometheus 和 Grafana。 2. 配置 Prometheus 以捕获 Substrate 节点的时间序列。 3. 配置 Grafana 以可视化使用 Prometheus 端点收集的节点指标。 Upgrade a running network jump 前置条件 1. Build a local blockchain 2. 从 Add a pallet to the runtime 了解如何添加pallet 目标内容 1. 使用 Sudo 托盘(sudo pallet)模拟链升级的治理(governance)。 2. 升级运行节点的运行时以包含新的托盘。 3. 为运行时安排升级。 Work with pallets jump 通过示例介绍pallets的结构和相关使用 Add a pallet to the runtime jump 前置条件 1. Build a local blockchain 目标内容 1. 了解如何更新运行时依赖项以包含新托盘。 2. 了解如何配置特定于托盘(pallet-specific)的 Rust 特征(trait)。 3. 通过使用前端模板与新托盘交互来查看运行时的更改。 Configure the contracts pallet jump 前置条件 1. Build a local blockchain 目标内容 Use macros in a custom pallet jump 前置条件 1. Build a local blockchain 2. Simulate a network 3. 需要1~2h编译运行 目标内容 1. 了解定制托盘的基本结构。 2. 查看 Rust 宏如何简化需要编写的代码的示例。 3. 启动一个包含自定义托盘的区块链节点。 4. 添加暴露存在证明托盘的前端代码。 Develop smart contracts jump Prepare your first contract jump 前置条件 目标内容 1. 了解如何创建智能合约项目。 2. 使用ink!智能合约语言构建和测试智能合约。 3. 在本地 Substrate 节点上部署智能合约。 4. 通过浏览器与智能合约交互。 Develop a smart contract jump 前置条件 1. Prepare your first contract 目标内容 1. 了解如何使用智能合约模板。 2. 使用智能合约存储简单值。 3. 使用智能合约增加和检索存储的值。 4. 向智能合约添加公共和私有功能。 Use maps for storing values jump 前置条件 目标内容 Buid a token contract jump 前置条件 1. Prepare your first contract 2. Develop a smart contract 目标内容 1. 了解 ERC-20 标准中定义的基本属性和接口。 2. 创建符合 ERC-20 标准的代币。 3. 在合约之间转移代币。 4. 处理涉及批准或第三方的转移活动的路由。 5. 创建与令牌活动相关的事件。 Troubleshoot smart contracts jump Connect with other chains jump Start a local relay chain jump 前置条件 1. Build a local blockchain 2. Add trusted nodes 3. 了解波卡的架构 4. 了解平行链 Atchitecture of Polkadot Parachains 目标内容 1. 确认软件需求。 2. 设置平行链(para chain)构建环境。 3. 准备中继链(relay chain)规格。 4. 在本地启动中继链。 Connect a local parachain jump 前置条件 1. Start a local relay chain 2. 注意与1的波卡版本一致,比如: polkadot-v0.9.24 polkadot-v0.9.24/substrate-parachain-template 目标内容 1. 在中继链上为你的平行链注册一个 ParaID。 2. 在中继链上开始生产平行链。 Connect to Rococo testnet jump 前置条件 1. 回顾Add trusted nodes: - 如何生成并修改链规范文件 - 如何生成和存储keys 2. Connect a local parachain 目标内容 Access EVM accounts jump 前置条件 一、完成课程 1. Build a local blockchain 2. Add a pallet to the runtime 3. Use macros in a custom pallet 二、熟悉操作 1. 启动一个 Substrate 区块链节点。 2. 在运行时添加、移除和配置托盘。 3. 通过使用 Polkadot-JS 或其他前端连接到节点来提交交易。 三、掌握概念 1. 以太坊核心概念和术语 2. 以太坊虚拟机 (EVM) 基础知识 3. 去中心化应用程序和智能合约 4. 托盘设计原则 目标内容 Build a local blockchain 返回 Compile a Substrate node: git clone https://github.com/substrate-developer-hub/substrate-node-template cd substrate-node-template && git checkout latest cargo build --release Start the local node: ./target/release/node-template --dev Install the front-end template: node --version yarn --version npm install -g yarn git clone https://github.com/substrate-developer-hub/substrate-front-end-template cd substrate-front-end-template yarn install Start the front-end template: yarn start Open http://localhost:8000 in a browser to view the front-end template. Transfer funds from an account
这里主要使用官方提供的默认模版启动节点。
由于rust对crate的版本只能检查,无法解决冲突问题,需要手动进行,所以一定要注意文档是否有更新,尤其是里面的代码
New Substrate documentation released · Issue #1132 · substrate-developer-hub/substrate-docs
另外,substrate官方文档也一直处在更新状态中。
# 1.安装预编译包
sudo apt update && sudo apt install -y git clang curl libssl-dev llvm libudev-dev

# 2.安装Rust编译环境
curl https://sh.rustup.rs -sSf | sh
source ~/.cargo/env
rustup default stable
rustup update
rustup update nightly
rustup target add wasm32-unknown-unknown --toolchain nightly
rustc --version
rustup show
node-template实际上是官方提供的使用substrate开发的模板链,可以理解为substrate官方提供的样例,后续任何人想使用substrate可以在这个样例的基础上进行修改,这样开发链就更方便。
这就好比以前的好多山寨链,在btc的源码上改下创世区块的配置,就是一条新链。那么substrate其实也一样,提供了node-template这样一个模板,后续根据需求在这个上面改吧改吧,就能产生一条新链。
git clone https://github.com/substrate-developer-hub/substrate-node-template
cd substrate-node-template
git checkout latest
/home/substrate-node-template on #polkadot-v0.9.24
tree -L 2                                                                                                                                                                                                                              ─╯
.
├── Cargo.lock
├── Cargo.toml
├── LICENSE
├── README.md
├── docker-compose.yml
├── docs
│   └── rust-setup.md
├── node
│   ├── Cargo.toml
│   ├── build.rs
│   └── src
├── pallets
│   └── template
├── runtime
│   ├── Cargo.toml
│   ├── build.rs
│   └── src
├── rustfmt.toml
├── scripts
│   ├── docker_run.sh
│   └── init.sh
├── shell.nix
└── target
    ├── CACHEDIR.TAG
    └── release

10 directories, 15 files
[workspace]
members = [
    "node",
    "pallets/template",
    "runtime",
]
[profile.release]
panic = "unwind"
可见node-template主要包含三部分:node、pallets/template、runtime
cargo check -p node-template-runtime
IDEA将会在修改Cargo.toml之后自动执行指令进行检查
cargo metadata --verbose --format-version 1 --all-features
Output JSON to stdout containing information about the workspace members and resolved dependencies of the current
package.
It is recommended to include the –format-version flag to future-proof your code to ensure the output is in the format
you are expecting.
cargo build --release
这个过程比较慢,会下载并编译上面三部分内的Cargo.toml列出的所有包
brew install cmake
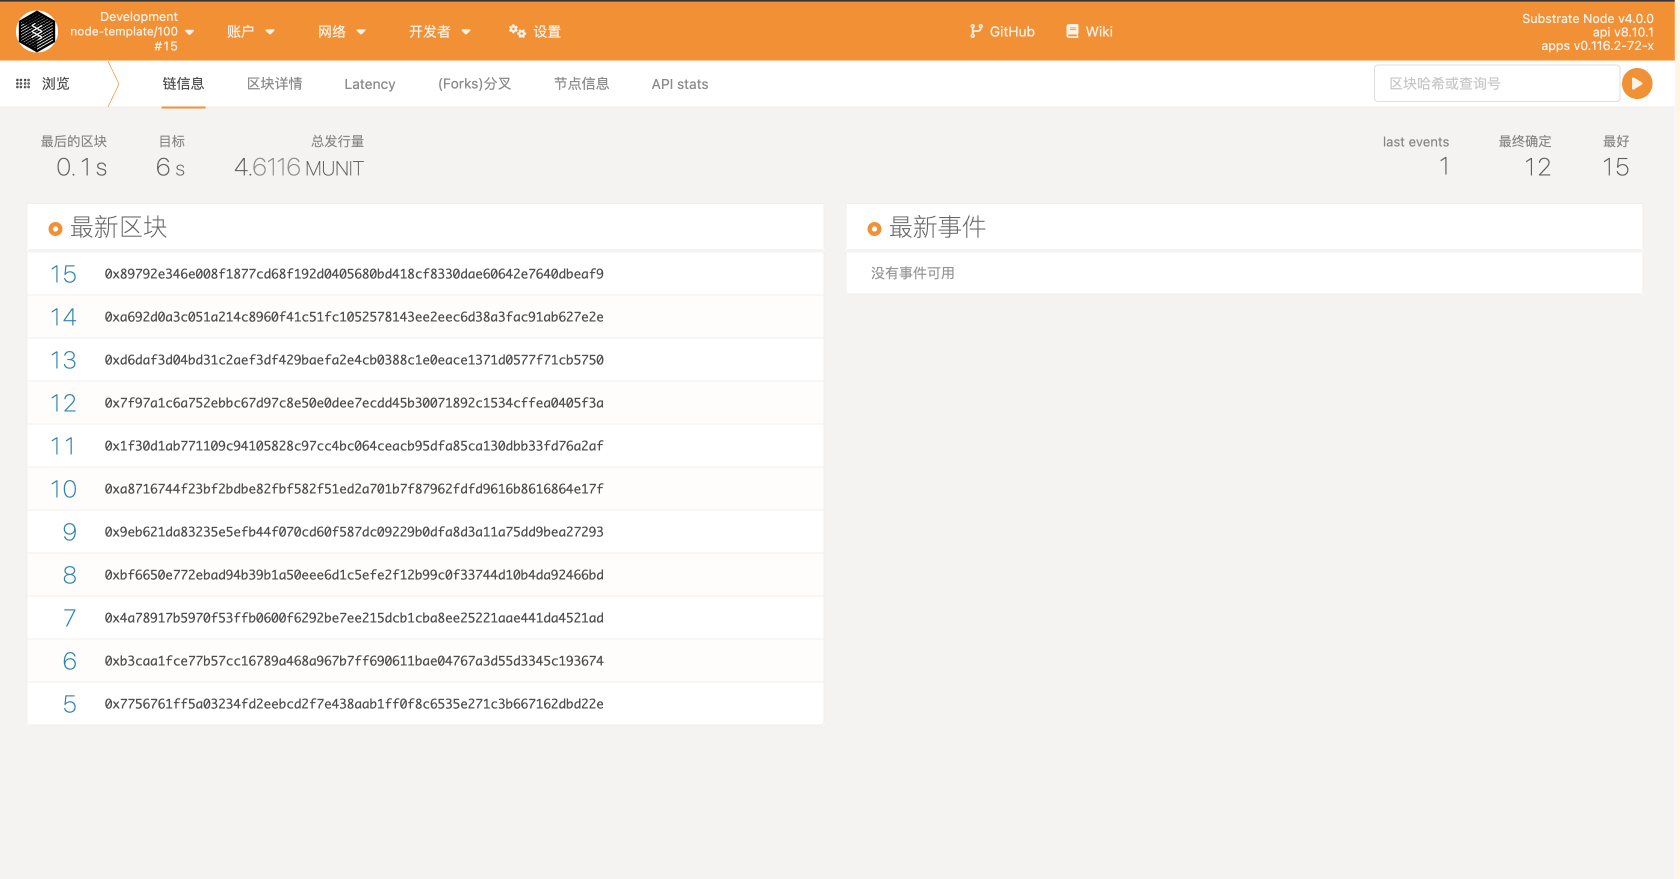
./target/release/node-template --dev
Build a local blockchain | Substrate_ Docs
node --version
yarn --version
npm install -g yarn
git clone https://github.com/substrate-developer-hub/substrate-front-end-template
cd substrate-front-end-template
yarn install
yarn start
启动后访问本地:http://localhost:8000
在substrate官方的教程中,是使用了substrate的前端模板来访问刚才启动的节点。但是在实际的开发中,后端人员其实更多的使用polkadot-js-app来访问我们的节点,所以这里我们也使用它来访问我们的节点。
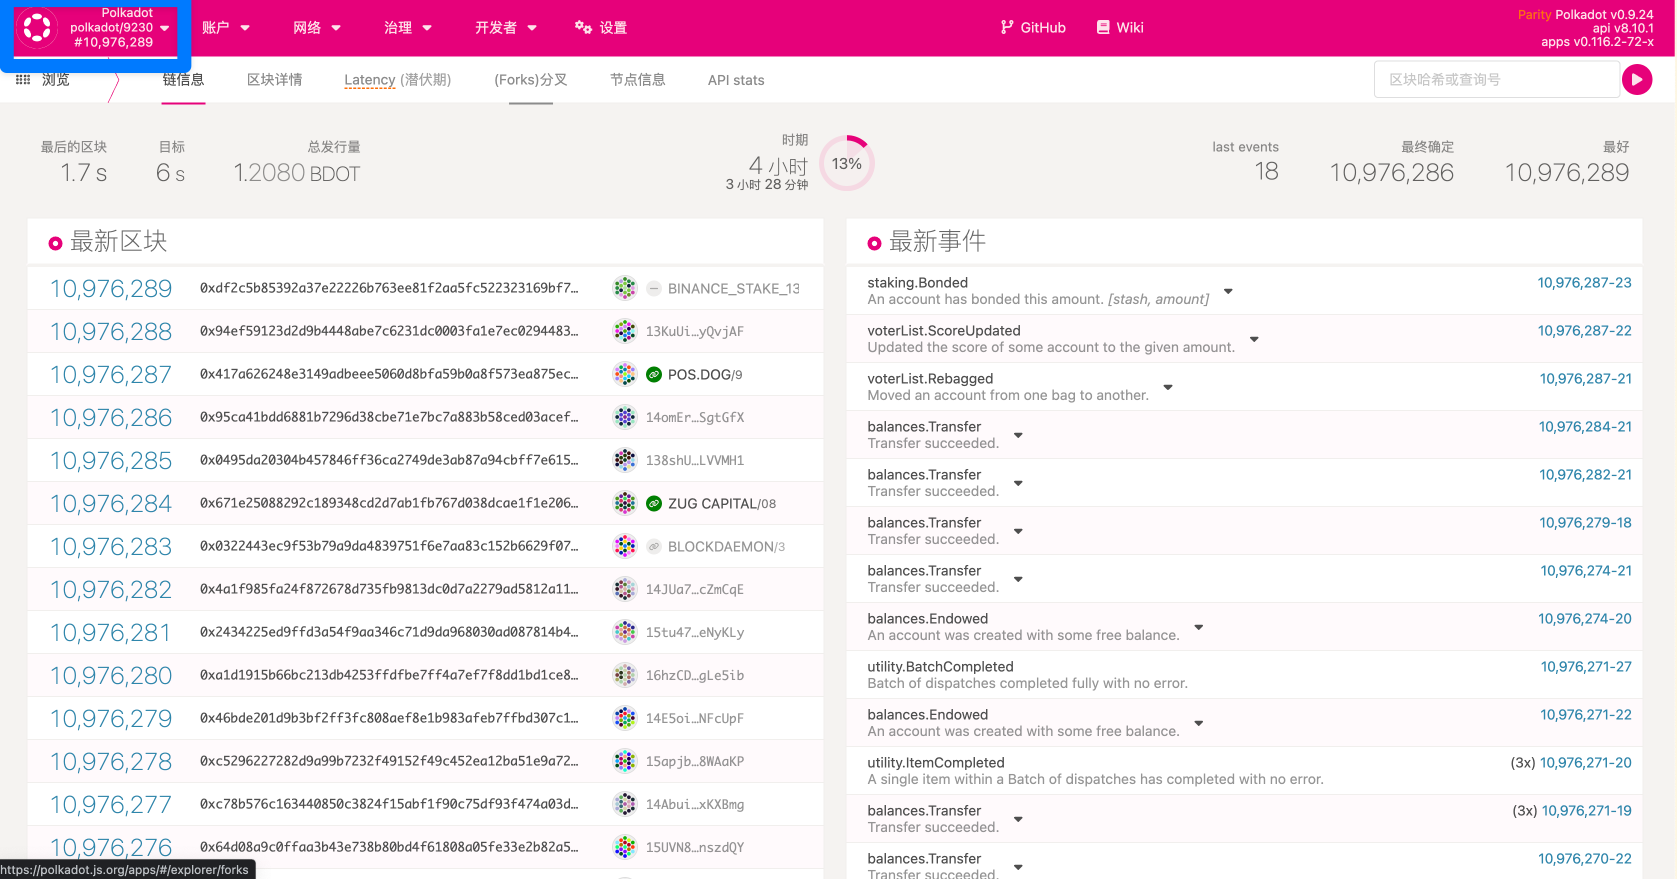
在浏览器中输入https://polkadot.js.org/apps, 点击左上角会展开;
在展开的菜单中点击DEVELOPMENT;
点击Local Node;
点击switch。
使用substrate的方式主要有以下几种:
开发者可以运行已经设计好的substrate节点,并配置genesis区块,在此方式下只需要提供一个json文件就可以启动自己的区块链。其实我们上一节的substrate初体验,也可以看成是使用此种方式的一个例子。
frame其实是一组模块(pallet)和支持库。使用substrate frame可以轻松的创建自己的自定义运行时,因为frame是用来构建底层节点的。使用frame还可以配置数据类型,也可以从模块库中选择甚至是添加自己定义的模块。
使用substrate code运行开发者完全从头开始设计运行时(runtime,问题:什么是runtime?),当然此种方式也是使用substrate自由度最大的方式。
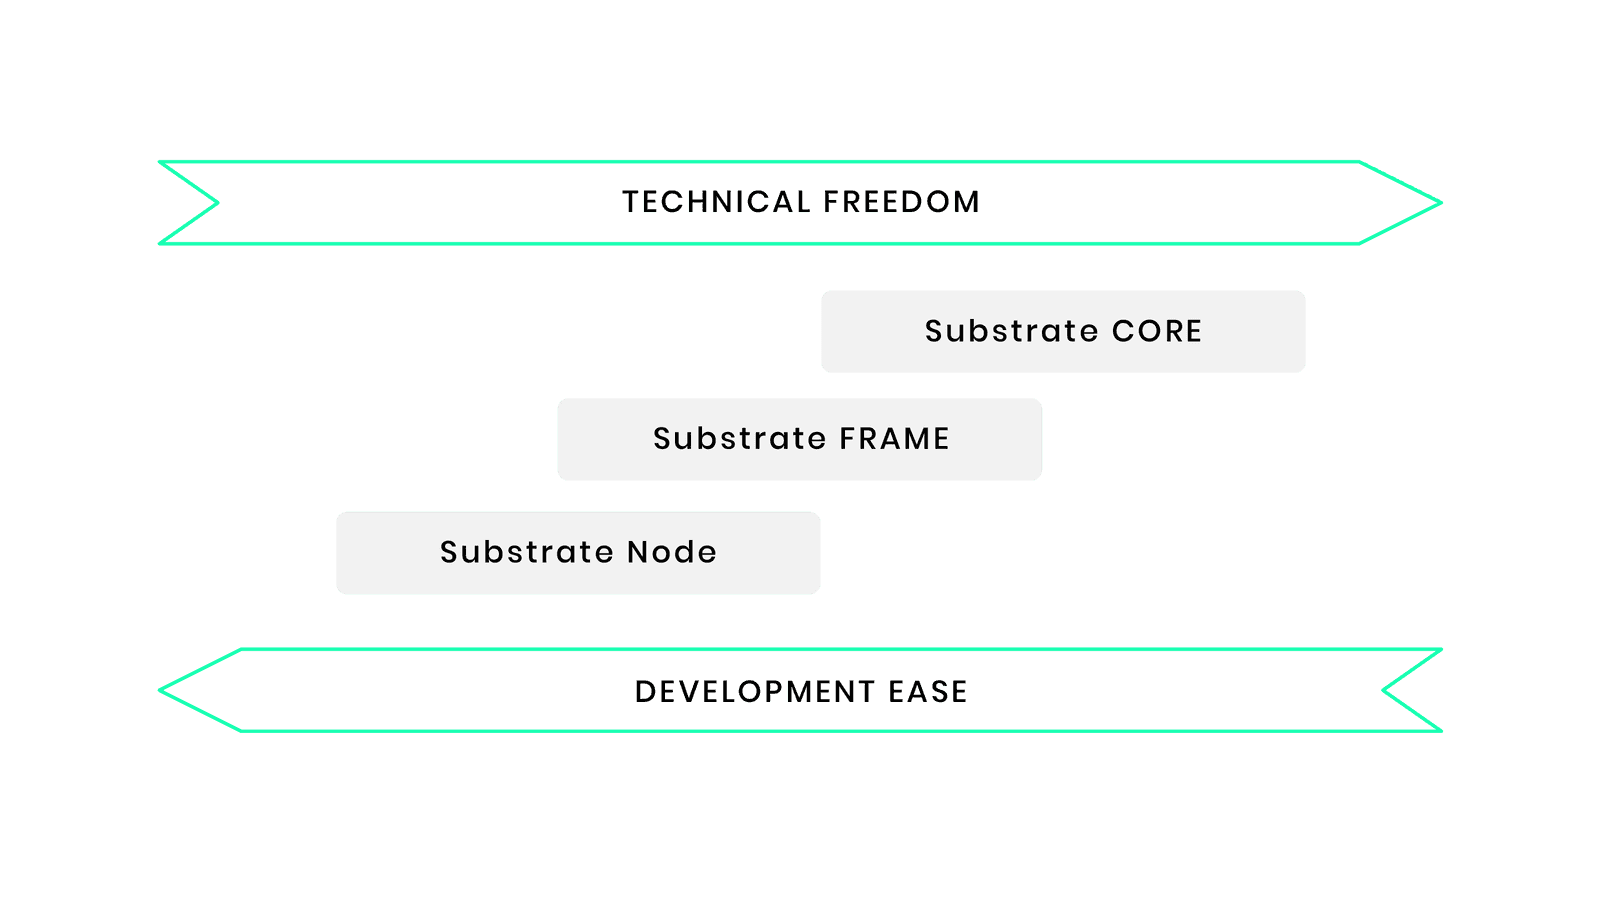
几种方式的关系可以用图描述如下:技术自由 vs 开发便利
返回顶部
Simulate a network 返回 Start the first alice blockchain node 清理之前alice的链数据: ./target/release/node-template purge-chain --base-path /tmp/alice --chain local Are you sure to remove "/tmp/alice/chains/local_testnet/db"? [y/N]: 启动alice节点 ./target/release/node-template --base-path /tmp/alice --chain local --alice --port 30333 --ws-port 9945 --rpc-port 9933 --node-key 0000000000000000000000000000000000000000000000000000000000000001 --telemetry-url "wss://telemetry.polkadot.io/submit/ 0" --validator Review the command-line options For more details: ./target/release/node-template --help > the-command-line-options.txt : Review the node messages displayed 🔨 Initializing Genesis block/state 🏷 Local node identity is Add a second node to the blockchain network 现在开始使用 alice 帐户密钥的节点正在运行, 接着可以使用 bob 帐户将另一个节点添加到网络中。 因为要加入一个已经在运行的网络,所以可以使用 正在运行的节点来识别新节点要加入的网络。 这些命令与之前使用的命令相似,但有一些重要区别。 1. --base-path 2. --port 3. --ws-port 4. --rpc-port 5. --bootnodes: 指定一个单独启动节点,这个节点来自于alias 总共有4步,重点介绍后面两步 1. 重新打开一个终端 2. 进入substrate-node-template 清除之前的链数据 ./target/release/node-template purge-chain --base-path /tmp/bob --chain local -y 通过在命令中添加-y,可以在不提示确认操作的情况下删除链数据。 启动第二个节点,用bob的账号 ./target/release/node-template --base-path /tmp/bob --chain local --bob --port 30334 --ws-port 9946 --rpc-port 9934 --telemetry-url "wss://telemetry.polkadot.io/submit/ 0" --validator --bootnodes /ip4/127.0.0.1/tcp/30333/p2p/12D3KooWEyoppNCUx8Yx66oV9fJnriXwCcXwDDUA2kj6vnc6iDEp --base-path --bob --port --ws-port --rpc-port --bootnodes ip4 表示节点的 IP 地址使用 IPv4 格式 127.0.0.1 指定运行节点的 IP 地址,在这种情况下,本地主机的地址。 tcp 将 TCP 指定为用于对等通信的协议。 30333 指定用于点对点通信的端口号,在这种情况下,TCP 流量的端口号。 12D3KooWEyoppNCUx8Yx66oV9fJnriXwCcXwDDUA2kj6vnc6iDEp 标识该网络要与之通信的运行节点。 在这种情况下,节点的标识符开始使用 alice 帐户。 Verify blocks are produced and finalized 为了方便识别,还在每行前面加了标记: ✌️ version 4.0.0-dev-9c89be106cb ❤️ by Substrate DevHub <https://github.com/substrate-developer-hub>, 2017-2022 📋 Chain specification: Local Testnet 🏷 Node name: Bob 👤 Role: AUTHORITY 💾 Database: RocksDb at /tmp/bob/chains/local_testnet/db/full ⛓ Native runtime: node-template-100 (node-template-1.tx1.au1) 🔨 Initializing Genesis block/state (state: 0x0336…17a1, header-hash: 0x387f…a9b7) 👴 Loading GRANDPA authority set from genesis on what appears to be first startup. Using default protocol ID "sup" because none is configured in the chain specs 🏷 Local node identity is: 12D3KooWCPbSKhf9WggmGev8RBwzB5WKDNi9BjA8gjwsA4uDSkxN 💻 Operating system: macos 💻 CPU architecture: x86_64 📦 Highest known block at #0 🏷 Local node identity is: <encrypted account name> 🔍 Discovered new external address for our node The first node was started by alice: 💤 Idle (1 peers), best... finalized... The node has a one peer (1 peers). The nodes have produced some blocks (best: #4 (0x2b8a…fdc4)). The blocks are being finalized (finalized #2 (0x8b6a…dce6)). 🙌 Starting consensus session 🎁 Prepared block for proposing at ... 🔖 Pre-sealed block for proposal at ... ✨ Imported #85 (0x5f7a…9b10) 需要关注的标记有两个:🔍和💤 🔍 Discovered new external address for our node The first node was started by alice: 注意:新版本已经更新,没有这个标记,改成如下: discovered: 12D3KooWEyoppNCUx8Yx66oV9fJnriXwCcXwDDUA2kj6vnc6iDEp /ip4/172.16.0.79/tcp/30333 这也和第一个alice节点启动的身份码一致 💤 Idle (1 peers), best... finalized... The node has a one peer (1 peers). The nodes have produced some blocks (best: #4 (0x2b8a…fdc4)). (重点内容) Add trusted nodes 返回 1. Sr25519: 用于使用 aura 为一个节点生成块。 2. Ed25519: 用于使用 grapdpa 为一个节点生成块。 2. SS58: 对应公钥 步骤: 1. 使用Sr25519 -> 一个助记词和对应SS58公钥 -> aura 2. 使用Ed25519+前面的助记词 -> Ed25519 公钥 -> grandpa About Substrate Consensus: The Substrate node template uses a proof of authority consensus model also referred to as authority round or Aura consensus . The Aura consensus protocol limits block production to a rotating list of authorized accounts. The authorized accounts—authorities—create blocks in a round robin fashion and are generally considered to be trusted participants in the network. This consensus model provides a simple approach to starting a solo blockchain for a limited number of participants. In this tutorial, you'll see how to generate the keys required to authorize a node to participate in the network, how to configure and share information about the network with other authorized accounts, and how to launch the network with an approved set of validators. Generate your account and keys Key generation options: 1. a node-template subcommand 2. the standalone subkey command-line program 3. the Polkadot-JS application 4. third-party key generation utilities. Generate local keys using the node template: 使用Sr25519 -> 一个助记词和对应SS58公钥 -> aura # Generate a random secret phrase and keys ./target/release/node-template key generate --scheme Sr25519 --password-interactive Key password: <123456> Secret phrase: answer cotton spike caution blouse only radio artefact middle guilt bleak original Network ID: substrate Secret seed: 0xfcd01919178fa73e7223bdeea134b1ef809b75d3fabd672a52dcc69b964813b6 Public key (hex): 0x5413998d3c189f62288daaf2bd2ca3da5e78b00be9172a36ae063aae4cc7f607 Account ID: 0x5413998d3c189f62288daaf2bd2ca3da5e78b00be9172a36ae063aae4cc7f607 Public key (SS58): 5DxwhfEDto6kGkHz1SZQWE1hDGM8E2LFQNujQdJ3vHNWrnc3 SS58 Address: 5DxwhfEDto6kGkHz1SZQWE1hDGM8E2LFQNujQdJ3vHNWrnc3 您现在拥有 Sr25519 密钥,用于使用 aura 为一个节点生成块。 在此示例中,帐户的 Sr25519 公钥是 5DxwhfEDto6kGkHz1SZQWE1hDGM8E2LFQNujQdJ3vHNWrnc3 使用Ed25519+前面的助记词 -> Ed25519 公钥 -> grandpa ./target/release/node-template key inspect --scheme Ed25519 --password-interactive "answer cotton spike caution blouse only radio artefact middle guilt bleak original" Key password: 123456 Secret phrase: answer cotton spike caution blouse only radio artefact middle guilt bleak original Network ID: substrate Secret seed: 0xfcd01919178fa73e7223bdeea134b1ef809b75d3fabd672a52dcc69b964813b6 Public key (hex): 0xb293f948a04a5bac3b8321f99bb4c9532f6ffe2b8ff40926b23c68c9726ca40a Account ID: 0xb293f948a04a5bac3b8321f99bb4c9532f6ffe2b8ff40926b23c68c9726ca40a Public key (SS58): 5G6rLZNtZPyMrYTo2YXL9nzaatJ837hmKPnsgYqDURgAWBgX SS58 Address: 5G6rLZNtZPyMrYTo2YXL9nzaatJ837hmKPnsgYqDURgAWBgX Generate a second set of keys 此教程的专用网络仅包含两个节点,因此需要两组密钥。 有几个选项可以继续本教程: 1. 可以将密钥用于预定义帐户之一。 2. 可以使用本地计算机上的不同身份重复上一节中的步骤,以生成第二个密钥对。 3. 您可以派生一个子密钥对来模拟本地计算机上的第二个身份。 4. 您可以招募其他参与者来生成加入您的私有网络所需的密钥。 出于强化目的,这里再次重复前面的操作, ./target/release/node-template key generate --scheme Sr25519 --password-interactive Key password: 234567 Secret phrase: twelve genuine tree month sport thought more almost frown question suit life Network ID: substrate Secret seed: 0x627c5e2ac10a94cc0150efb2e2d38e0de2477e6a53892ade5f8b3cd9862e541e Public key (hex): 0x0069217a6b3a9a4d3fa248a69fb39cef88c27301b5a63aeff52ba59c6781173d Account ID: 0x0069217a6b3a9a4d3fa248a69fb39cef88c27301b5a63aeff52ba59c6781173d Public key (SS58): 5C5F62ga8UtigQK1YRTcuVk1sexcmuLHtVSBnJk5xQQ9P6ud SS58 Address: 5C5F62ga8UtigQK1YRTcuVk1sexcmuLHtVSBnJk5xQQ9P6ud ./target/release/node-template key inspect --password-interactive --scheme Ed25519 "<前面的助记词>" Key password: 234567 Secret phrase: twelve genuine tree month sport thought more almost frown question suit life Network ID: substrate Secret seed: 0x627c5e2ac10a94cc0150efb2e2d38e0de2477e6a53892ade5f8b3cd9862e541e Public key (hex): 0xcde9a701b5965bb5327f900c83c2f9753d1d124fa21228851d6e26659d8dff5f Account ID: 0xcde9a701b5965bb5327f900c83c2f9753d1d124fa21228851d6e26659d8dff5f Public key (SS58): 5Gih5kiPMdKBrz4HTuKWQrTedqr8TLYWLb2WW67VzUyRzgF1 SS58 Address: 5Gih5kiPMdKBrz4HTuKWQrTedqr8TLYWLb2WW67VzUyRzgF1 使用的第二组键是: Sr25519 对应 SS58:5C5F62ga8UtigQK1YRTcuVk1sexcmuLHtVSBnJk5xQQ9P6ud 用于aura。 Ed25519 对应 SS58:5Gih5kiPMdKBrz4HTuKWQrTedqr8TLYWLb2WW67VzUyRzgF1 用于grapdpa Create a custom chain specification 生成用于区块链的密钥后,您就可以使用这些密钥对创建自定义链规范, 然后与作为验证器(validators)的受信任网络参与者共享您的自定义链规范。 为了使其他人能够参与您的区块链网络,请确保他们生成自己的密钥。 收集完网络参与者的密钥后,可以创建自定义链规范以替换本地链规范。 为简单起见,本教程中创建的自定义链规范是本地链规范的修改版本, 用于说明如何创建双节点网络。 如果您拥有所需的密钥,您可以按照相同的步骤将更多节点添加到网络中。 --------> Modify the local chain specification 这个操作很重要,后续课程还会用到。(Connect to Rococo testnet) Export the local chain specification to a file ./target/release/node-template build-spec --disable-default-bootnode --chain local > customSpec.json head customSpec.json # customSpec.json { "name": "Local Testnet", "id": "local_testnet", "chainType": "Local", "bootNodes": [], "telemetryEndpoints": null, "protocolId": null, "properties": null, "consensusEngine": null, "codeSubstitutes": {}, } tail -n 80 customSpec.json 此命令显示 Wasm 二进制字段后面的最后部分, 包括运行时使用的几个托盘的详细信息, 例如 sudo 和 balances 托盘。 Modify the name field to identify this chain specification as a custom chain specification. "name": "My Custom Testnet", :Modify aura field to specify the nodes "aura": { "authorities": [ "<aura的Sr25519密钥>", "<aura的Sr25519公钥对应地址(SS58)>" ] }, Modify the grandpa field to specify the nodes "grandpa": { "authorities": [ [ "节点 1 的grandpa Ed25519 对应 SS58公钥(地址)", 1 ], [ "节点 2 的grandpa Ed25519 对应 SS58公钥(地址)", 1 ] ] }, 请注意,grandpa 部分中的 authority 字段有两个数据值。 1. 第一个值是地址键。 2. 第二个值用于支持加权投票。 在此示例中,每个验证者的权重为 1 票。 Add validators 如你所见: 可以通过修改 aura 和 grandpa 部分来添加和更改链规范中的权限地址。 可以使用此技术添加任意数量的验证器。 添加验证器: 1. 修改 aura 部分以包含 Sr25519 地址。 2. 修改 grapdpa 部分以包括 Ed25519 地址和投票权重。 确保为每个验证器使用唯一的密钥。 如果两个验证器具有相同的密钥,它们会产生冲突的块。 Convert the chain specification to raw format ./target/release/node-template build-spec --chain=customSpec.json --raw --disable-default-bootnode > customSpecRaw.json Share the chain specification with others 如果你正在创建私有区块链网络以与其他参与者共享, 请确保只有一个人创建链规范并与该规范中的所有其 他验证器共享生成的该规范的原始版本 (例如 customSpecRaw.json 文件)网络。 因为 Rust 编译器生成的优化的 WebAssembly 二进 制文件在确定性上无法重现,所以每个生成 Wasm 运行 时的人都会生成稍微不同的 Wasm blob。 为了确保确定性,区块链网络中的所有参与者必须使用 完全相同的原始链规范文件。 有关此问题的更多信息,请参阅<Hunting down a non-determinism-bug in our Rust Wasm build>。 Hunting down a non-determinism-bug in our Rust Wasm build Prepare to launch the private network 将自定义链规范分发给所有网络参与者后,就可以启动自己的私有区块链了。 这些步骤类似于在启动第一个区块链节点中执行的步骤。 但是,如果按照本教程中的步骤操作,则可以将多台计算机添加到您的网络中。 要继续,请验证以下内容: 1. 已经为至少两个权限帐户生成或收集了帐户密钥。 2. 已经更新自定义链规范,以包含用于块生产(aura)和块完成(grandpa)的密钥。 3. 已将自定义链规范转换为原始格式,并将原始链规范分发给参与私有网络的节点。 如果已完成这些步骤,您就可以启动私有区块链中的第一个节点了。 Start the first node 此命令还使用您自己的密钥而不是预定义的帐户来启动节点。 由于没有使用具有已知密钥的预定义帐户,因此需要在单独 的步骤中将密钥添加到密钥库。 ./target/release/node-template --base-path /tmp/node01 --chain ./customSpecRaw.json --port 30333 --ws-port 9945 --rpc-port 9933 --telemetry-url "wss://telemetry.polkadot.io/submit/ 0" --validator --rpc-methods Unsafe --name MyNode01 --password-interactive Keystore password: 234567 2022-07-21 21:10:58 Substrate Node 2022-07-21 21:10:58 ✌️ version 4.0.0-dev-9c89be106cb 2022-07-21 21:10:58 ❤️ by Substrate DevHub <https://github.com/substrate-developer-hub>, 2017-2022 2022-07-21 21:10:58 📋 Chain specification: My Custom Testnet 2022-07-21 21:10:58 🏷 Node name: MyNode01 2022-07-21 21:10:58 👤 Role: AUTHORITY 2022-07-21 21:10:58 💾 Database: RocksDb at /tmp/node01/chains/local_testnet/db/full 2022-07-21 21:10:58 ⛓ Native runtime: node-template-100 (node-template-1.tx1.au1) 2022-07-21 21:10:59 🔨 Initializing Genesis block/state (state: 0xe114…e9a6, header-hash: 0xbe24…67a2) 2022-07-21 21:10:59 👴 Loading GRANDPA authority set from genesis on what appears to be first startup. 2022-07-21 21:10:59 Using default protocol ID "sup" because none is configured in the chain specs 2022-07-21 21:10:59 🏷 Local node identity is: 12D3KooWA6tqKTpAQVV8uanr7X3sRaEuTAaeHw3V5RVEupMoaCDA 2022-07-21 21:10:59 💻 Operating system: macos 2022-07-21 21:10:59 💻 CPU architecture: x86_64 2022-07-21 21:10:59 📦 Highest known block at #0 2022-07-21 21:10:59 〽️ Prometheus exporter started at 127.0.0.1:9615 --base-path /tmp/node01 The --base-path command-line option specifies a custom location for the chain associated with this first node. --chain ./customSpecRaw.json The --chain command-line option specifies the custom chain specification. --port 30333 --ws-port 9945 --rpc-port 9933 --telemetry-url "wss://telemetry.polkadot.io/submit/ 0" :--validator The --validator command-line option indicates that this node is an authority for the chain. --rpc-methods Unsafe The --rpc-methods Unsafe command-line option allows you to continue the tutorial using an unsafe communication mode because your blockchain is not being used in a production setting. --name MyNode01 The --name command-line option enables you to give your node a human-readable name in the telemetry UI. --password-interactive View information about node operations 注意其中的这些信息 --chain 输出表明正在使用的链规范是您使用 --chain 命令行选项创建和指定的自定义链规范。 --validator 输出表明该节点是一个授权,因为您使用 --validator 命令行选项启动了该节点。 state 输出显示使用块哈希(状态:0x2bde…8f66,标头哈希:0x6c78…37de)初始化创世块。 node identify 输出指定您的节点的本地节点身份。在此示例中,节点身份为 12d3koowlmrydlontytytytdyzlwde1paxzxtw5rgjmhlfzw96sx。 IP address 输出指定用于节点的 IP 地址是本地主机 127.0.0.1。 Add keys to the keystore 启动第一个节点后,尚未生成任何块。 下一步是将两种类型的密钥添加到网络中每个节点的密钥库中。 对于每个节点: 1. 添加 aura 权限密钥以启用块生产。 2. 添加g randpa 权限密钥以启用块完成。 有几种方法可以将密钥插入密钥库。 对于本教程,您可以使用 key 子命令插入本地生成的密钥。 Insert the aura secret key: ./target/release/node-template key insert --base-path /tmp/node01 --chain customSpecRaw.json --scheme Sr25519 --suri <your-secret-seed> --password-interactive --key-type aura Replace <your-secret-seed> with the secret phrase or secret seed for the first key pair that you generated in Generate local keys using node template. You can also insert a key from a specified file location. ./target/release/node-template key insert --help Insert the grandpa secret key ./target/release/node-template key insert --base-path /tmp/node01 --chain customSpecRaw.json --scheme Ed25519 --suri <your-secret-key> --password-interactive --key-type gran Verify that your keys are in the keystore for node01 ls /tmp/node01/chains/local_testnet/keystore Restart the node After you have added your keys to the keystore for the first node under /tmp/node01, you can restart the node using the command you used previously in <Start the first node>. Enable other participants to join tip: You can now allow other validators to join the network using the --bootnodes and --validator command-line options. To add a second validator to the private network, just start a second blockchain node ./target/release/node-template --base-path /tmp/node02 --chain ./customSpecRaw.json --port 30334 --ws-port 9946 --rpc-port 9934 --telemetry-url "wss://telemetry.polkadot.io/submit/ 0" --validator --rpc-methods Unsafe --name MyNode02 --bootnodes /ip4/127.0.0.1/tcp/30333/p2p/12D3KooWLmrYDLoNTyTYtRdDyZLWDe1paxzxTw5RgjmHLfzW96SX --password-interactive
用于使用 aura 为一个节点生成块。
用于使用 grapdpa 为一个节点生成块。
使用Sr25519 -> 一个助记词和对应SS58公钥 -> aura
使用Ed25519+前面的助记词 -> Ed25519 公钥 -> grandpa
  blockdiag
  actdiag {
  first_sr25519 -> first_ed25519 -> add_validators
  second_sr25519 -> second_ed25519 -> add_validators
  export_customSpec -> add_validators
  add_validators -> first_start -> first_import_key -> first_restart
  add_validators -> second_start -> second_import_key -> second_restart
  first_restart -> peers
  second_restart -> peers

  lane node1 {
    label = "node1"
    first_sr25519 [label = "使用Sr25519 -> 一个助记词和对应SS58公钥 -> aura"];
    first_ed25519 [label = "使用Ed25519+前面的助记词 -> Ed25519 公钥 -> grandpa"];
    first_start [label = "使用链规范文件启动第一个节点"];
    first_import_key [label = "导入第一个节点的key"];
    first_restart [label = "使用链规范文件重启第一个节点"];
  }
  lane network {
    label = "本地链"
    export_customSpec [label = "导出链规范文件"];
    add_validators [label = "添加验证节点信息"];
    peers [label = "进入本地链,互为观察者(peers)"];
  }
  lane node2 {
    label = "node2"
    second_sr25519 [label = "使用Sr25519 -> 一个助记词和对应SS58公钥 -> aura"];
    second_ed25519 [label = "使用Ed25519+前面的助记词 -> Ed25519 公钥 -> grandpa"];
    second_start [label = "使用链规范文件启动第二个节点"];
    second_import_key [label = "导入第二个节点的key"];
    second_restart [label = "使用链规范文件重启第二个节点"];
  }
}


  node1

  本地链

  node2


  使用Sr25519 -> 一个助
  记词和对应SS58公钥 ->
  aura

  使用Ed25519+前面的助记
  词 -> Ed25519 公钥 ->
   grandpa

  使用Ed25519+前面的助记
  词 -> Ed25519 公钥 ->
   grandpa

  导出链规范文件

  添加验证节点信息

  使用Sr25519 -> 一个助
  记词和对应SS58公钥 ->
  aura

  使用链规范文件启动第一
  个节点

  导入第一个节点的key

  使用链规范文件重启第一
  个节点

  使用链规范文件重启第二
  个节点

  使用链规范文件启动第二
  个节点

  导入第二个节点的key

  进入本地链,互为观察者(
  peers)
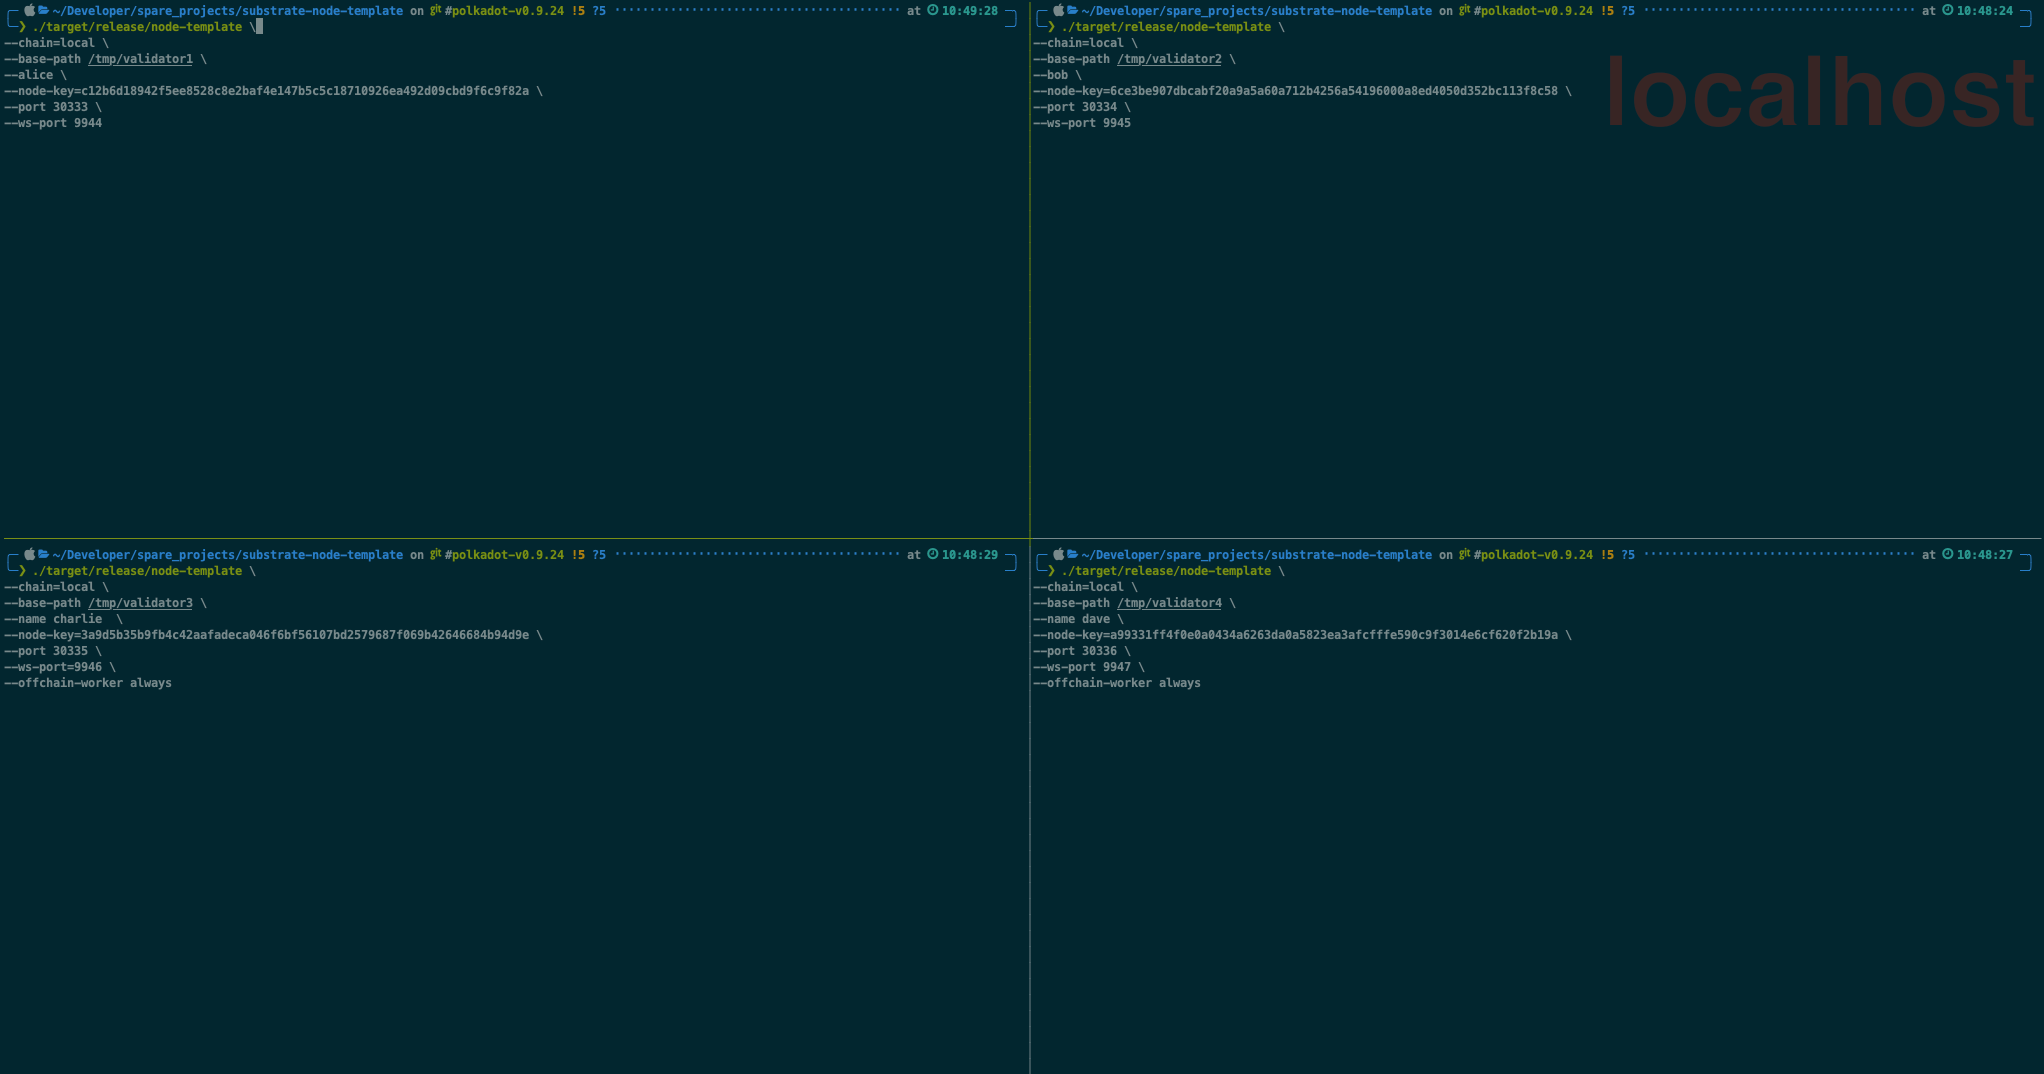
Authorize specific nodes 返回 using the node authorization pallet The node-authorization pallet is a prebuilt FRAME pallet that enables you to manage a configurable set of nodes for a network. Each node is identified by a PeerId. Each PeerId is owned by one and only one AccountId that claims the node. Why permissioned network In Add trusted nodes, you saw how to build a simple network with a known set of validator nodes. That tutorial illustrated a simplified version of a permissioned network. In a permissioned network, only authorized nodes are allowed to perform specific network activities. For example, you might grant some nodes the permission to validate blocks and other nodes the permission to propagate transactions. A blockchain with nodes that are granted specific permissions is different from a public or permissionless blockchain. In a permissionless blockchain, anyone can join the network by running the node software on suitable hardware. In general, a permissionless blockchain offers greater decentralization of the network. However, there are use cases where creating a permissioned blockchain might be appropriate. For example,a permissioned blockchain would be suitable for the following types of projects: 1. For a private or consortium network such as a private enterprise or a non-profit organization. 2. In highly-regulated data environments such as healthcare, finance, or business-to-business ledgers. 3. For testing of a pre-public blockchain network at scale. Node authorization and ownership There are two ways you can authorize a node to join the network: 1. By adding the PeerId to the list of predefined nodes. You must be approved by the governance or sudo pallet in the network to do this. 2. By asking for a paired peer connection from a specific node. This node can either be a predefined node PeerId or a normal one. any user can claim to be the owner of a PeerId To protect against false claims, you should claim the node before you start the node. After you start the node, its PeerID is visible to the network and anyone could subsequently claim it. As the owner of a node you can add and remove connections for your node. For example, you can manipulate the connection between a predefined node and your node or between your node and other non-predefined nodes. You can't change the connections for predefined nodes. They are always allowed to connect with each other. offchain worker The node-authorization pallet uses an offchain worker to configure its node connections. Make sure to enable the offchain worker when you start the node because it is disabled by default for non-authority nodes. Need to be familiar with peer-to-peer networking in Substrate 编译一下项目,获取可执行文件 cd substrate-node-template git checkout latest cargo build --release Add the node authorization pallet Cargo.toml the Cargo.toml file controls two important pieces of information: 1. The pallets to be imported as dependencies for the runtime, including the location and version of the pallets to import. 2. The features in each pallet that should be enabled when compiling the native Rust binary. By enabling the standard (std) feature set from each pallet , you can compile the runtime to include functions, types, and primitives that would otherwise be missing when you build the WebAssembly binary. cargo dependencies cargo features Add note-authorization dependencies runtime/Cargo.toml->[depencies] [dependencies] pallet-node-authorization = { default-features = false, git = "https://github.com/paritytech/substrate.git", tag = "devhub/latest", version = "4.0.0-dev" } <code> runtime/Cargo.toml->[features] [features] default = ['std'] std = [ ... "pallet-node-authorization/std", # add this line ... ] 如果忘记更新 Cargo.toml 文件中的 features 部分, 可能会在编译运行时二进制文件时看到找不到函数错误。 Build process 本节指定要为此运行时编译的默认功能集是 std 功能集。 使用 std 功能集编译运行时的时候,将启用所有列为依赖项的托盘中的 std 功能。 有关如何使用标准库将运行时编译为原生 Rust 二进制文件以及 使用 no_std 属性编译为 WebAssembly 二进制文件的更多详细信息, 请参阅构建运行时。 check new dependencies cargo check -p node-template-runtime Add an administrative rule 要在本教程中模拟治理(governance),可以将托盘配置为使用 EnsureRoot 特权功能, 该功能可以使用 Sudo 托盘调用。 Sudo 托盘默认包含在节点模板中,使您能够通过根级 管理帐户进行调用。在生产环境中,将使用更现实的基于治理的检查。 runtime/src/lib.rs use frame_system::EnsureRoot; Implement the Config trait for the pallet About Pallet Config Trait 每个托盘都有一个名为 Config 的 Rust 特征。 Config trait 用于识别托盘所需的参数和类型。 添加托盘所需的大多数特定于托盘的代码都是使用 Config 特征实现的。 可以通过参考其 Rust 文档或托盘的源代码来查看您需要为任何托盘实现的内容。 例如,要查看 node-authorization 托盘中的 Config trait 需要实现什么,可以参考托盘节点授权::Config 的 Rust 文档。 [[Traits: Defining Shared Behavior - The Rust Programming Language](https://doc.rust-lang.org/book/ch10-02-traits.html) Traits]] pallet_node_authorization::pallet::Config To implement the node-authorization pallet in your runtime runtime/src/lib.rs Add the parameter_types parameter_types! { pub const MaxWellKnownNodes: u32 = 8; pub const MaxPeerIdLength: u32 = 128; } Add the impl section impl pallet_node_authorization::Config for Runtime { type Event = Event; type MaxWellKnownNodes = MaxWellKnownNodes; type MaxPeerIdLength = MaxPeerIdLength; type AddOrigin = EnsureRoot<AccountId>; type RemoveOrigin = EnsureRoot<AccountId>; type SwapOrigin = EnsureRoot<AccountId>; // type ResetOrigin = EnsureRoot<AccountId>; // type WeightInfo = (); // } Add the pallet to the construct_runtime macro construct_runtime!( pub enum Runtime where Block = Block, NodeBlock = opaque::Block, UncheckedExtrinsic = UncheckedExtrinsic { /* Add This Line */ NodeAuthorization: pallet_node_authorization::{Pallet, Call, Storage, Event<T>, Config<T>}, } ); Cargo check cargo check -p node-template-runtime Add genesis storage for authorized nodes Before you can launch the network to use node authorization, some additional configuration is needed to handle the peer identifiers and account identifiers . For example, the PeerId is encoded in bs58 format, so you need to add a new dependency for the bs58 library in the node/Cargo.toml to decode the PeerId to get its bytes. To keep things simple, the authorized nodes are associated with predefined accounts. node/Cargo.toml [dependencies] bs58 = "0.4.0" node/src/chain_spec.rs Add genesis storage for nodes // A struct wraps Vec<u8>, represents as our `PeerId`. use sp_core::OpaquePeerId; // The genesis config that serves for our pallet. use node_template_runtime::NodeAuthorizationConfig; Locate the testnet_genesis function /// Configure initial storage state for FRAME modules. fn testnet_genesis( wasm_binary: &[u8], initial_authorities: Vec<(AuraId, GrandpaId)>, root_key: AccountId, endowed_accounts: Vec<AccountId>, _enable_println: bool, ) -> GenesisConfig { Within the GenesisConfig declaration node_authorization: NodeAuthorizationConfig { nodes: vec![ ( OpaquePeerId(bs58::decode("12D3KooWBmAwcd4PJNJvfV89HwE48nwkRmAgo8Vy3uQEyNNHBox2").into_vec().unwrap()), endowed_accounts[0].clone() ), ( OpaquePeerId(bs58::decode("12D3KooWQYV9dGMFoRzNStwpXztXaBUjtPqi6aU76ZgUriHhKust").into_vec().unwrap()), endowed_accounts[1].clone() ), ], }, 在这段代码中,NodeAuthorizationConfig 包含一个 nodes 属性, 它是一个包含两个元素的元组的向量。 1. 元组的第一个元素是 OpaquePeerId。 bs58::decode 操作将人类可读的 PeerId (例如 12D3KooWBmAwcd4PJNJvfV89HwE48nwkRmAgo8Vy3uQEyNNHBox2)转换为字节。 2. 元组的第二个元素是代表该节点所有者的 AccountId。 此示例使用预定义的 Alice 和 Bob,此处标识为捐赠账户 [0] 和 [1]。 预定义的key Verify that the node compiles cargo build --release Launch the permissioned network For the purposes of this tutorial 现在可以使用预定义帐户的节点密钥和对等标识符来启动许可网络并授权其他节点加入。 出于本教程的目的,将启动四个节点: 1. 其中三个节点与预定义的帐户相关联,并且所有这三个节点都被允许创作和验证区块。 2. 第四个节点是一个子节点,只有在该节点所有者批准的情况下才被授权从选定节点读取数据。 Obtain node keys and peerIDs 现在已经在创世存储(Genesis storage)中配置了与 Alice 和 Bob 账户关联的节点。 可以使用子密钥程序(subkey)检查与预定义帐户关联的密钥,并生成和检查您自己的密钥。 但是,如果运行 subkey generate-node-key 命令,节点密钥和对等标识符是随机生成的, 并且与教程中使用的密钥不匹配。 因为本教程使用预定义的账户和众所周知的节点密钥,所以总结了每个账户的密钥。 使用表中数据启动alice节点 ./target/release/node-template --chain=local --base-path /tmp/validator1 --alice --node-key=c12b6d18942f5ee8528c8e2baf4e147b5c5c18710926ea492d09cbd9f6c9f82a --port 30333 --ws-port 9944 使用表中数据启动bob节点 ./target/release/node-template --chain=local --base-path /tmp/validator2 --bob --node-key=6ce3be907dbcabf20a9a5a60a712b4256a54196000a8ed4050d352bc113f8c58 --port 30334 --ws-port 9945 两个节点都启动后,您应该能够在两个终端日志中看到创建和完成的新块。 Add a third node to the list of well-known nodes 您可以使用 --name charlie 命令启动第三个节点。 节点授权托盘使用脱链工作者来配置节点连接。 由于第三个节点不是知名节点,并且会将网络中的第四 个节点配置为只读子节点, 因此您必须包含命令行选项以启用脱链工作者(offchain worker)。 ./target/release/node-template --chain=local --base-path /tmp/validator3 --name charlie --node-key=3a9d5b35b9fb4c42aafadeca046f6bf56107bd2579687f069b42646684b94d9e --port 30335 --ws-port=9946 --offchain-worker always charlie节点没有连接的peers 启动此节点后,您应该会看到该节点没有连接的对等方。 因为这是一个许可网络,所以必须明确授权该节点进行连接。 Alice 和 Bob 节点在 genesis chain_spec.rsfile 中配置。 必须使用对 Sudo 托盘的调用手动添加所有其他节点。 Authorize access for the third node This tutorial uses the sudo pallet for governance. Therefore, yu can use the sudo pallet to call the add_well_known_node function provided by node-authorization pallet to add the third node. Add a sub-node 该网络中的第四个节点不是众所周知的节点。 1. 该节点归用户 dave 所有,是 charlie 节点的子节点。 2. 子节点只能通过连接到 charlie 拥有的节点来访问网络。 3. 父节点负责其授权连接的任何子节点,并在子节点需要删除或审计时控制访问。 ./target/release/node-template --chain=local --base-path /tmp/validator4 --name dave --node-key=a99331ff4f0e0a0434a6263da0a5823ea3afcfffe590c9f3014e6cf620f2b19a --port 30336 --ws-port 9947 --offchain-worker always
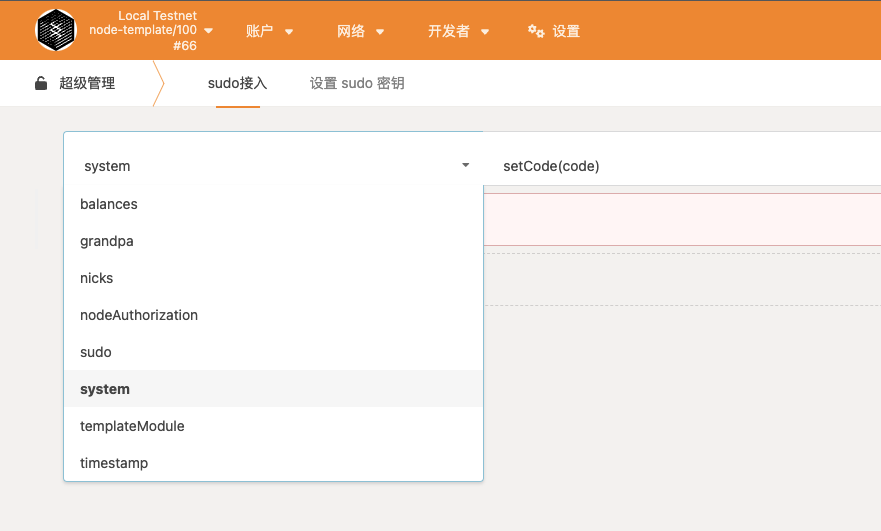
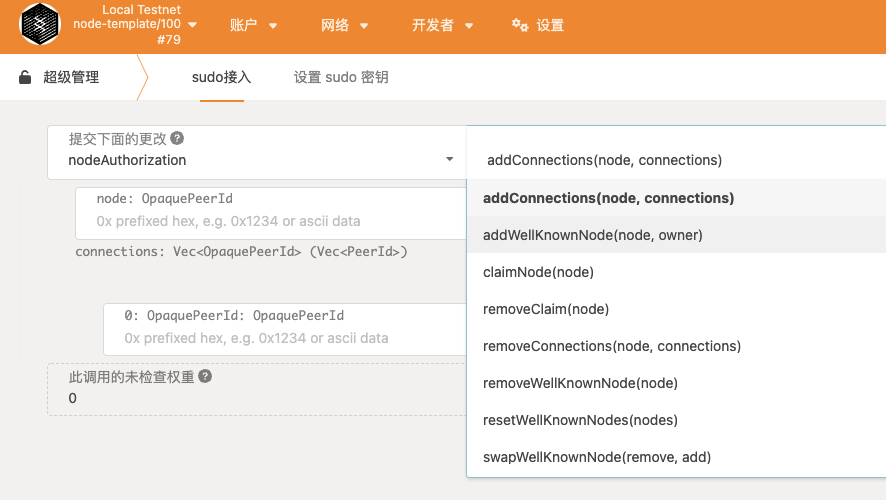
使用polkadot-js-app打开并切换到本地网络,开发者>超级管理(sudo)>nodeAuthorization
切换到nodeAuthorization
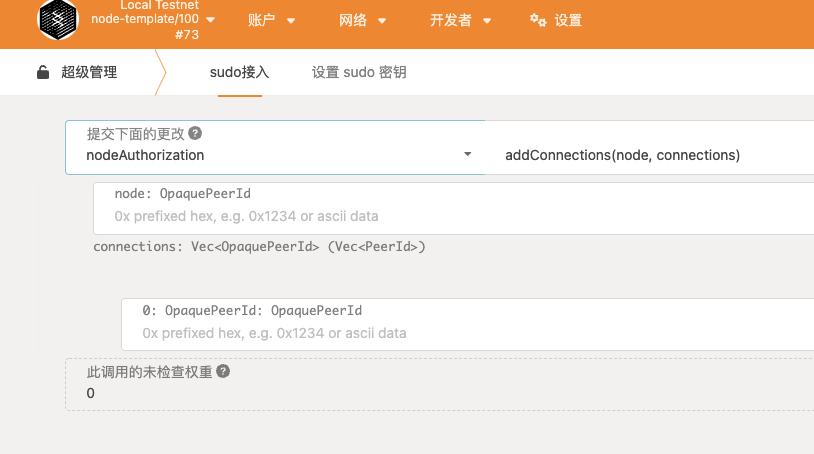
切换addConnections(node, owner)
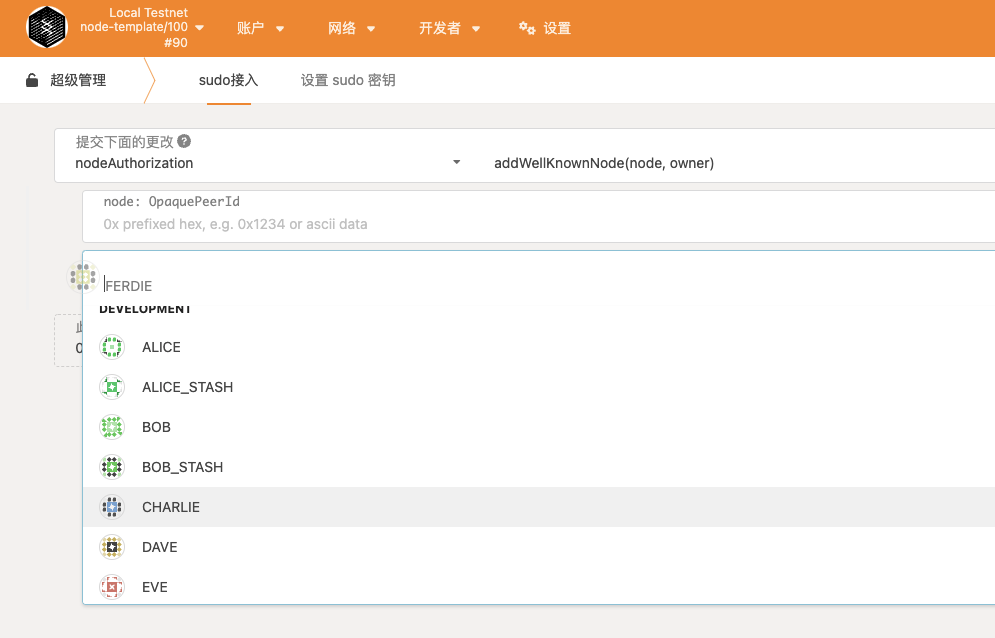
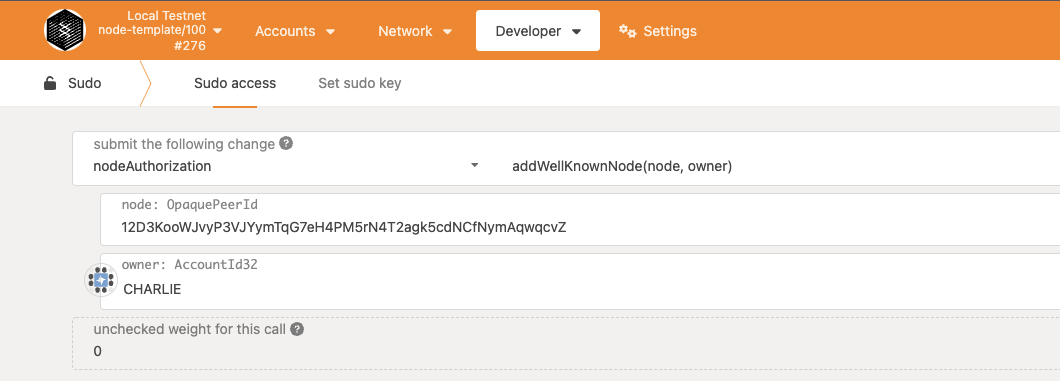
选择CHARLIE节点进行授权
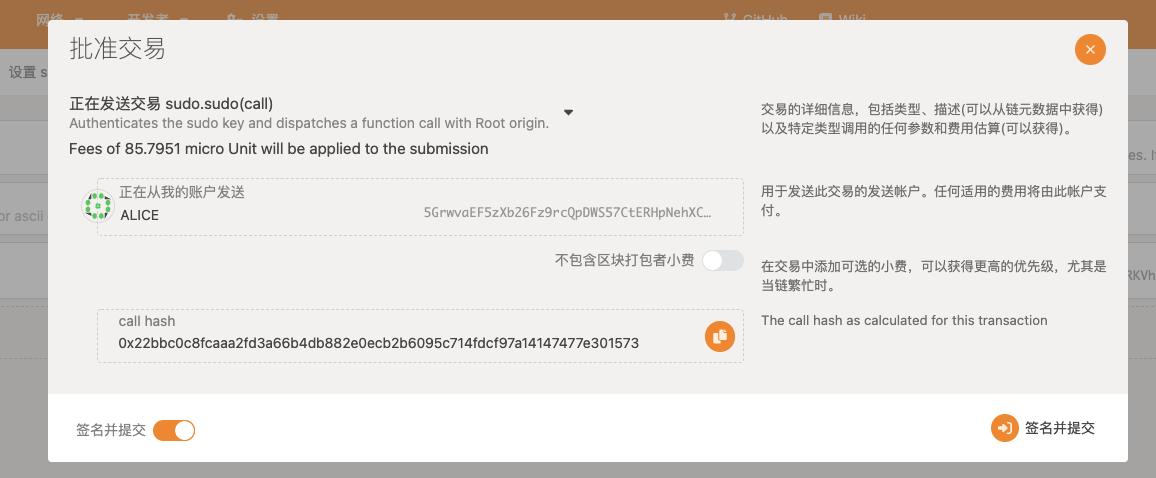
签名并提交
交易包含在区块中后,您应该看到 charlie 节点连接到 alice 和 bob 节点,并开始同步区块。这三个节点可以使用本地网络中默认启用的 mDNS 发现机制找到彼此。 如果您的节点不在同一个本地网络上,您应该使用命令行选项
–no-mdns 来禁用它。
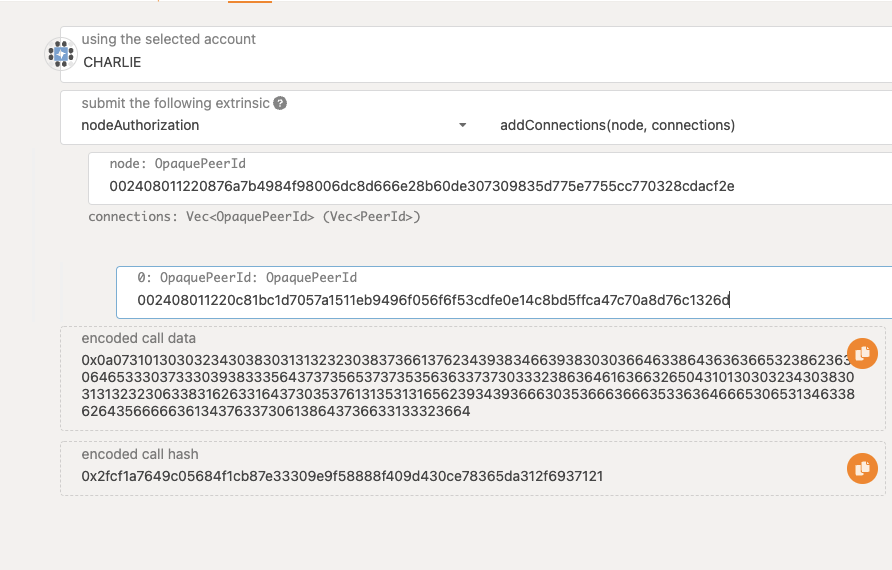
切换Charlie账户,执行addConnections(node, connections)操作
注意:第一个填Chalie的peerid in hex,第二个填Dave的peer id in hex
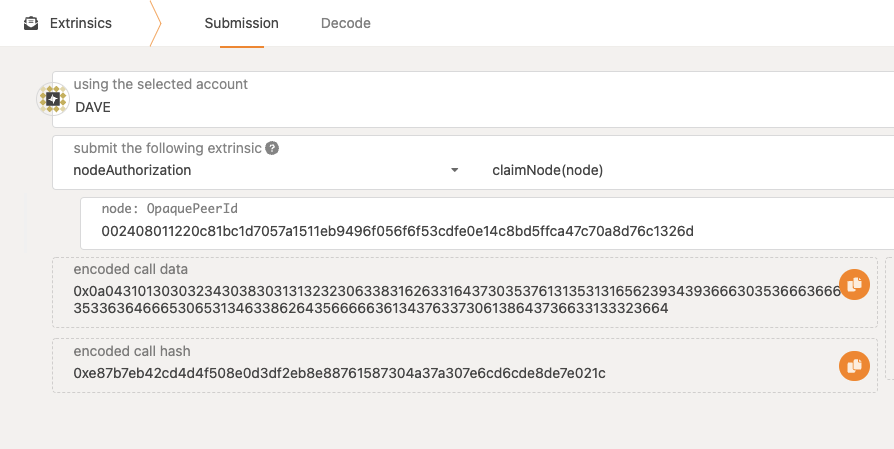
切换Dave账户,执行claimNode(node)操作
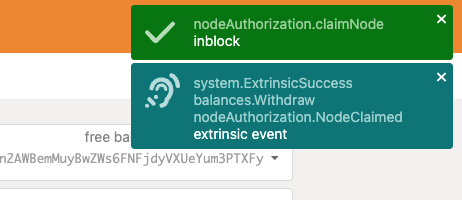
提示,操作成功后右侧会出现弹窗
您现在应该看到 Dave 正在捕获区块,并且只有一个属于 Charlie 的节点!重新启动 Dave 的节点,以防它没有立即与 Charlie 连接
sequenceDiagram
    actor terminal as 终端
    participant runtime as 运行时:添加pallet
    participant node as 节点:修改链规范
    participant pkjs as polkadot-js-app
    terminal->>terminal: git chekout latest & cargo build --release
    terminal->>+runtime: 开始修改运行时cargo文件,添加pallet依赖与feature
    rect rgb(200, 150, 255)
    runtime->>runtime: runtime/Cargo.toml:depencies添加pallet-node-authorization
    runtime->>runtime: runtime/Cargo.toml:features添加pallet-node-authorization/std
    end
    runtime->>-terminal: prepare to check
    terminal->>terminal: cargo check -p node-template-runtime
    terminal->>+runtime: 开始给节点node添加pallet用到的参数类型、实现块、构建运行时配置
    rect rgb(200, 150, 255)
    runtime->>runtime: runtime/src/runtime.rs:add parameter_types
    runtime->>runtime: runtime/src/runtime.rs:add impl section
    runtime->>runtime: runtime/src/runtime.rs:add the pallet to the construct_runtime macro
    end
    runtime->>-terminal: 开始检查
    terminal->>terminal: cargo check -p node-template-runtime
    terminal->>+node: 开始给授权节点添加创始区块存储功能
    node->>node: node/Cargo.toml:add bs58 dependency
    rect rgb(200, 150, 255)
    node->>+node: 添加创始区块存储功能
    node->>node: node/src/node.rs:add genesis storage for nodes
    node->>node: node/src/node.rs:locate the testnet_genesis function
    node->>node: node/src/node.rs:add GenesisConfig declaration
    end
    node->>-terminal: cargo check & start nodes
    terminal->>terminal: cargo check -p node-template-runtime
    rect rgb(200, 150, 255)
    terminal->>terminal: start alice node
    terminal->>terminal: start bob node
    terminal->>terminal: start Charlie node
    terminal->>terminal: start Dave node
    end
    terminal->>pkjs: 开始进行授权与建立连接操作
    rect rgb(200, 150, 255)
    pkjs->>pkjs: 使用alice账号给Charlie授权
    pkjs->>pkjs: 使用Charlie账号连接Dave节点
    pkjs->>pkjs: Dave对外claimNode
    end
`
任何节点都可以发出影响其他节点行为的交易(extrinsics),只要它位于用于参考的链数据上,并且您在密钥库中拥有可用于所需来源的相关帐户的密钥。此演示中的所有节点都可以访问开发人员签名密钥,因此能够代表 Charlie
从网络上的任何连接节点发出影响 charlie 子节点的命令。
在现实世界的应用程序中,节点操作员只能访问他们的节点密钥,并且是唯一能够正确签署和提交外部信息的人,很可能来自他们自己的节点,他们可以控制密钥的安全性。
Error rendering admonishment
Failed with: TOML parsing error: expected an equals, found an identifier at line 1 column 5
Original markdown input:
```admonish tip info title='承接关系:需要基于上一节课'
```
Monitor node metrics 返回 Substrate exposes metrics about the operation of your network. For example, you can collect information about: 1. how many peers your node is connected to 2. how much memory your node is using. To visualize these metrics, you can use tools like Prometheus and Grafana. This tutorial demonstrates how to use Grafana and Prometheus to scrape and visualize these types of node metrics . A possible architecture +-----------+ +-------------+ +---------+ | Substrate | | Prometheus | | Grafana | +-----------+ +-------------+ +---------+ | -----------------\ | | | | Every 1 minute |-| | | |----------------| | | | | | | GET current metric values | | |<---------------------------------| | | | | | `substrate_peers_count 5` | | |--------------------------------->| | | | --------------------------------------------------------------------\ | | |-| Save metric value with corresponding time stamp in local database | | | | |-------------------------------------------------------------------| | | | -------------------------------\ | | | | Every time user opens graphs |-| | | |------------------------------| | | | | | | GET values of metric `substrate_peers_count` from time-X to time-Y | | |<-------------------------------------------------------------------------| | | | | | `substrate_peers_count (1582023828, 5), (1582023847, 4) [...]` | | |------------------------------------------------------------------------->| | | | Tutorial objectives 1. Install Prometheus and Grafana. 2. Configure Prometheus to capture a time series for your Substrate node. 3. Configure Grafana to visualize the node metrics collected using the Prometheus endpoint. Install Prometheus and Grafana Start a Substrate node Configure Prometheus to scrape your Substrate node # prometheus.yml # --snip-- # A scrape configuration containing exactly one endpoint to scrape: # Here it's Prometheus itself. scrape_configs: # The job name is added as a label `job=<job_name>` to any timeseries scraped from this config. - job_name: "substrate_node" # metrics_path defaults to '/metrics' # scheme defaults to 'http'. # Override the global default and scrape targets from this job every 5 seconds. # ** NOTE: you want to have this *LESS THAN* the block time in order to ensure # ** that you have a data point for every block! scrape_interval: 5s static_configs: - targets: ["localhost:9615"] # specify a custom config file instead if you made one here: ./prometheus --config.file prometheus.yml Check all Prometheus metrics curl localhost:9615/metrics Visualizing Prometheus metrics with Grafana
+-----------+                     +-------------+                                                              +---------+
| Substrate |                     | Prometheus  |                                                              | Grafana |
+-----------+                     +-------------+                                                              +---------+
      |               -----------------\ |                                                                          |
      |               | Every 1 minute |-|                                                                          |
      |               |----------------| |                                                                          |
      |                                  |                                                                          |
      |        GET current metric values |                                                                          |
      |<---------------------------------|                                                                          |
      |                                  |                                                                          |
      | `substrate_peers_count 5`        |                                                                          |
      |--------------------------------->|                                                                          |
      |                                  | --------------------------------------------------------------------\    |
      |                                  |-| Save metric value with corresponding time stamp in local database |    |
      |                                  | |-------------------------------------------------------------------|    |
      |                                  |                                         -------------------------------\ |
      |                                  |                                         | Every time user opens graphs |-|
      |                                  |                                         |------------------------------| |
      |                                  |                                                                          |
      |                                  |       GET values of metric `substrate_peers_count` from time-X to time-Y |
      |                                  |<-------------------------------------------------------------------------|
      |                                  |                                                                          |
      |                                  | `substrate_peers_count (1582023828, 5), (1582023847, 4) [...]`           |
      |                                  |------------------------------------------------------------------------->|
      |                                  |                                                                          |
gunzip prometheus-<version>.darwin-amd64.tar.gz && tar -xvf prometheus-2.35.0.darwin-amd64.tar
brew update && brew install grafana
==> Downloading https://ghcr.io/v2/homebrew/core/grafana/manifests/9.0.2
######################################################################## 100.0%
==> Downloading https://ghcr.io/v2/homebrew/core/grafana/blobs/sha256:6022dd955d971d2d34d70f29e56335610108c84b75081020092e29f3ec641724
==> Downloading from https://pkg-containers.githubusercontent.com/ghcr1/blobs/sha256:6022dd955d971d2d34d70f29e56335610108c84b75081020092e29f3ec64
######################################################################## 100.0%
==> Pouring grafana--9.0.2.monterey.bottle.tar.gz
==> Caveats
To restart grafana after an upgrade:
  brew services restart grafana
Or, if you don't want/need a background service you can just run:
  /usr/local/opt/grafana/bin/grafana-server --config /usr/local/etc/grafana/grafana.ini --homepath /usr/local/opt/grafana/share/grafana --packaging=brew cfg:default.paths.logs=/usr/local/var/log/grafana cfg:default.paths.data=/usr/local/var/lib/grafana cfg:default.paths.plugins=/usr/local/var/lib/grafana/plugins
==> Summary
🍺  /usr/local/Cellar/grafana/9.0.2: 6,007 files, 247.3MB
==> Running `brew cleanup grafana`...
Disable this behaviour by setting HOMEBREW_NO_INSTALL_CLEANUP.
Hide these hints with HOMEBREW_NO_ENV_HINTS (see `man brew`).
# --snip--

# A scrape configuration containing exactly one endpoint to scrape:
# Here it's Prometheus itself.
scrape_configs:
  # The job name is added as a label `job=<job_name>` to any timeseries scraped from this config.
  - job_name: "substrate_node"

    # metrics_path defaults to '/metrics'
    # scheme defaults to 'http'.

    # Override the global default and scrape targets from this job every 5 seconds.
    # ** NOTE: you want to have this *LESS THAN* the block time in order to ensure
    # ** that you have a data point for every block!
    scrape_interval: 5s

    static_configs:
      - targets: [ "localhost:9615" ]
# specify a custom config file instead if you made one here:
./prometheus --config.file substrate_prometheus.yml
curl localhost:9615/metrics
也可以直接打开浏览器:localhost:9615/metrics
# 后台运行
brew services restart grafana
# 指定运行
/usr/local/opt/grafana/bin/grafana-server --config /usr/local/etc/grafana/grafana.ini --homepath /usr/local/opt/grafana/share/grafana --packaging=brew cfg:default.paths.logs=/usr/local/var/log/grafana cfg:default.paths.data=/usr/local/var/lib/grafana cfg:default.paths.plugins=/usr/local/var/lib/grafana/plugins
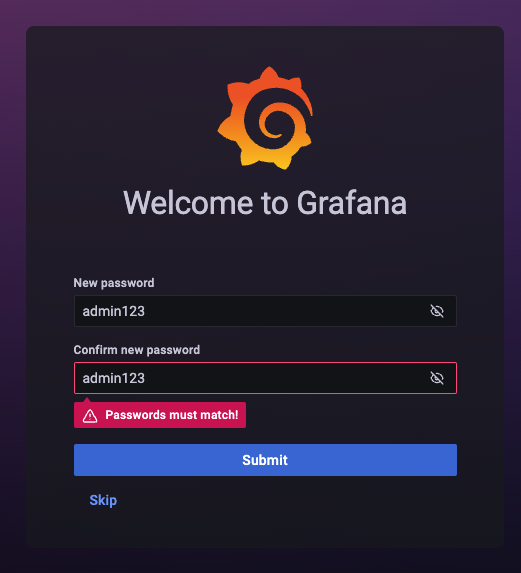
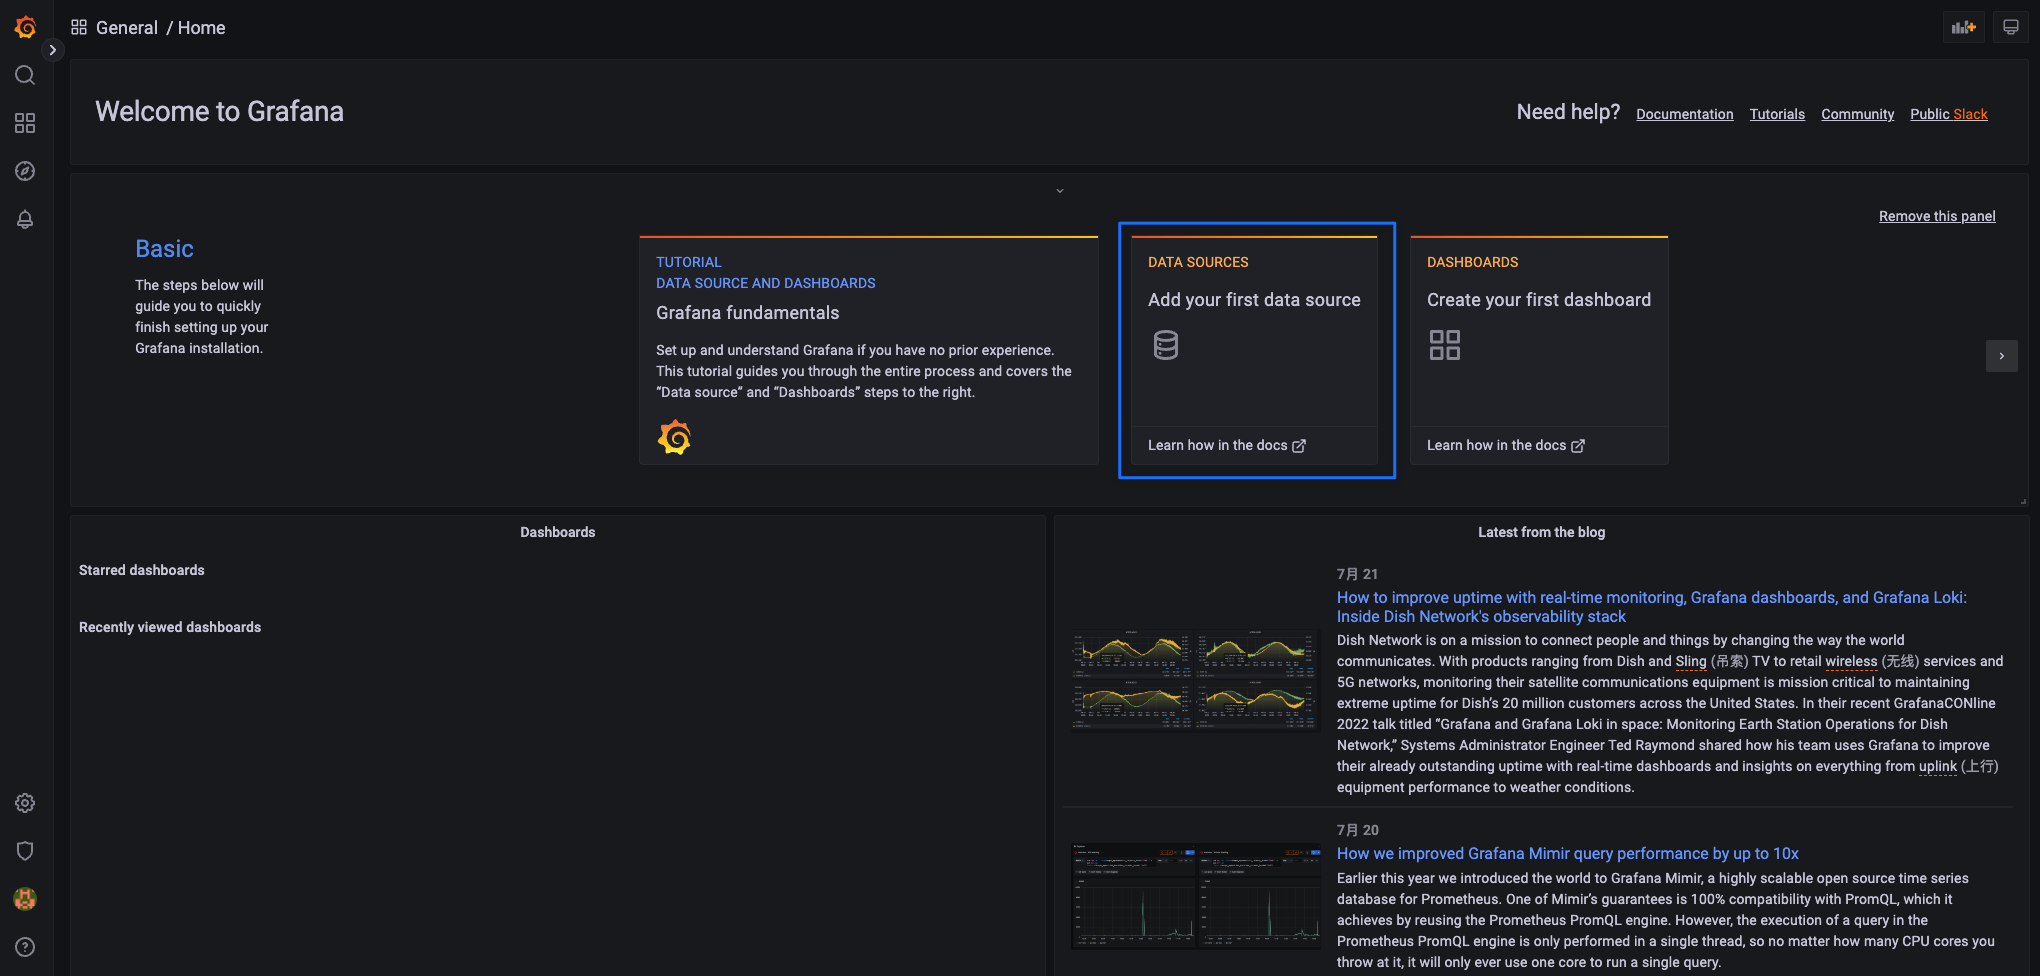
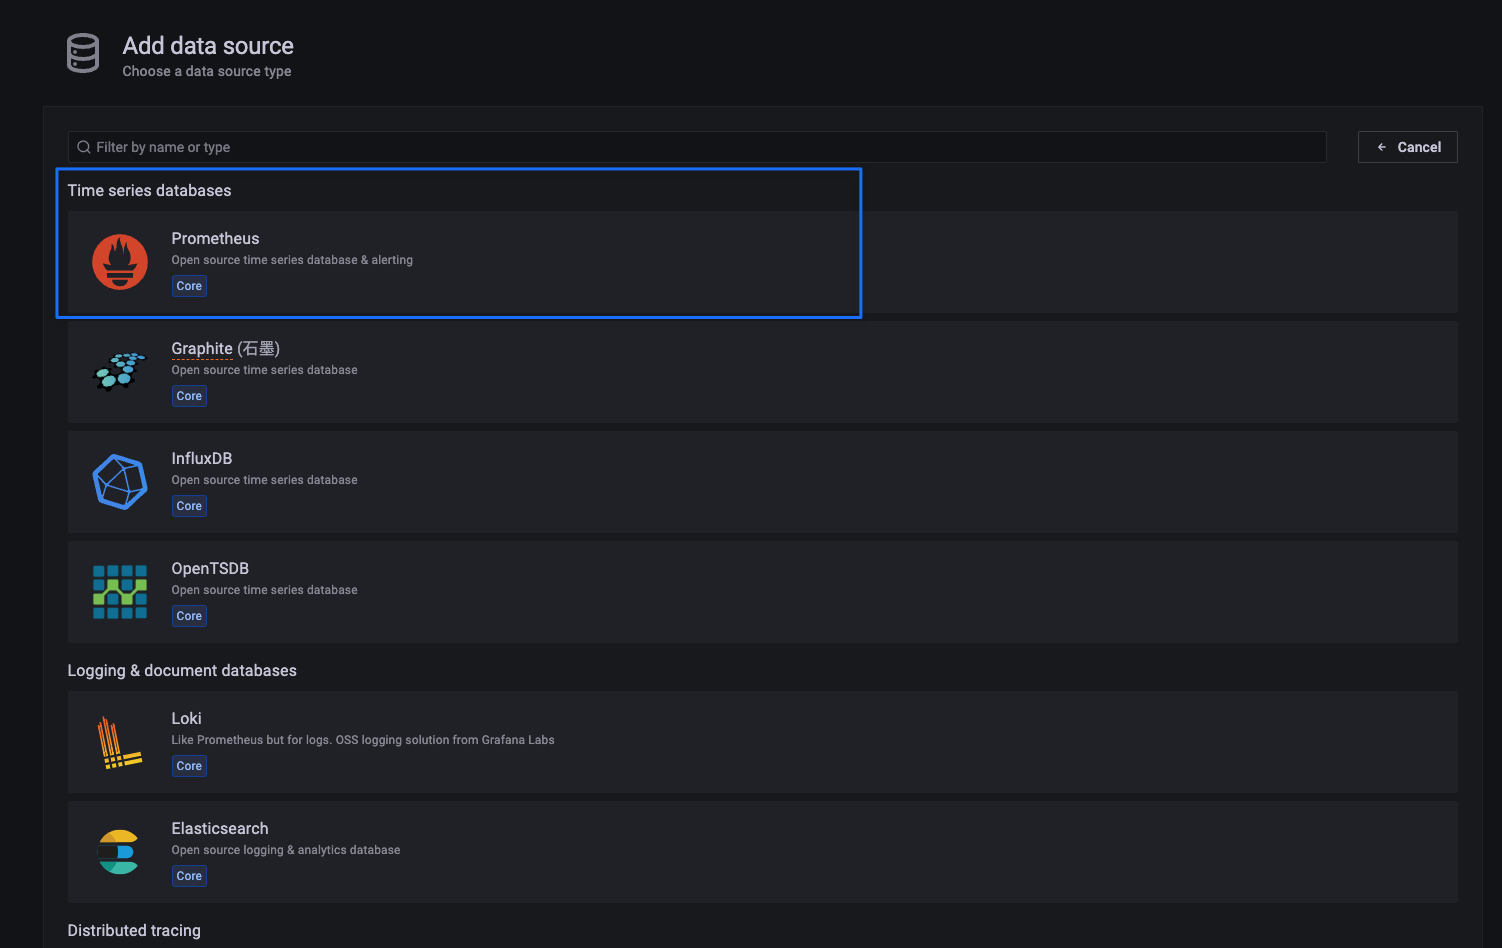
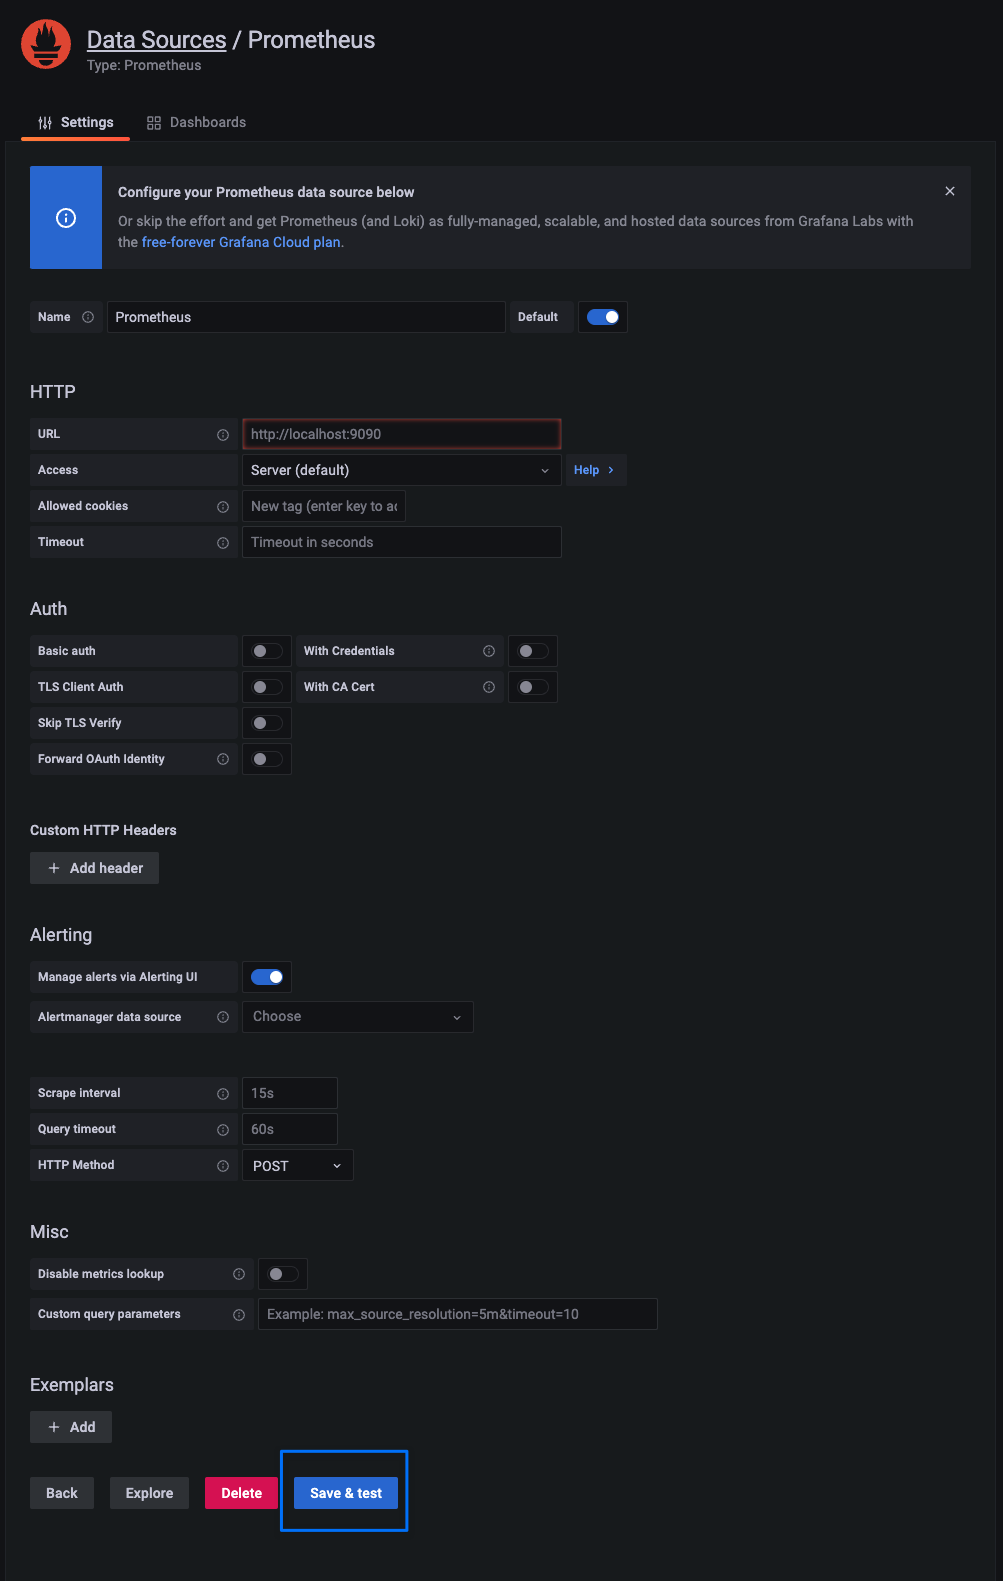
然后需要选择 Prometheus 数据源类型并指定 Grafana 需要查找它的位置。
Grafana 需要的 Prometheus 端口不是在 prometheus.yml 文件 (http://localhost:9615) 中为节点发布其数据的位置设置的端口。
在同时运行 Substrate 节点和 Prometheus 的情况下,配置 Grafana 以在其默认端口 http://localhost:9090 或配置的端口(如果自定义它)上查找 Prometheus。
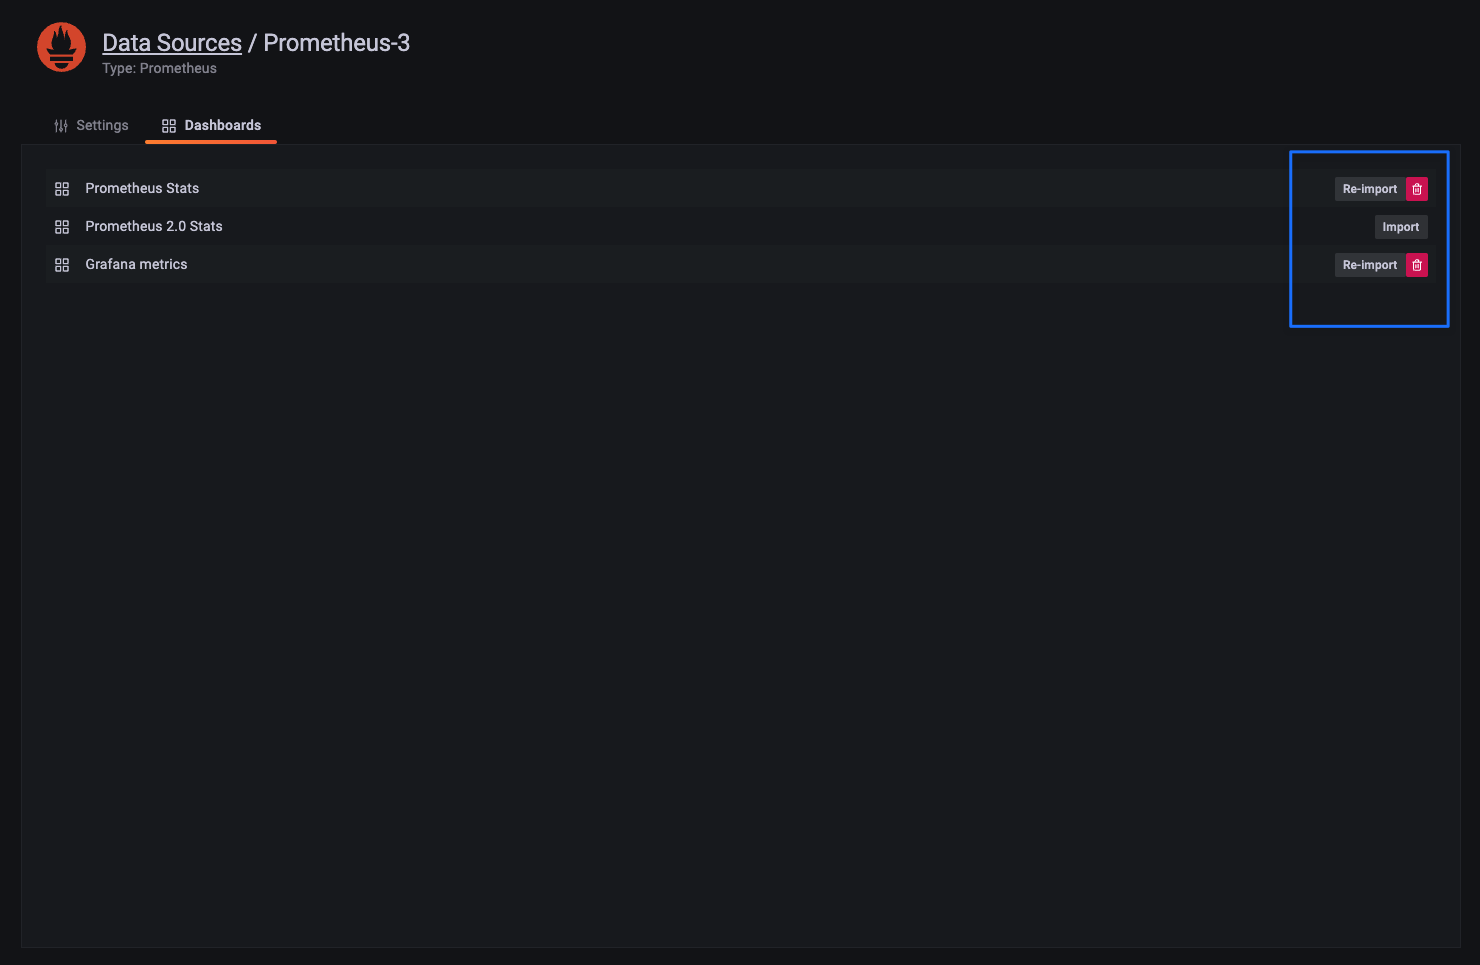
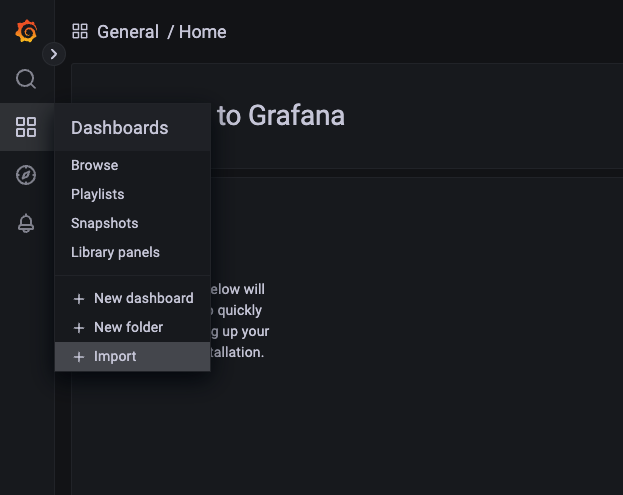
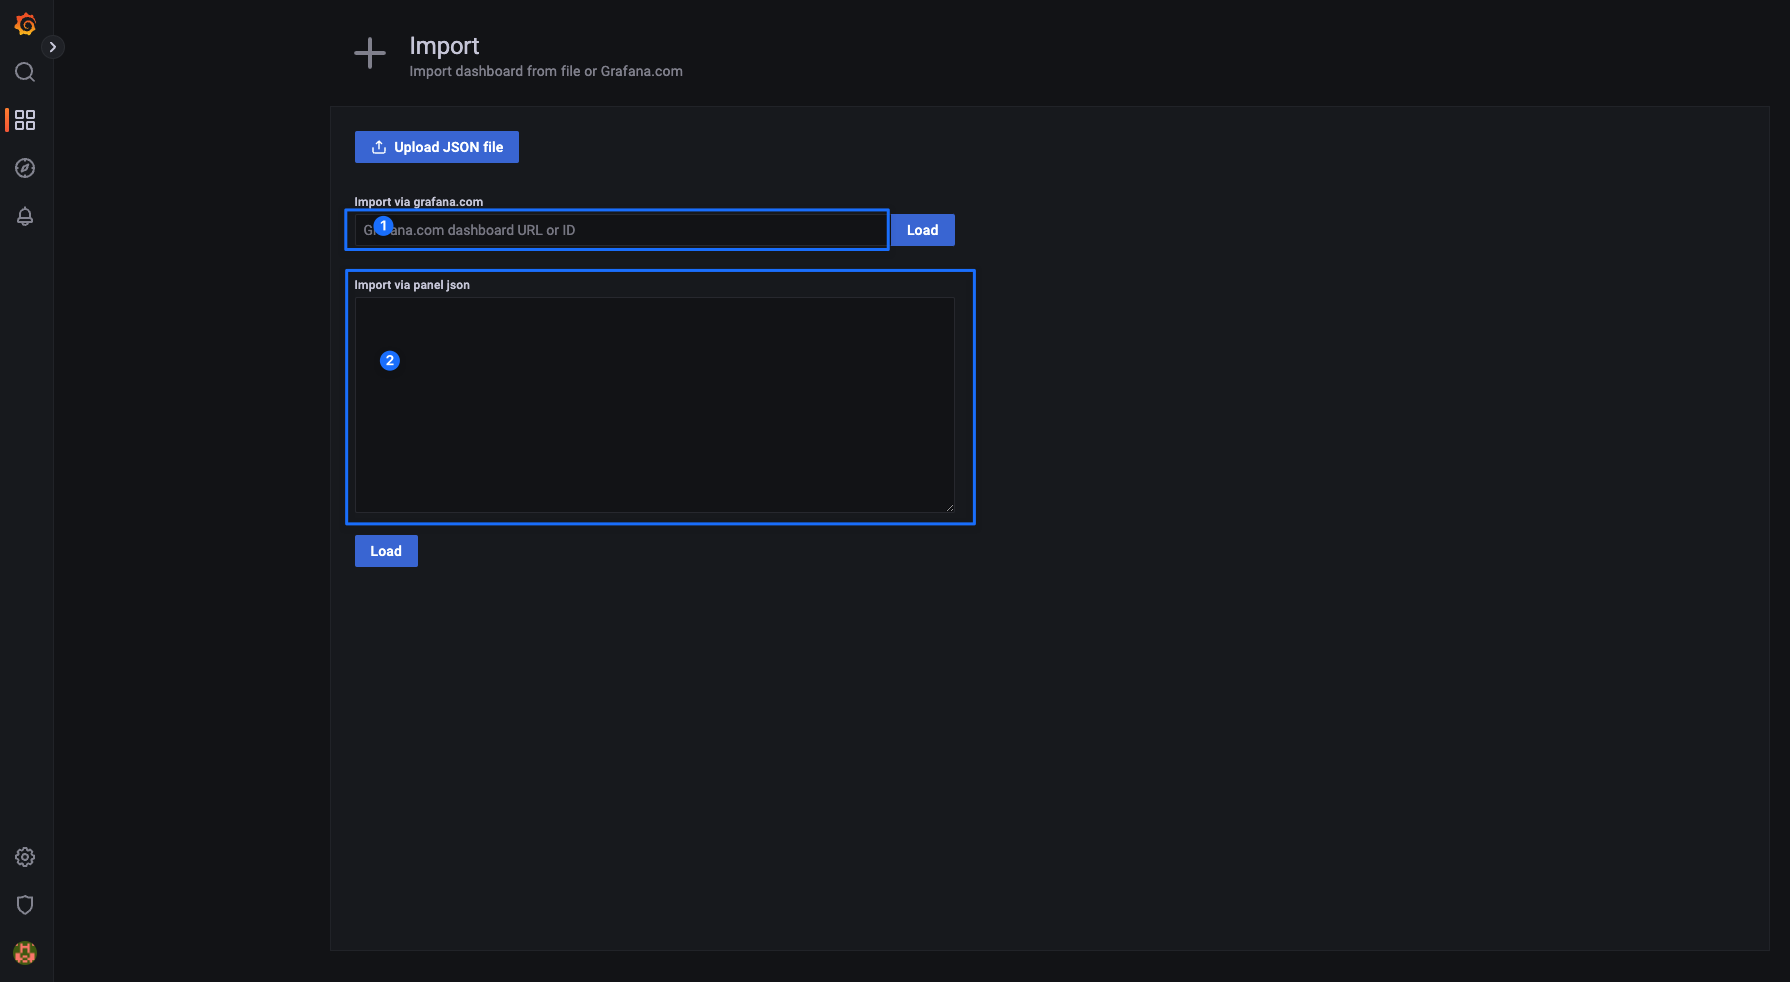
Export and import | Grafana documentation
Dashboards | Grafana Labs
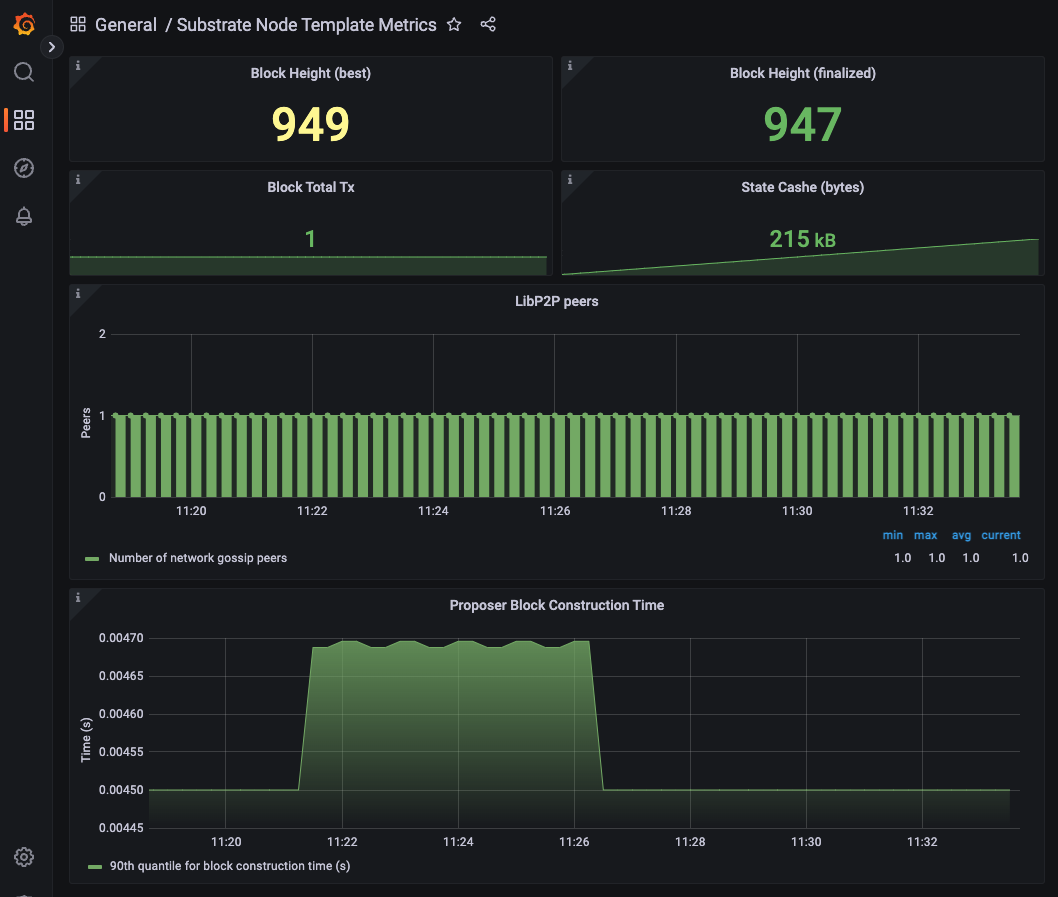
Substrate Node Template Metrics dashboard for Grafana | Grafana Labs
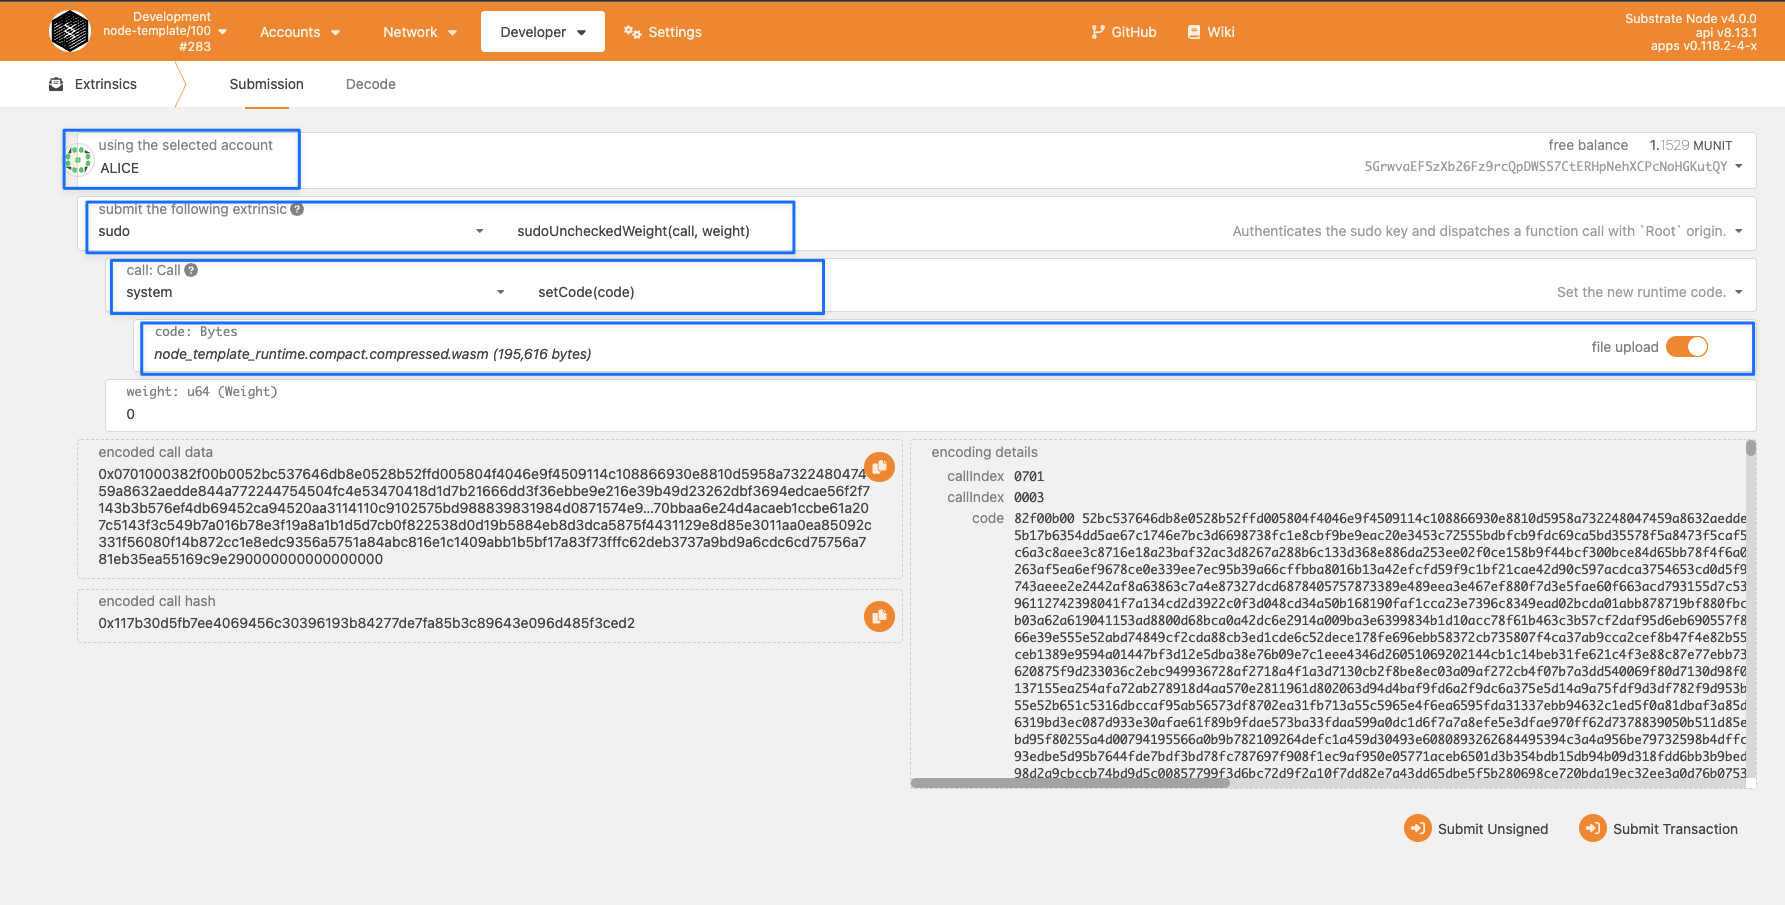
Upgrade a running network Upgrade a running network 返回 Forkless upgrade intro Unlike many blockchains, the Substrate development framework supports forkless upgrades to the runtime that is the core of the blockchain. Most blockchain projects require a hard fork of the code base to support ongoing development of new features or enhancements to existing features. With Substrate , you can deploy enhanced runtime capabilities—including breaking changes—without a hard fork. Because the definition of the runtime is itself an element in a Substrate chain's state, network participants can update this value by calling the set_code function in a transaction. Because updates to the runtime state are validates using the blockchain's consensus mechanisms and cryptographic guarantees, network participants can use the blockchain itself to distribute updated or extended runtime logic without needing to fork the chain or release a new blockchain client. Hard Fork Substrate set_code function Tutorial objectives 1. Use the Sudo pallet to simulate governance for a chain upgrade. 2. Upgrade the runtime for a running node to include a new pallet . 3. Schedule an upgrade for a runtime. Authorize an upgrade using the Sudo pallet In FRAME, the Root origin identifies the runtime administrator. Only this administrator can update the runtime by calling the set_code function. To invoke this function using the Root origin, you can use the the sudo function in the Sudo pallet to specify the account that has superuser administrative permissions. By default, the chain specification file for the node template specifies that the alice development account is the owner of the Sudo administrative account. Therefore, this tutorial uses the alice account to perform runtime upgrades. Resource accounting for runtime upgrades Function calls that are dispatched to the Substrate runtime are always associated with a weight to account for resource usage. The FRAME System module sets boundaries on the block length and block weight that these transactions can use. However, the set_code function is intentionally designed to consume the maximum weight that can fit in a block. Forcing a runtime upgrade to consume an entire block prevents transactions in the same block from executing on different versions of a runtime. The weight annotation for the set_code function also specifies that the function is in the Operational class because it provides network capabilities. Functions calls that are identified as operational: 1. Can consume the entire weight limit of a block. 2. Are given maximum priority. 3. Are exempt from paying the transaction fees. Managing resource accounting In this tutorial, the sudo_unchecked_weight function is used to invoke the set_code function for the runtime upgrade. The sudo_unchecked_weight function is the same as the sudo function except that it supports an additional parameter to specify the weight to use for the call. This parameter enables you to work around resource accounting safeguards to specify a weight of zero for the call that dispatches the set_code function. This setting allows for a block to take an indefinite time to compute to ensure that the runtime upgrade does not fail, no matter how complex the operation is. It can take all the time it needs to succeed or fail. Upgrade the runtime to add the Scheduler pallet The node template doesn't include the Scheduler pallet in its runtime. To illustrate a runtime upgrade, let's add the Scheduler pallet to a running node. First Screen: Start the local node in development mode # Leave this node running. # You can edit and re-compile to upgrade the runtime # without stopping or restarting the running node. cargo run --release -- --dev Second Screen: Upgrade Operation substrate-node-template/runtime/Cargo.toml Add the Scheduler pallet as a dependency [dependencies] ... pallet-scheduler = { version = "4.0.0-dev", default-features = false, git = "https://github.com/paritytech/substrate.git", branch = "polkadot-v0.9.24" } ... Add the Scheduler pallet to the features list. [features] default = ["std"] std = [ ... "pallet-scheduler/std", ... substrate-node-template/runtime/src/lib.rs Add the types required by the Scheduler pallet parameter_types! { pub MaximumSchedulerWeight: Weight = 10_000_000; pub const MaxScheduledPerBlock: u32 = 50; } Add the implementation for the Config trait for the Scheduler pallet . impl pallet_scheduler::Config for Runtime { type Event = Event; type Origin = Origin; type PalletsOrigin = OriginCaller; type Call = Call; type MaximumWeight = MaximumSchedulerWeight; type ScheduleOrigin = frame_system::EnsureRoot<AccountId>; type MaxScheduledPerBlock = MaxScheduledPerBlock; type WeightInfo = (); type OriginPrivilegeCmp = EqualPrivilegeOnly; type PreimageProvider = (); type NoPreimagePostponement = (); } Add the Scheduler pallet inside the construct_runtime! macro. construct_runtime!( pub enum Runtime where Block = Block, NodeBlock = opaque::Block, UncheckedExtrinsic = UncheckedExtrinsic { /* snip */ Scheduler: pallet_scheduler, } ); Add the following trait dependency at the top of the file: pub use frame_support::traits::EqualPrivilegeOnly; Increment the spec_version in the RuntimeVersion struct pub const VERSION: RuntimeVersion = RuntimeVersion { spec_name: create_runtime_str!("node-template"), impl_name: create_runtime_str!("node-template"), authoring_version: 1, spec_version: 101, // *Increment* this value, the template uses 100 as a base impl_version: 1, apis: RUNTIME_API_VERSIONS, transaction_version: 1, }; Review the components of the RuntimeVersion struct spec_name specifies the name of the runtime. impl_name specifies the name of the client. authoring_version specifies the version for block authors. spec_version specifies the version of the runtime. impl_version specifies the version of the client. apis specifies the list of supported APIs. transaction_version specifies the version of the dispatchable function interface. author dispatch Build the updated runtime in the second terminal # without stopping the running node. cargo build --release -p node-template-runtime Connect to the local node to upgrade the runtime to use the new build artifact. Polkadot-JS application Schedule an Upgrade Now that the node template has been upgraded to include the Scheduler pallet , the schedule function can be used to perform the next runtime upgrade. In the previous part, the sudo_unchecked_weight function was used to override the weight associated with the set_code function; in this section, the runtime upgrade will be scheduled so that it can be processed as the only extrinsic in a block. the schedule function extrinsic Prepare an Upgraded Runtime // runtime/src/lib.rs pub const VERSION: RuntimeVersion = RuntimeVersion { spec_name: create_runtime_str!("node-template"), impl_name: create_runtime_str!("node-template"), authoring_version: 1, spec_version: 102, // *Increment* this value. impl_version: 1, apis: RUNTIME_API_VERSIONS, transaction_version: 1, }; /* snip */ parameter_types! { pub const ExistentialDeposit: u128 = 1000; // Update this value. pub const MaxLocks: u32 = 50; } /* snip */ Build the upgraded runtime cargo build --release -p node-template-runtime Upgrade the Runtime Upgrade a running network 终端1 直接运行节点 终端1 直接运行节点 终端2 用于更新 终端2 用于更新 运行时 运行时 运行时 运行时 Polkadot-JS application 波卡前端 Polkadot-JS application 波卡前端 运行原先节点 1.1 运行原先节点 cargo run release --dev 更新palelt ref substrate-node-template/runtime/Cargo.toml 2.1 添加pallet-scheduler依赖. 2.2 feature添加pallet-scheduler/std. ref substrate-node-template/runtime/src/lib.rs 2.3 Add the types required by the Scheduler pallet 2.4 Add the implementation for the Config trait for the Scheduler pallet . 2.5 Add the Scheduler pallet inside the construct_runtime! macro. 2.6 Add the following trait dependency 2.7 Increment the spec_version in the RuntimeVersion struct 注意下列参数的意思: spec_name, impl_name, authoring_version, spec_version, impl_version, apis, traction_version 在第二个终端编译更新运行时,获取编译后的wasm文件 3.1 Build the updated runtime in the second terminal window or tab without stopping the running node 先检查:cargo check -p node-template-runtime 再编译:cargo build --release -p node-template-runtim 在波卡前端的extrinsics提交wasm文件升级runtime 4.1 Connect to the local node to upgrade the runtime to use the new build artifact. 4.2 Select the Alice account to submit a call https: polkadot.js.org/apps/#/extrinsics?rpc=ws: 127.0.0.1:9944 using the selected account: Alice submit the following extrinsic: sudo > sudoUncheckedWeight(call, weight) call: system > setCode(code) then toggle file upload 4.3 编译生成的wasm文件用于上传 target/release/wbuild/node-template-runtime/ node_template_runtime.compact.compressed.wasm 4.4 Select file upload, then select or drag and drop the WebAssembly file that nyou generated for the runtime. 4.5 Click Submit Transaction. 现在runtime已经更新成功,节点模版包含Scheduler pallet。 可以使用the schedule函数进行自动更新spec_version 5.1 update spec_version runtime/src/lib.rs pub const VERSION: RuntimeVersion = RuntimeVersion { spec_name: create_runtime_str!("node-template"), impl_name: create_runtime_str!("node-template"), authoring_version: 1, spec_version: 102, // *Increment* this value. impl_version: 1, apis: RUNTIME_API_VERSIONS, transaction_version: 1, }; / * snip */ parameter_types! { pub const ExistentialDeposit: u128 = 1000; // Update this value. pub const MaxLocks: u32 = 50; } / * snip */ 6.1 再次编译运行时,获取wasm文件 This will override any previous build artifacts! So if you want to have a copy on hand of your last runtime Wasm build files, be sure to copy them somewhere else. 先检查:cargo check -p node-template-runtime 再编译:cargo build --release -p node-template-runtim 6.2 提供wasm文件 6.3 打开对应功能上传文件 https: polkadot.js.org/apps/#/sudo?rpc=ws: 127.0.0.1:9944 6.4 查看区块,等到达到指定条件, 自动更新 https: polkadot.js.org/apps/#/explorer?rpc=ws: 127.0.0.1:9944
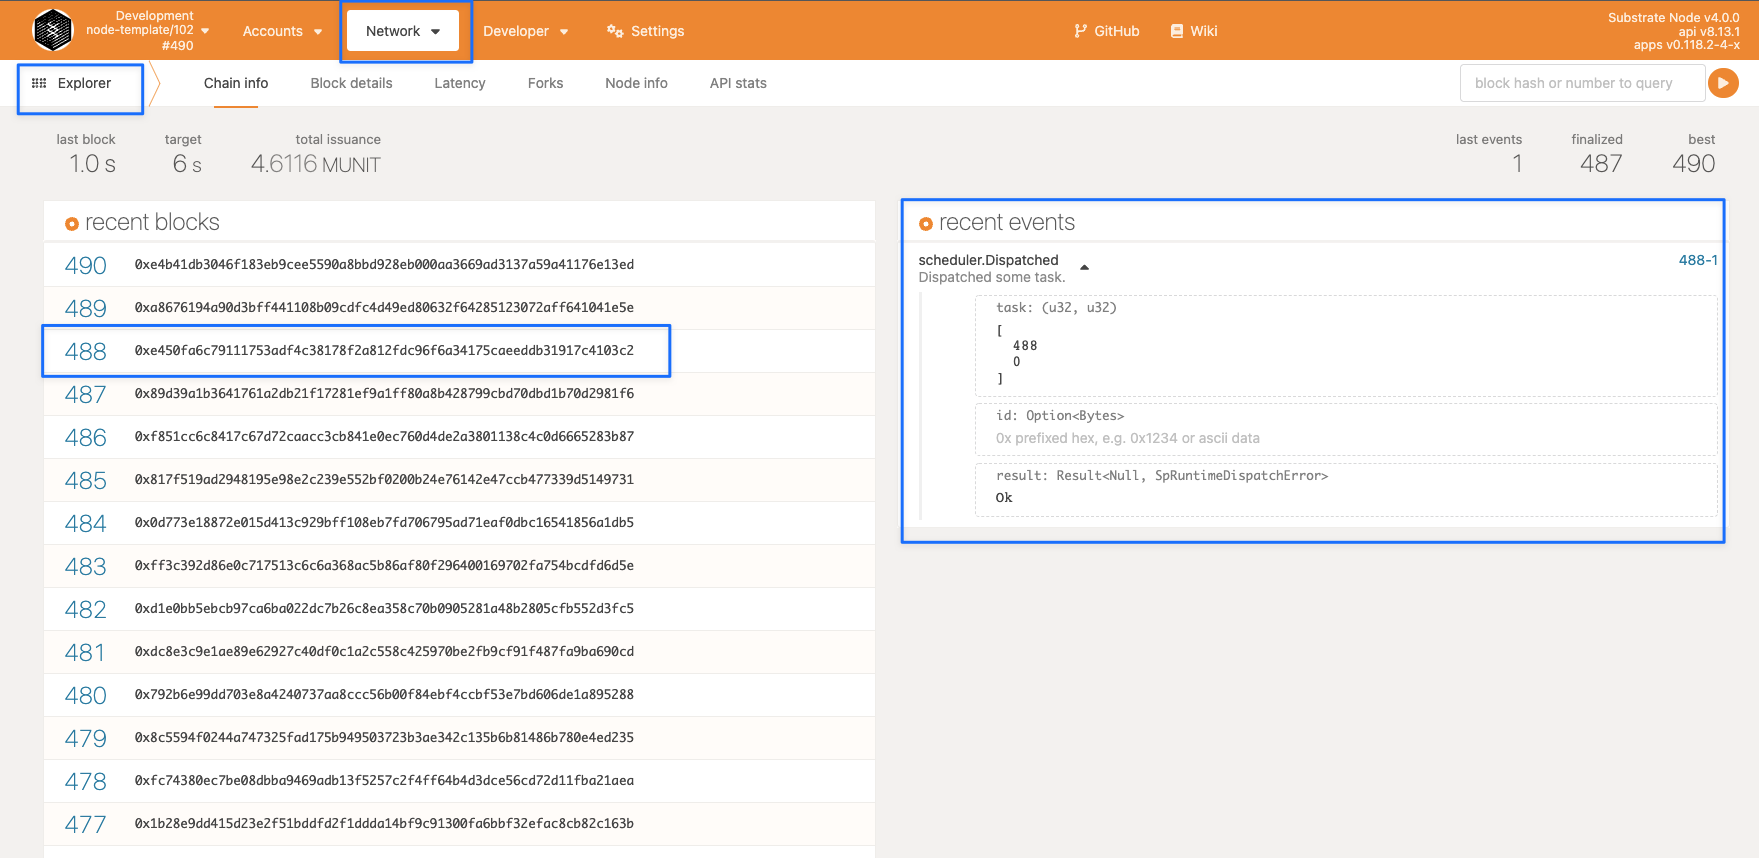
使用alice账户上传wasm文件
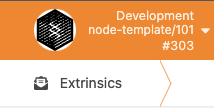
node-template版本更新
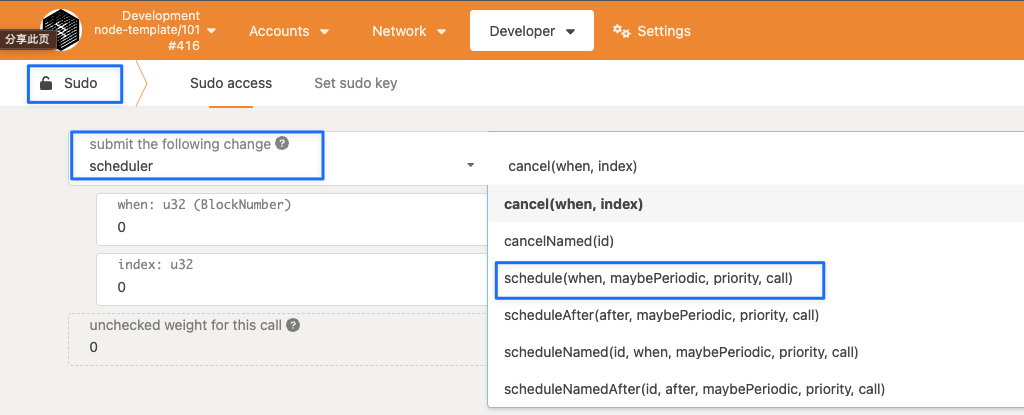
已经添加新的交易函数scheduler
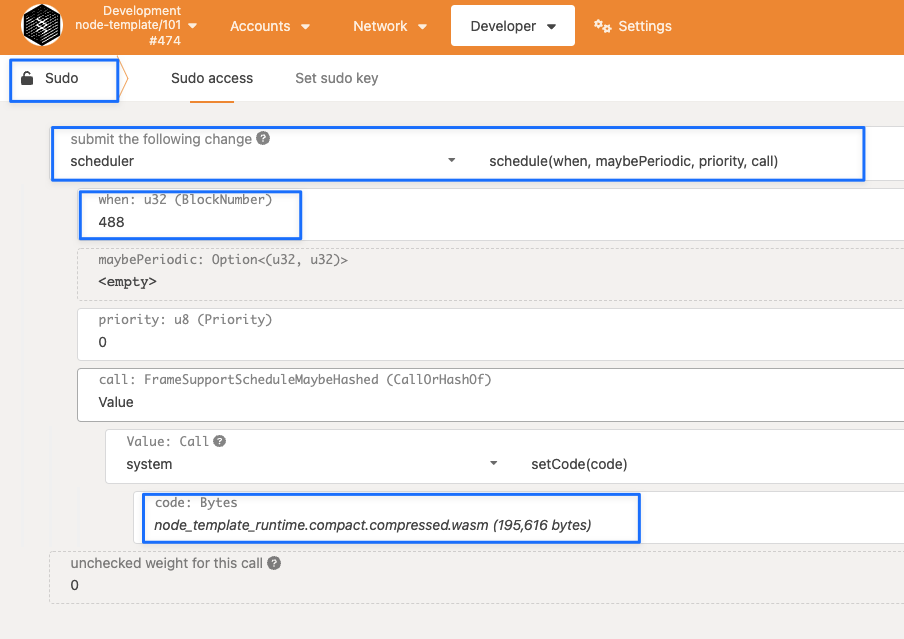
使用scheduler函数
达到条件自动触发
由于目前substrate的源码和文档都在快速更新,所以可能出现一些未曾说过的问题。
比如链接找不到、目录里面不存在对应文章链接、编译时依赖包版本冲突。
这些都需要对文档的熟悉、对rust编程的熟悉才能轻松越过。
由于官方文档和代码一直都在更新,可能会出现问题,这里就需要根据默认依赖的substrate分支进行更换
[dependencies]
sp-std = { version = "4.0.0-dev", default-features = false, git = "https://github.com/paritytech/substrate.git", branch = "polkadot-v0.9.24" }
如上所示,对应的分支为:branch = “polkadot-v0.9.24”, 所以需要改成:
[dependencies.pallet-nicks]
default-features = false
git = 'https://github.com/paritytech/substrate.git'
#tag = 'monthly-2021-10'
#tag = 'monthly-2022-04'
branch = "polkadot-v0.9.24"
version = '4.0.0-dev'
详见: cargo 与 git
设置昵称:添加第一个Pallet到Runtime
substrate node template提供了一个最小的可工作的运行时,但是为了保持精炼,它并不包括Frame中的大多数的Pallet
接下来接着使用前面的node template
tree -L 2 runtime                                                                                               ─╯
runtime
├── Cargo.toml
├── build.rs
└── src
    └── lib.rs

1 directory, 3 files
运行时 运行时 运行时 运行时 终端 用于检查和编译 终端 用于检查和编译 Polkadot-JS application 波卡前端 Polkadot-JS application 波卡前端 添加pallet-nicks ref substrate-node-template/runtime/Cargo.toml 添加pallet依赖pallet-nicks 添加pallet-nicks/std features cargo check ref substrate-node-template/runtime/src/lib.rs impl-实现新增pallet对应的功能 construct_runtime!宏添加新增pallet cargo check cargo build --release start the node 切换连接到本地测试网络 ref 其实pallet的源码都是单独一个 crate 测试新增pallet的 setName [package] name = "pallet-nicks" version = "4.0.0-dev" authors = ["Parity Technologies <admin@parity.io>"] edition = "2021" license = "Apache-2.0" homepage = "https://substrate.io" repository = "https://github.com/paritytech/substrate/" description = "FRAME pallet for nick management" readme = "README.md" 测试新增pallet的 nameof 测试新增pallet的 clear_name 测试新增pallet的 kill_name add pallet-nicks
此小节接着上节内容进行修改,主要是强化权限
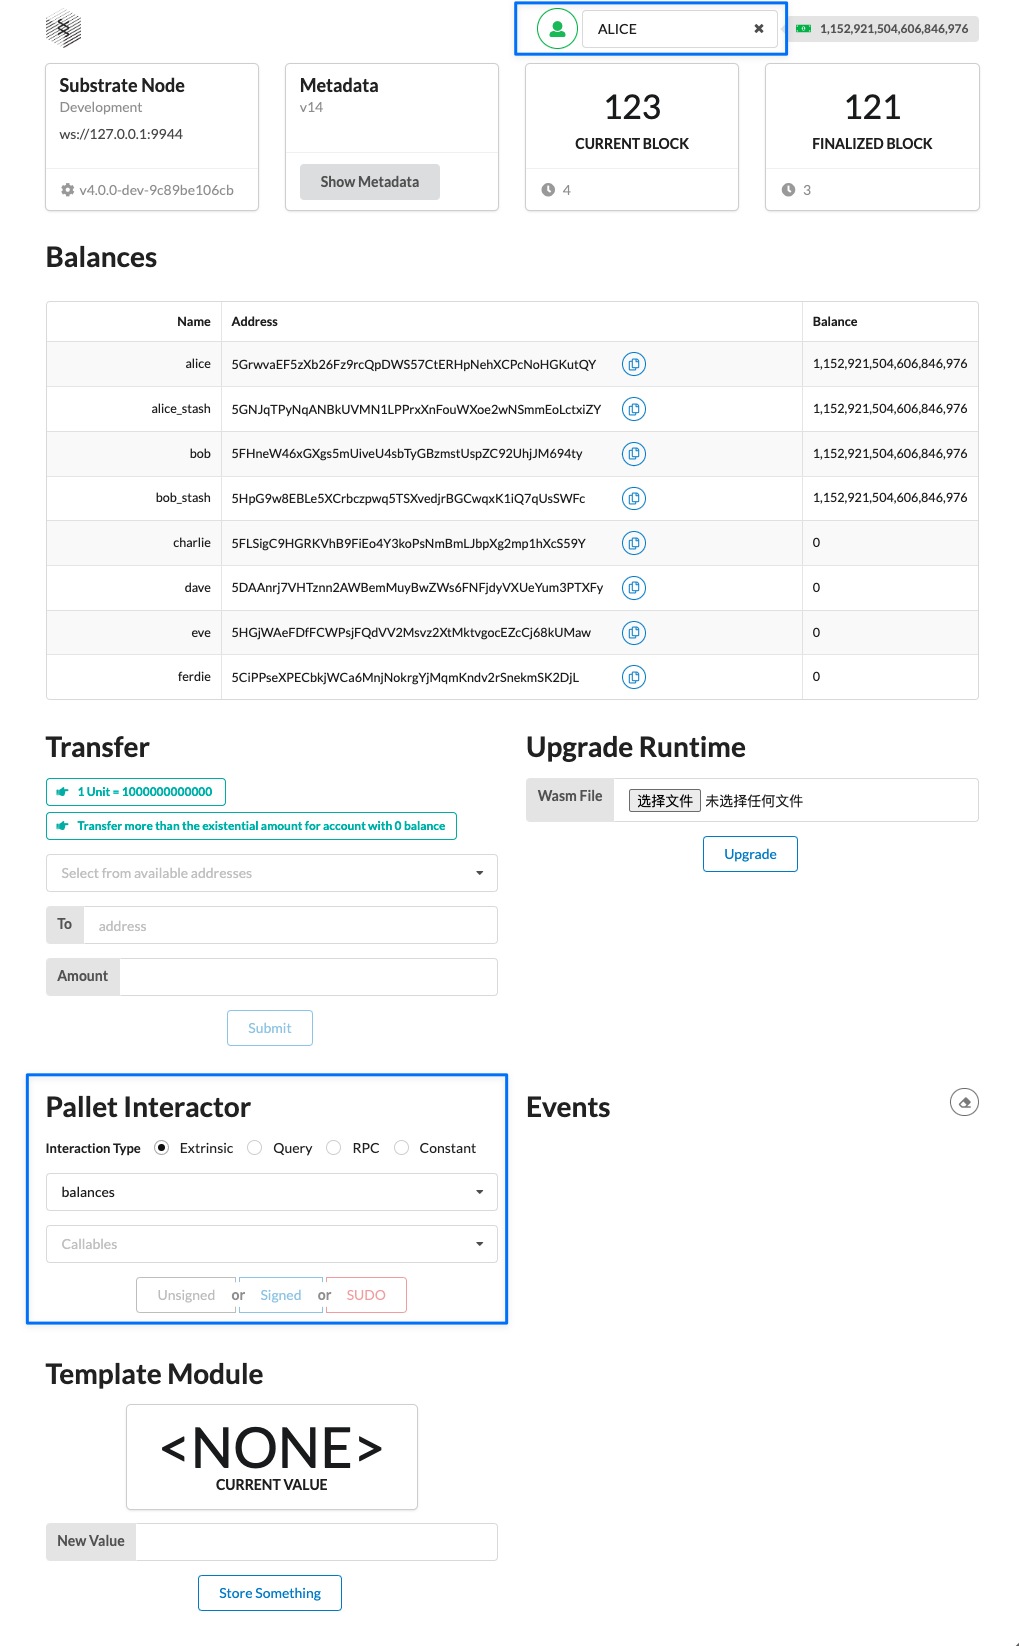
检查帐户选择列表以验证当前选择了 Alice 帐户。
在 Pallet Interactor 组件中,确认选择了 Extrinsic。
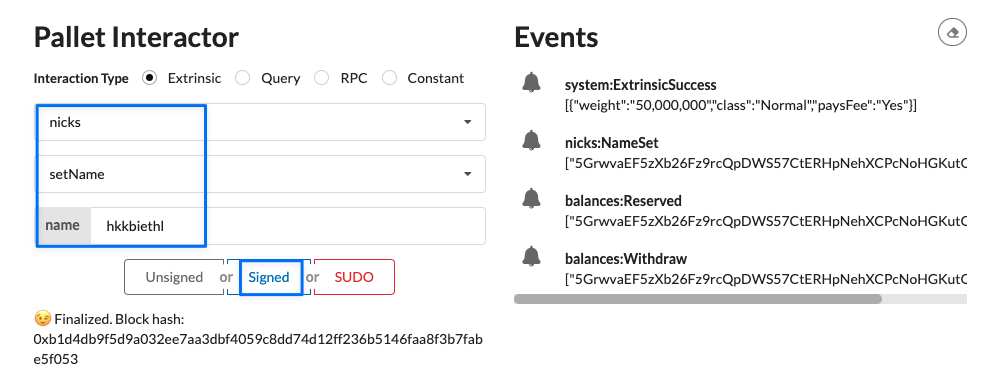
从可调用的托盘列表中选择nicks。
选择 settName 作为要从 nicks palette 调用的函数。
键入一个长于 MinNickLength(8 个字符)且不长于 MaxNickLength(32 个字符)的名称。
单击Signed以执行该功能。
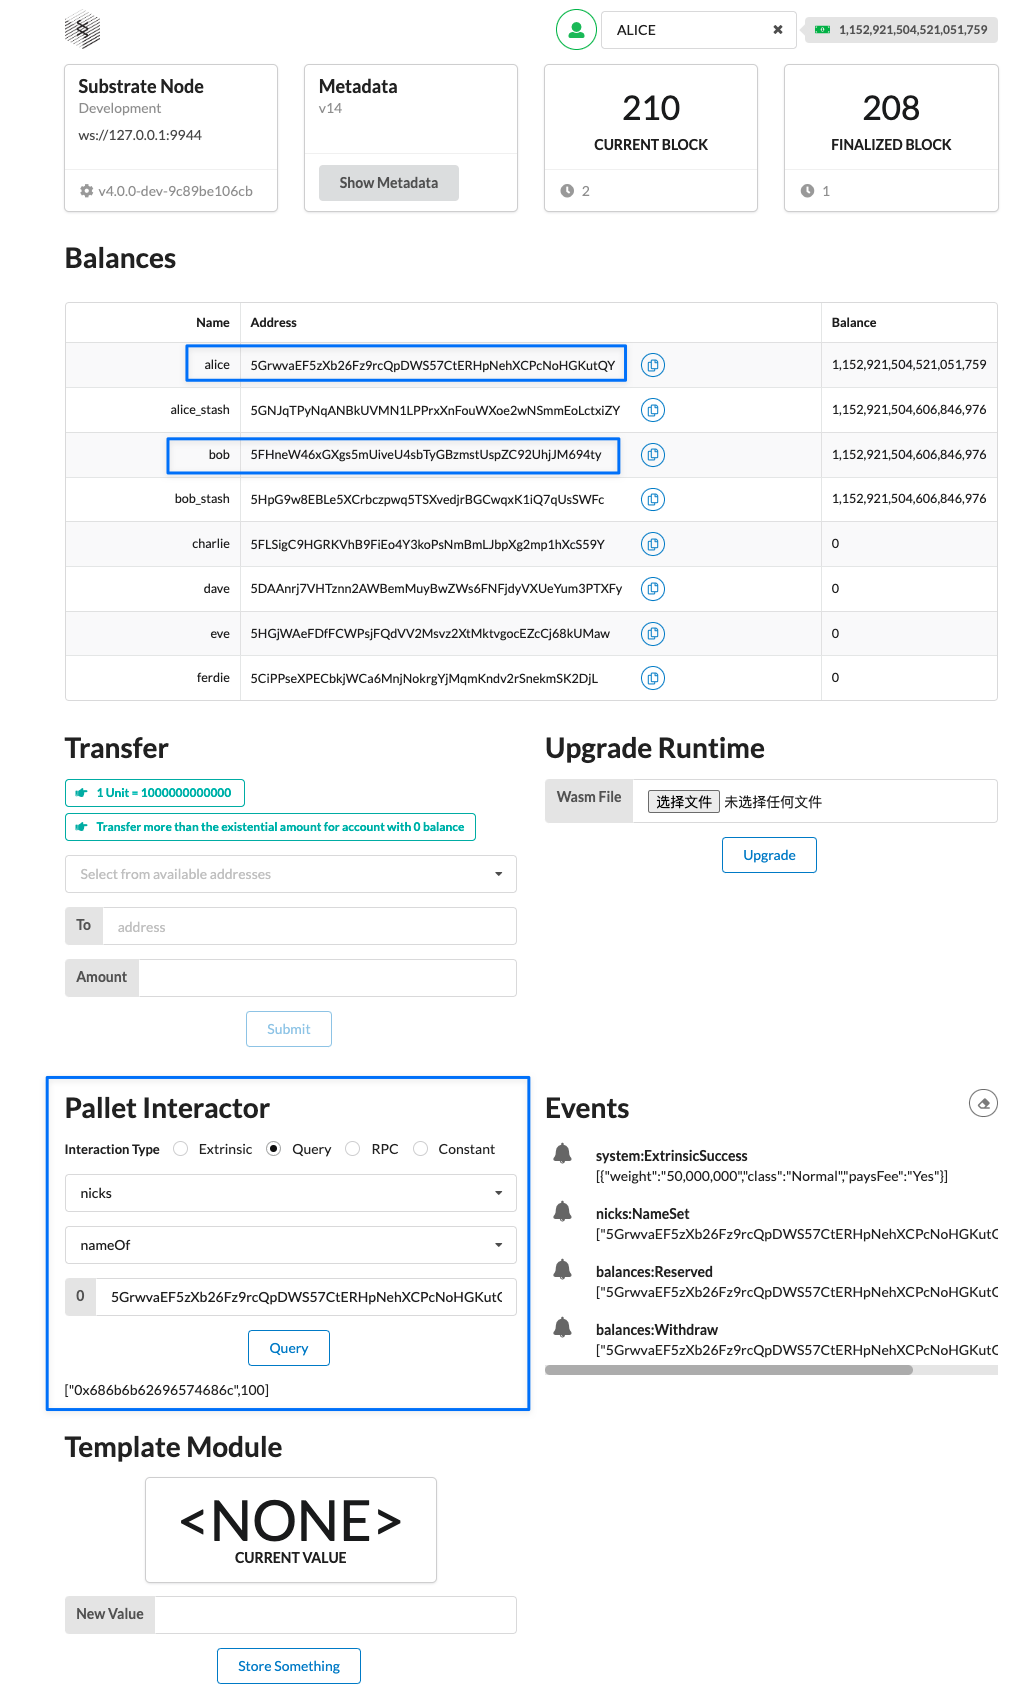
如果使用Bob的地址,会返回None,因为没有给他设置昵称。
返回顶部
指定调用源头unsigned, signed or sudo
前面已经介绍用Alice的地址来设置并查询nickname(setName),里面还有其他函数(killName、forceName、clearName)这里将会进行调用验证
点击Sudo按钮将会发出一个 Sudid 事件以通知节点参与者 Root 源发送了一个呼叫。 但是,内部调度会因 DispatchError 而失败(Sudo 按钮的 sudo 函数是“外部”调度)。
特别是,这是 DispatchError::Module 变体的一个实例,它会提供两个元数据:一个索引号和一个错误号。
索引号与产生错误的pallet有关;它对应于construct_runtime!中pallet的索引(位置)!。
错误编号与该托盘的错误枚举中相关变体的索引相对应。
使用这些数字查找托盘错误时,请记住索引是从零开始。
比如:
索引为 9(第十个托盘),对应nicks,
错误为 2(第三个错误),
对应substrate源码 中定义的第三个错误
#![allow(unused)]
fn main() {
/// Error for the nicks pallet.
#[pallet::error]
pub enum Error<T> {
    /// A name is too short.
    TooShort,
    /// A name is too long.
    TooLong,
    /// An account isn't named.
    Unnamed,
}
}
取决于您的construct_runtime中尼克斯托盘的位置!宏,您可能会看到不同的索引编号。不管 index 的值如何,你应该看到错误值是 2,它对应于 Nick 的 Pallet 的 Error 枚举的第三个变体,Unnamed
变体。这应该不足为奇,因为 Bob 尚未保留昵称,因此无法清除!
运行时 runtime 运行时 runtime 终端 用于检查和编译 终端 用于检查和编译 节点 node 节点 node Polkadot-JS application 波卡前端 Polkadot-JS application 波卡前端 添加pallet-contracts依赖 ref substrate-node-template/runtime/Cargo.toml 添加pallet依赖pallet-contracts 添加pallet依赖pallet-contracts-primitives std features: 添加上述两个pallet的std pallet-contracts/std pallet-contracts-primitives/std cargo check 实现配置trait ref substrate-node-template/runtime/src/lib.rs 更新pub use frame_support 引入 use pallet_contracts::DefaultContractAccessWeight; // Add this line 添加pallet-contracts用到的参数 /* After this block */ // Time is measured by number of blocks. pub const MINUTES: BlockNumber = 60_000 / (MILLISECS_PER_BLOCK as BlockNumber); pub const HOURS: BlockNumber = MINUTES * 60; pub const DAYS: BlockNumber = HOURS * 24; /* Add this block */ // Contracts price units. pub const MILLICENTS: Balance = 1_000_000_000; pub const CENTS: Balance = 1_000 * MILLICENTS; pub const DOLLARS: Balance = 100 * CENTS; const fn deposit(items: u32, bytes: u32) -> Balance { items as Balance * 15 * CENTS + (bytes as Balance) * 6 * CENTS } const AVERAGE_ON_INITIALIZE_RATIO: Perbill = Perbill::from_percent(10); / * End Added Block */ parameter_types!添加用到的参数类型 impl-实现新增pallet对应的功能 construct_runtime!宏添加新增pallet cargo check 对外暴露合约API ref substrate-node-template/runtime/Cargo.toml 添加依赖pallet-contracts-rpc-runtime-api 添加std feature ref substrate-node-template/runtime/src/lib.rs 添加常量 const CONTRACTS_DEBUG_OUTPUT: bool = true; 实现运行时api,impl_runtime_apis! / * Add this block */ impl pallet_contracts_rpc_runtime_api::ContractsApi<Block, AccountId, Balance, BlockNumber, Hash> for Runtime { fn call(...) -> pallet_contracts_primitives::ContractExecResult<Balance> {} fn instantiate(...) -> pallet_contracts_primitives::ContractInstantiateResult<AccountId, Balance> {} fn upload_code(...) -> pallet_contracts_primitives::CodeUploadResult<Hash, Balance> {} fn get_storage(...) -> pallet_contracts_primitives::GetStorageResult {} } cargo check 更新节点,添加对应RPC功能 ref substrate-node-template/node/Cargo.toml 更新依赖pallet-contracts\pallet-contracts-rpc ref substrate-node-template/node/src/rpc.rs 更新use node_template_runtime::{..., Hash, BlockNumber} 添加use use pallet_contracts_rpc::{Contracts, ContractsApiServer}; create_full函数中添加RPC扩展 cargo check -p node-template cargo build --release start the node 切换连接到本地测试网络 至此已经将合约pallet添加完成,要想进一步,还需要学习如何写合约 add pallet-contracts
返回顶部
pallet pallets/template/src pallet pallets/template/src lib.rs pallets/template/src/lib.rs lib.rs pallets/template/src/lib.rs Cargo.toml pallets/template/Cargo.toml Cargo.toml pallets/template/Cargo.toml 终端 用于检查和编译 终端 用于检查和编译 本地前端 不使用pkjs,因为要添加新的前端模块 本地前端 不使用pkjs,因为要添加新的前端模块 一、准备全新模版 移除其他文件 benchmarking.rs mock.rs tests.rs ref substrate-node-template/pallets/template/src/lib.rs 删除所有内容 添加std本地构建和wasm构建no_std所需要的宏 1. ![cfg_attr(not(feature = "std"), no_std)] 把一个lib所需的基本结构复制进去 // Re-export pallet items so that they can be accessed from the crate namespace. pub use pallet::*; /#[frame_support::pallet] pub mod pallet { use frame_support::pallet_prelude::*; use frame_system::pallet_prelude::*; use sp_std::vec::Vec; // Step 3.1 will include this in `Cargo.toml` #[pallet::config] // <-- Step 2. code block will replace this. #[pallet::event] // <-- Step 3. code block will replace this. #[pallet::error] // <-- Step 4. code block will replace this. #[pallet::pallet] #[pallet::generate_store(pub(super) trait Store)] pub struct Pallet<T>(_); #[pallet::storage] // <-- Step 5. code block will replace this. #[pallet::hooks] impl<T: Config> Hooks<BlockNumberFor<T>> for Pallet<T> {} #[pallet::call] // <-- Step 6. code block will replace this. } event config Replace the #[lib::config] /// Configure the pallet by specifying the parameters and types on which it depends. 1. [pallet::config] pub trait Config: frame_system::Config { /// Because this pallet emits events, it depends on the runtime's definition of an event. type Event: From<Event<Self>> + IsType<<Self as frame_system::Config>::Event>; } event impl 实现配置的事件 // Pallets use events to inform users when important changes are made. // Event documentation should end with an array that provides descriptive names for parameters. 1. [pallet::event] 2. [pallet::generate_deposit(pub(super) fn deposit_event)] pub enum Event<T: Config> { /// Event emitted when a proof has been claimed. [who, claim] ClaimCreated(T::AccountId, Vec<u8>), /// Event emitted when a claim is revoked by the owner. [who, claim] ClaimRevoked(T::AccountId, Vec<u8>), } 添加依赖 [dependencies.sp-std] default-features = false git = 'https://github.com/paritytech/substrate.git' branch = 'polkadot-v0.9.26' # Must *match* the rest of your Substrate deps! [features] default = ['std'] std = [ # snip ] error Replace the #[pallet::error] 1. [pallet::error] pub enum Error<T> { /// The proof has already been claimed. ProofAlreadyClaimed, /// The proof does not exist, so it cannot be revoked. NoSuchProof, /// The proof is claimed by another account, so caller can't revoke it. NotProofOwner, } storage Replace the #[pallet::storage] 1. [pallet::storage] pub(super) type Proofs<T: Config> = StorageMap<_, Blake2_128Concat, Vec<u8>, (T::AccountId, T::BlockNumber), ValueQuery>; call Replace the #[pallet::call] // Dispatchable functions allow users to interact with the pallet and invoke state changes. // These functions materialize as "extrinsics", which are often compared to transactions. // Dispatchable functions must be annotated with a weight and must return a DispatchResult. 1. [pallet::call] impl<T: Config> Pallet<T> { #[pallet::weight(1_000)] pub fn create_claim( origin: OriginFor<T>, proof: Vec<u8>, ) -> DispatchResult {...} #[pallet::weight(10_000)] pub fn revoke_claim( origin: OriginFor<T>, proof: Vec<u8>, ) -> DispatchResult {...} } cargo check cargo build start node add react component src/TemplateModule.js yarn start verify pallet function custom pallet
github发布
crates.io发布
这两个方法其实就是rust的crate常见发布方式。
返回顶部
终端 更新工具链, 下载安装 Substrate contract code 终端 更新工具链, 下载安装 Substrate contract code 智能合约项目 flipper/Cargo.toml 智能合约项目 flipper/Cargo.toml contracts-ui application 智能合约web app contracts-ui application 智能合约web app 更新工具链 rustup component add rust-src --toolchain nightly rustup target add wasm32-unknown-unknown --toolchain nightly cargo install cargo install contracts-node --git https://github.com/paritytech/substrate-contracts-node.git tag <latest-tag> force --locked 可以去这里查看标签号: substrate contract code 安装相关包 linux: sudo apt install binaryen mac: brew install binaryen cargo install dylint-link cargo install cargo-contract --force cargo contract --help 新建智能合约项目 cargo contract new flipper cd flipper/ ls -al -rwxr-xr-x 1 dev-doc staff 285 Mar 4 14:49 .gitignore -rwxr-xr-x 1 dev-doc staff 1023 Mar 4 14:49 Cargo.toml -rwxr-xr-x 1 dev-doc staff 2262 Mar 4 14:49 lib.rs 修改scale和scale-info scale = { package = "parity-scale-codec", version = "3", default-features = false, features = ["derive"] } scale-info = { version = "2", default-features = false, features = ["derive"], optional = true } Test the default contract cargo +nightly test Build the contract cargo +nightly contract build 此命令为 Flipper 项目构建: 1. 一个 WebAssembly 二进制文件 2. 一个包含合约应用程序二进制接口 (ABI) 的元数据文件 3. 一个用于部署合约的 .contract 文件。 target/ink 目录中的 metadata.json 文件描述了 你可以用来与这个合约交互的所有接口。 该文件包含几个重要部分: 1. 规范部分包括有关可以调用的函数(如构造函数和消息) 2. 发出的事件以及可以显示的任何文档的信息。 本节还包括一个选择器字段, 该字段包含函数名称的 4 字节散列, 用于将合约调用路由到正确的函数。 storage 部分定义了合约管理的所有存储项以及如何访问它们。 类型部分提供了整个 JSON 其余部分中使用的自定义数据类型。 Start the Substrate smart contracts node substrate-contracts-node --dev Select Local Node Deploy the contract Add New Contract & Upload New Contract Code Select an account, such as alice, and uplodat flipper.contract create an instance on the blockchain Try smart contract test the get() function test the flip() function
返回顶部
终端 更新工具链, 下载安装 Substrate contract code 终端 更新工具链, 下载安装 Substrate contract code lib.rs incrementer/lib.rs lib.rs incrementer/lib.rs Cargo.toml incrementer/Cargo.toml Cargo.toml incrementer/Cargo.toml contracts-ui application 智能合约web app contracts-ui application 智能合约web app create & cd cargo contract new incrementer cd incrementer/ update incrementer source code modify scale and scale-info scale = { package = "parity-scale-codec", version = "3", default-features = false, features = ["derive"] } scale-info = { version = "2", default-features = false, features = ["derive"], optional = true } test & build cargo +nightly test cargo +nightly contract build store simple values update #[ink(storage)] 1. [ink(storage)] pub struct MyContract { // Store a bool my_bool: bool, // Store a number my_number: u32, } supported types & parity scale codec // We are importing the default ink! types use ink_lang as ink; 1. [ink::contract] mod MyContract { // Our struct will use those default ink! types #[ink(storage)] pub struct MyContract { // Store some AccountId my_account: AccountId, // Store some Balance my_balance: Balance, } /* snip */ } add contructors use ink_lang as ink; 1. [ink::contract] mod mycontract { #[ink(storage)] pub struct MyContract { number: u32, } impl MyContract { /// Constructor that initializes the `u32` value to the given `init_value`. #[ink(constructor)] pub fn new(init_value: u32) -> Self { Self { number: init_value, } } /// Constructor that initializes the `u32` value to the `u32` default. /// /// Constructors can delegate to other constructors. #[ink(constructor)] pub fn default() -> Self { Self { number: Default::default(), } } /* snip */ } } update smart contract replace the Storage Declaration 1. [ink(storage)] pub struct Incrementer { value: i32, } modify the incrementer constructor impl Incrementer { #[ink(constructor)] pub fn new(init_value: i32) -> Self { Self { value: init_value, } } } add a second constructor 1. [ink(constructor)] pub fn default() -> Self { Self { value: 0, } } cargo +nightly test add a function to get a storage value use #[link(message)] to get message 1. [ink(message)] pub fn get(&self) -> i32 { self.value } } add test code fn default_works() { let contract = Incrementer::default(); assert_eq!(contract.get(), 0); } cargo +nightly test add a function to modify the storage value add inc function in #[ink(message)] 1. [ink(message)] pub fn inc(&mut self, by: i32) { self.value += by; } } add test code 1. [ink::test] fn it_works() { let mut contract = Incrementer::new(42); assert_eq!(contract.get(), 42); contract.inc(5); assert_eq!(contract.get(), 47); contract.inc(-50); assert_eq!(contract.get(), -3); } cargo +nightly test build wasm file cargo +nightly contract build deploy and test the smart contract substrate-contracts-node --dev add new contract Open the Contracts UI and verify that it is connected to the local node. Click Add New Contract. Click Upload New Contract Code. Select the incrementer.contract file, then click Next. Click Upload and Instantiate. Explore and interact with the smart contract using the Contracts UI.
返回顶部
lib.rs incrementer/lib.rs lib.rs incrementer/lib.rs 终端 更新工具链, 下载安装 Substrate contract code 终端 更新工具链, 下载安装 Substrate contract code initialize a mapping 1. ![cfg_attr(not(feature = "std"), no_std)] use ink_lang as ink; 2. [ink::contract] mod mycontract { use ink_storage::traits::SpreadAllocate; #[ink(storage)] #[derive(SpreadAllocate)] pub struct MyContract { // Store a mapping from AccountIds to a u32 map: ink_storage::Mapping<AccountId, u32>, } impl MyContract { #[ink(constructor)] pub fn new(count: u32) -> Self { // This call is required to correctly initialize the // Mapping of the contract. ink_lang::utils::initialize_contract(|contract: &mut Self| { let caller = Self::env().caller(); contract.map.insert(&caller, &count); }) } #[ink(constructor)] pub fn default() -> Self { ink_lang::utils::initialize_contract(|_| {}) } // Get the number associated with the caller's AccountId, if it exists #[ink(message)] pub fn get(&self) -> u32 { let caller = Self::env().caller(); self.map.get(&caller).unwrap_or_default() } } } identifying the contract caller using the contract caller 1. ![cfg_attr(not(feature = "std"), no_std)] use ink_lang as ink; 2. [ink::contract] mod mycontract { #[ink(storage)] pub struct MyContract { // Store a contract owner owner: AccountId, } impl MyContract { #[ink(constructor)] pub fn new() -> Self { Self { owner: Self::env().caller(); } } /* snip */ } } add mapping to the smart contract import 1. [ink::contract mod incrementer { use ink_storage::traits::SpreadAllocate; #[ink(storage)] #[derive(SpreadAllocate)] add mapping key pub struct Incrementer { value: i32, my_value: ink_storage::Mapping<AccountId, i32>, } set an initial value in the new function 1. [ink(constructor)] pub fn new(init_value: i32) -> Self { ink_lang::utils::initialize_contract(|contract: &mut Self| { contract.value = init_value; let caller = Self::env().caller(); contract.my_value.insert(&caller, &0); }) } set an initial value in the default function 1. [ink(constructor)] pub fn default() -> Self { ink_lang::utils::initialize_contract(|contract: &mut Self| { contract.value = Default::default(); }) } add get function 1. [ink(message)] pub fn get_mine(&self) -> i32 { self.my_value.get(&self.env().caller()).unwrap_or_default() } add test code 1. [ink::test] fn my_value_works() { let contract = Incrementer::new(11); assert_eq!(contract.get(), 11); assert_eq!(contract.get_mine(), 0); } cargo +nightly test insert, update, or remove values add insert function 1. [ink(message)] pub fn inc_mine(&mut self, by: i32) { let caller = self.env().caller(); let my_value = self.get_mine(); self.my_value.insert(caller, &(my_value + by)); } add test code for insert function 1. [ink::test] fn inc_mine_works() { let mut contract = Incrementer::new(11); assert_eq!(contract.get_mine(), 0); contract.inc_mine(5); assert_eq!(contract.get_mine(), 5); contract.inc_mine(5); assert_eq!(contract.get_mine(), 10); } add remove function 1. [ink(message)] pub fn remove_mine(&self) { self.my_value.remove(&self.env().caller()) } add test code for remove function 1. [ink::test] fn remove_mine_works() { let mut contract = Incrementer::new(11); assert_eq!(contract.get_mine(), 0); contract.inc_mine(5); assert_eq!(contract.get_mine(), 5); contract.remove_mine(); assert_eq!(contract.get_mine(), 0); } cargo +nightly test
返回顶部
lib.rs erc20/lib.rs lib.rs erc20/lib.rs Cargo.toml erc20/Cargo.toml Cargo.toml erc20/Cargo.toml 终端 更新工具链, 下载安装 Substrate contract code 终端 更新工具链, 下载安装 Substrate contract code contracts-ui application 智能合约web app contracts-ui application 智能合约web app build an ERC-20 token smart contract create & cd cargo contract new new erc20 code cd erc20/ replace the default src with new modify [dependencies] scale = { package = "parity-scale-codec", version = "3", default-features = false, features = ["derive"] } scale-info = { version = "2", default-features = false, features = ["derive"], optional = true } cargo +nightly test cargo +nightly contract build Upload an instantiate the contract connect & upload contract file and sequence operations Transfer tokens add Error declaration /// Specify ERC-20 error type. 1. [derive(Debug, PartialEq, Eq, scale::Encode, scale::Decode)] 2. [cfg_attr(feature = "std", derive(scale_info::TypeInfo))] pub enum Error { /// Return if the balance cannot fulfill a request. InsufficientBalance, } add an Result return type /// Specify the ERC-20 result type. pub type Result<T> = core::result::Result<T, Error>; add the transfer() 1. [ink(message)] pub fn transfer(&mut self, to: AccountId, value: Balance) -> Result<()> { let from = self.env().caller(); self.transfer_from_to(&from, &to, value) } add transfer_from_to() fn transfer_from_to( &mut self, from: &AccountId, to: &AccountId, value: Balance, ) -> Result<()> { let from_balance = self.balance_of_impl(from); if from_balance < value { return Err(Error::InsufficientBalance) } self.balances.insert(from, &(from_balance - value)); let to_balance = self.balance_of_impl(to); self.balances.insert(to, &(to_balance + value)); Ok(()) } add balance_of_impl 1. [inline] fn balance_of_impl(&self, owner: &AccountId) -> Balance { self.balances.get(owner).unwrap_or_default() } cargo + nightly test create events add a transfer event 1. [ink(event)] pub struct Transfer { #[ink(topic)] from: Option<AccountId>, #[ink(topic)] to: Option<AccountId>, value: Balance, } emit the event in new function fn new_init(&mut self, initial_supply: Balance) { let caller = Self::env().caller(); self.balances.insert(&caller, &initial_supply); self.total_supply = initial_supply; Self::env().emit_event(Transfer { from: None, to: Some(caller), value: initial_supply, }); } emit the eventh in transfer_from_to function self.balances.insert(from, &(from_balance - value)); let to_balance = self.balance_of_impl(to); self.balances.insert(to, &(to_balance + value)); self.env().emit_event(Transfer { from: Some(*from), to: Some(*to), value, }); add test code for transfers tokens 1. [ink::test] fn transfer_works() { let mut erc20 = Erc20::new(100); assert_eq!(erc20.balance_of(AccountId::from([0x0; 32])), 0); assert_eq!(erc20.transfer((AccountId::from([0x0; 32])), 10), Ok(())); assert_eq!(erc20.balance_of(AccountId::from([0x0; 32])), 10); } cargo +nightly test enable third-party transfers declare the approval event 1. [ink(event)] pub struct Approval { #[ink(topic)] owner: AccountId, #[ink(topic)] spender: AccountId, value: Balance, } add an Error declaration 1. [derive(Debug, PartialEq, Eq, scale::Encode, scale::Decode)] 2. [cfg_attr(feature = "std", derive(scale_info::TypeInfo))] pub enum Error { InsufficientBalance, InsufficientAllowance, } add the storage mapping allowances: Mapping<(AccountId, AccountId), Balance>, add the approve() 1. [ink(message)] pub fn approve(&mut self, spender: AccountId, value: Balance) -> Result<()> { let owner = self.env().caller(); self.allowances.insert((&owner, &spender), &value); self.env().emit_event(Approval { owner, spender, value, }); Ok(()) } add the allowance() 1. [ink(message)] pub fn allowance(&self, owner: AccountId, spender: AccountId) -> Balance { self.allowance_impl(&owner, &spender) } add the allowance_impl() 1. [inline] fn allowance_impl(&self, owner: &AccountId, spender: &AccountId) -> Balance { self.allowances.get((owner, spender)).unwrap_or_default() } add test for the allowance() 1. [ink::test] fn allowances_works() { let mut contract = Erc20::new(100); assert_eq!(contract.balance_of(AccountId::from([0x1; 32])), 100); contract.approve(AccountId::from([0x1; 32]), 200); assert_eq!(contract.allowance(AccountId::from([0x1; 32]), AccountId::from([0x1; 32])), 200); contract.transfer_from(AccountId::from([0x1; 32]), AccountId::from([0x0; 32]), 50); assert_eq!(contract.balance_of(AccountId::from([0x0; 32])), 50); assert_eq!(contract.allowance(AccountId::from([0x1; 32]), AccountId::from([0x1; 32])), 150); contract.transfer_from(AccountId::from([0x1; 32]), AccountId::from([0x0; 32]), 100); assert_eq!(contract.balance_of(AccountId::from([0x0; 32])), 50); assert_eq!(contract.allowance(AccountId::from([0x1; 32]), AccountId::from([0x1; 32])), 150); } add the transfer_from() /// Transfers tokens on the behalf of the `from` account to the `to account 1. [ink(message)] pub fn transfer_from( &mut self, from: AccountId, to: AccountId, value: Balance, ) -> Result<()> { let caller = self.env().caller(); let allowance = self.allowance_impl(&from, &caller); if allowance < value { return Err(Error::InsufficientAllowance) } self.transfer_from_to(&from, &to, value)?; self.allowances .insert((&from, &caller), &(allowance - value)); Ok(()) } } add test code for the transfer_from() 1. [ink::test] fn transfer_from_works() { let mut contract = Erc20::new(100); assert_eq!(contract.balance_of(AccountId::from([0x1; 32])), 100); contract.approve(AccountId::from([0x1; 32]), 20); contract.transfer_from(AccountId::from([0x1; 32]), AccountId::from([0x0; 32]), 10); assert_eq!(contract.balance_of(AccountId::from([0x0; 32])), 10); } cargo +nightly test cargo +nightly contract build
返回顶部
返回顶部
您必须使用本教程中规定的确切版本。
平行链与它们连接的中继链代码库紧密耦合,因为它们共享许多共同的依赖关系。
在处理整个 Substrate 文档中的任何示例时,请务必将相应版本的 Polkadot
与任何其他软件一起使用。您必须与中继链升级保持同步,您的平行链才能继续成
功运行。如果你不跟上中继链升级,你的网络很可能会停止生产区块。
终端 终端 链规范文件 Plain/Raw rococo-local relay chain spec 链规范文件 Plain/Raw rococo-local relay chain spec Build the relay chain node git clone & compile 1. Clone the Polkadot Repository, with correct version git clone depth 1 branch release-v0.9.26 https://github.com/paritytech/polkadot.git 2. Switch into the Polkadot directory cd polkadot 3. Build the relay chain Node 4. Compiling the node can take 15 to 60 minuets to complete. cargo b -r 5. Check if the help page prints to ensure the node is built correctly ./target/release/polkadot --help 准备链规范文件 Plain rococo-local relay chain spec Raw rococo-local relay chain spec 注意:文件比较大,直接复制比较麻烦。 可以git clone到本地后复制过来 start the alice validator start the bob validator
返回顶部
终端 终端 链规范文件 Plain/Raw rococo-local relay chain spec 链规范文件 Plain/Raw rococo-local relay chain spec Polkadot-JS application 波卡前端 Polkadot-JS application 波卡前端 Polkadot-JS application 2 波卡前端2, 验证平行链的实际使用 Polkadot-JS application 2 波卡前端2, 验证平行链的实际使用 build the parachain template clone & build 1. Clone the parachain template with the correct Polkadot version git clone --depth 1 --branch polkadot-v0.9.26 https://github.com/substrate-developer-hub/substrate-parachain-template 2. Switch into the parachain template directory cd substrate-parachain-template 3. Build the parachain template collator 4. Compiling the node can take 15 to 60 minuets cargo b -r reserve a paraID generate a plain spec 1. Assumes that `rococo-local` is in `node/chan_spec.rs` as the relay you registered with ./target/release/parachain-collator build-spec --disable-default-bootnode > rococo-local-parachain-plain.json set the correct reserved ParaID // snip "para_id": 2000, // <--- your already registered ID // snip "parachainInfo": { "parachainId": 2000 // <--- your already registered ID }, // snip generate a raw chain spec ./target/release/parachain-collator build-spec --chain rococo-local-parachain-plain.json --raw --disable-default-bootnode > rococo-local-parachain-2000-raw.json Save and distribute your raw spec Obtain Wasm runtime validation function ./target/release/parachain-collator export-genesis-wasm --chain rococo-local-parachain-2000-raw.json > para-2000-wasm convert the solo chain to a parachain 此运行时和状态仅适用于平行链的创世块。您不能将具有任何先前状态的平行链连接到中继链。 所有平行链必须从中继链上的区块 0 开始。之后可能推出迁移基于 Substrate 构建的单链 的区块历史,但短期内不会计划此功能。 generate a parachain genesis state ./target/release/parachain-collator export-genesis-state --chain rococo-local-parachain-2000-raw.json > para-2000-genesis start a collator node ./target/release/parachain-collator --alice --collator --force-authoring --chain rococo-local-parachain-2000-raw.json --base-path /tmp/parachain/alice --port 40333 --ws-port 8844 --execution wasm --chain <relay chain raw chain spec> --port 30343 --ws-port 9977 关于这个命令,首先要注意的是: 在单独的 -- 之前传递了几个参数,在它之后传递了更多参数。 平行链collator包含实际的收集人节点以及嵌入式中继链节点。 1. -- 之前的参数是针对整理者的, 2. -- 之后的参数是针对嵌入式中继链节点的。 如果为第二条平行链再次执行这些指令,请记住更改collator-specific的值。 必须使用相同的中继链规范文件,但要绑定到的第二个平行链收集器. 使用不同的 ParaID、基本路径和端口号。 目前没有嵌入中继链节点的平行链节点无法运行,但预计最后也会实现非收集节点。 执行命令后应该看到收集人节点作为独立节点运行,并且其中继节点作为对等节点 与已经运行的中继链验证节点连接。 请注意,如果没有看到嵌入式中继链与本地中继链节点对等,请尝试禁用防火墙或 添加带有中继节点地址的 bootnodes 参数。 此时还没有开始授权平行链区块。当收集人实际在中继链上注册时,才会开始。 Parachain Registration 有几种方法可以将平行链注册到中继链。 1. 对于测试,使用 sudo 是最常见的。 我们已经启动了中继链,并且我们的平行链整理器已经准备就绪。 现在我们必须在中继链上注册平行链。在生产网络中,这通常通过 平行链拍卖(parachain auctions)来完成。但是对于本教程, 我们将使用 sudo 调用来完成。 2. 注册交易 交易可以通过 Polkadot-JS Apps UI 在中继链节点上提交。 有多种选择可以解决这个问题,我们可以选择以下任何一种。请注意, 此处的所有选项都取决于保留的 paraID - 因此请务必先执行此操作。 Registration Transaction alt [option1] paraSudoWrapper.sudoScheduleParaInitialize 此选项完全绕过插槽租赁机制,从下一个中继链会话开始为保留的 paraID 加入平行链或平行线程。这是进行测试的最简单和最快的方法。 但请注意,平行链将这些注册平行链所需的文件包含在链规范中设置的详细信息, 这些详细信息必须明确针对正确的中继链并使用正确的 ParaID. 在这种情况下,是 rococo(而不是本教程中使用的 rococo-local) . [option2] slots.forceLease 这是生产中使用的更正式的注册流程(除了使用 sudo 强制槽租用): 使用保留它的同一帐户注册您的保留 paraID, 或者使用 sudo 和 registrar.forceRegister 交易操作,如果你希望。 block production The collator should start producing parachain blocks (aka collating) once the registration is successful and the next relay chain epoch begin! see block finalization 中继链跟踪每个平行链的最新块(头部)。 当一个中继链区块最终确定时,每个已完成验证过程的平行链区块也将最终确定。 这就是 Polkadot 为其平行链实现池化、共享安全性的方式! Connecting with the Apps UI 我们已经将 Apps UI 连接到中继链节点。现在我们还可以连接到平行链收集器。 在新的浏览器窗口中打开另一个应用程序 UI 实例,并将其连接到适当的端点。 如果您到目前为止已经按照本教程进行操作,则可以连接到平行链节点 Submit extrinsics 您可以进行一些简单的代币转账,以确保平行链正常运行。 您还可以通过转到外部页面,选择系统托盘并注释外部来进行一些链上注释。 如果交易按预期进行,你就有了一个有效的平行链。 链条清洗 1. Purge the collator(s) ./target/release/parachain-collator purge-chain --base-path <your collator DB path set above> 2. Purge the validator(s) polkadot purge-chain --base-path <your relay chain DB path set above> 收集者节点是平行链区块链数据的唯一归宿, 因为整个平行链网络上只有一个节点。 中继链仅存储平行链标头信息。 如果平行链数据丢失,您将无法恢复该链。 但是,在测试中,您可能需要从头开始。
返回顶部
user user Polkadot-JS Rococo app 波卡洛可可前端 Polkadot-JS Rococo app 波卡洛可可前端 浏览器 浏览器做其他申请操作 浏览器 浏览器做其他申请操作 终端 用于检查和编译 终端 用于检查和编译 Set up a wallet connect & have an account backup & make note Back up your secret seed phrase. Make note of your accountID that is using the default 42 SS58 prefix for use with Rococo. acquire ROC in Rococo faucet matrix channel Acquire a ParaID Network >> Parathreads Reserve a unique ParaID Make note of this 请注意,在 Rococo 上, ParaID 编号 0-999 保留给 系统平行链 , 而 1000-1999 保留给 公用工具平行链 . 只有尚未保留的 2000 及以上数字才能用于社区平行链。 generate file & start generate parachain genesis and wasm files 注册平行链所需的文件必须明确指定 正确的中继链和正确的 ParaID。 在本教程中,中继链是 rococo, 而不是 Connect a local parachain 教程中使用的 rococo-local。 配置您的链规范以使用: 1. 你的Rococo ParaID。 2. 您的整理者节点的开发密钥和帐户的独特替代方案。 虽然 Alice 和此类帐户可以使用,但您绝对不应该使用它们! 3. 为洛可可生成适当的平行链创世状态。 4. 为 Rococo 生成平行链运行时 Wasm blob。 start your collator 对于嵌入式中继链和平行链,您必须拥有可公开访问 和发现的整理者对等端口。这样你就可以与洛可可验证 节点对等,否则你将无法产生区块! 对等端口使用 port <collator node> --port <relay node>这两个 CLI 标志设置, 请务必分别对两个节点执行此操作 您很可能至少希望您的collator的 --ws-port <ws port> 端口也打开,以允许您自己(和其他人)通过 Polkadot 应用程序 UI 或 API 调用与其连接。 register and request Register as a parathread 申请开通你的平行链插槽 永久插槽是分配给当前在 Polkadot 上拥有平行链插槽的团队 (在成功的插槽租赁拍卖之后)的平行链插槽,因此需要不断测 试他们的代码库以与现实世界中的最新前沿功能兼容(洛可可)。 只有有限数量的永久插槽可用 临时插槽是平行链插槽,以连续的循环方式动态分配。 在每个租期开始时,一定数量的平行线程(最多为中继 链配置中定义的最大值)会在一定时间内自动升级为平 行链。在租约结束期间处于活动状态的平行链会自动降 级为平行线程,以释放插槽供其他人在后续期间使用。 临时插槽旨在供尚未在 Polkadot 上拥有平行链插 槽的团队使用,并计划在不久的将来使用。 在平行链作为平行线程激活后,相关项目团队应在 Rococo 上 打开永久或临时平行链插槽的请求 。 Rococo 运行时需要 sudo 访问权限来分配槽 (AssignSlotOrigin = EnsureRoot<Self::AccountId>;)。 Rococo sudo 密钥目前由 Parity Technologies 控制, 因此要进行获取插槽所需的操作,请在完成上述操作并准备好 连接后转到 Subport repo 并打开 Rococo Slot Request! 激活您的插槽后,Parity 团队成员将做出回应。 最终,该过程旨在通过洛可可式治理框架由社区驱动。 assign a temporary slot 1. Open Polkadot-JS Apps for Rococo. 2. Click Developer > Extrinsics. 3. Select the account you want to use to submit the transaction. 4. Select the assignedSlots pallet . 5. Choose the assignTempParachainSlot function. 6. Insert your reserved ParaID. Make sure you use the ParaID you previously reserved. 7. Select Current for the LeasePeriodStart. If the current slot is full, you will be assigned the next available slot. 8. Sign and submit the transaction. 给定 1 天的租期,洛可可分配的平行链插槽的当前设置是(在撰写本文时): 1. 永久插槽最短持续时间:1 年(365 天) 2. 临时时段最短持续时间:3 天 3. 永久插槽的最大数量:最多 25 个永久插槽 4. 最大临时槽数:最多 20 个临时槽 5. 每个租期分配的最大临时时段:每 3 天临时租期最多 5 个临时时段 Congratulations! Parity 团队激活您的插槽后,您可以在 Rococo 测试网络上测试您的平行链。 请注意,当您的临时插槽租约结束时,平行链会自动降级为平行线程。 注册和批准的插槽以循环方式自动循环,因此您可以不时作为平行链重新上线。
返回顶部
Truffle - Truffle Suite
Remix - Ethereum IDE
终端 终端 Polkadot-JS application 波卡前端 Polkadot-JS application 波卡前端 本节背景 本教程说明了如何使用 Frontier 项目中的 crate 来构建与以太坊兼容的区块链, 该区块链可以访问基于以太坊的账户并执行基于 Solidity 的智能合约。 Frontier 项目的两个主要目标是使您能够执行以下操作: 1. 使用本地 Substrate 节点运行未经修改的以太坊去中心化应用程序(Dapp)。 2. 从以太坊主网络导入状态。 本教程使用预定义的节点模板来提供工作环境。 该模板是使用 Frontier发布指南 中的说明生成的。 如果你想为自己生成一个独立的模板,你可以使用 node-template-release.sh 模板 生成脚本。 如果您使用 frontier 分支 或模板生成脚本构建自己的节点,请注意 Frontier 使用其自己的 Substrate crates 版本,您可能需要更新 Cargo 文件中的依赖项以匹配项目中的依赖项。 chain specification file frontier-node-template 中的开发链规范定义了一个创世区块, 该创世区块已预先配置了 alice 账户的 EVM 账户。 当您在开发模式下启动此节点时,alice 的 EVM 帐户将默认分配一定数量的eth。 您将使用此帐户查看 EVM 帐户详细信息并调用以太坊智能合约。 启动节点后,您将能够使用 Polkadot-JS 应用程序查看 alice 的 EVM 帐户的详细信息。 terminal -> terminal: clone -> compile -> start note left git clone https://github.com/substrate-developer-hub/frontier-node-template.git cd frontier-node-template cargo build --release ./target/release/frontier-template-node --dev connect local node Settings >> Developer >> Define to create an EVM Account { "Address": "MultiAddress", "LookupSource": "MultiAddress", "Account": { "nonce": "U256", "balance": "U256" }, "Transaction": { "nonce": "U256", "action": "String", "gas_price": "u64", "gas_limit": "u64", "value": "U256", "input": "Vec<u8>", "signature": "Signature" }, "Signature": { "v": "u64", "r": "H256", "s": "H256" } } Developer >> RPC calls 1. Verify that your node is still running and the Polkadot-JS application is connected to the node. 2. Click Developer, then select RPC calls. 3. On the Submission tab, select eth as the endpoint to call. 4. Select getBalance(address, number) from the list of functions to call. 5. Specify the EVM account identifier for the alice account for the address. The predefined account address is: - 0xd43593c715fdd31c61141abd04a99fd6822c8558. The address for the account was calculated fromthe public key for the alice account using Substrate EVM utilities. 6. Click Submit RPC call. deploy a smart contract 现在您已经了解了如何查询以太坊地址的余额, 您可能想探索如何部署和调用以太坊智能合约并测试相关功能。 本教程使用定义 ERC-20 代币的 Truffle 示例合约。 您还可以使用 Polkadot JS SDK 和 Typescript 创建 ERC-20 代币合约。 create the ERC-20 contract Developer >> Extrinsics >> ALICE >> evm >> create >> Configure >> Submit Transaction >> Sign and Submit source 0xd43593c715fdd31c61141abd04a99fd6822c8558 init raw bytecode hex value from MyToken.json value 0 gasLimit 4294967295 maxFeePerGas 100000000 view the smart contract、view -> transfer -> verify Network >> Explorer >> evm.Created event Developer >> Extrinsics >> ALICE >> evm >> call transfer(address, uint256) source target input value gasLimit maxFeePerGas Network >> Explorer >> evm.Excuted
添加一个pallet到runtime
substrate node template提供了一个最小的可工作的运行时,但是为了保持精炼,它并不包括Frame中的大多数的Pallet。本节我们将学习如何将Pallet添加到runtime中。
安装Node Template
导入Pallet
配置Pallet
将Nicks添加到construct_runtime!中
深入ink!智能合约
学习智能合约的开发,主要包括:
ink!智能合约的结构;
存储单个的值和hash map;
安全的设置或获取这些值;
编写public和private函数;
配置Rust使用安全的数学库。
总的来说,写ink!合约和直接用Rust编码没有太大的区别,只要能使用Rust都能很快的编写合约。
ERC20合约开发
学习写一个ERC20合约,主要包括:
初始token设置;
支持transfer;
通过substrate触发事件。
学习启动一个relay chain, 通过cumus来创建自己的parachain,并且在在本地测试网络中将parachain连接到relaychain。
连接parachain
上一节,我们启动了relaychain的节点,本节将连接parachain到relaychain节点。 主要包括以下内容:
启动parachain;
parachain注册;
和parachain交互;
连接到添加的parachain节点。
第一种情况相对来说比较简单,这个也比较好找到例子。
第二种情况则比较复杂,写起来也比较麻烦。
不过在我们的开发中,大部分都是第一种情况。
