编程解剖 in rust
以rust为例分享学习编程常考虑的方方面面
本地运行
cargo install mdbook
mdbook serve
git lfs配置
git lfs install
git lfs track '*.img'
项目基础结构
{{#check
- 每个文件夹下的同名md文件介绍当前文件夹的内容
- 关于待完成内容:主要基于mdbook-checklist插件
- [待完成](checklist.md)
- 添加待完成锚点的格式
check空格之后的内容不能有空格, 且只能为英文 “ | “之后的内容可以有空格,可以为中文
<a id="Note-1"></a>Note-1
- checklist页面渲染效果:
- <SUMMARY对应标题名>
    - [This is an important note](Note-1)
这种写法会自动在本地生成md文件:src/checklist.md, 但是不用管它,最后渲染还是以mdbook-checklist的内容为准
用到的工具
mdbook-checklist: 整理待办事项
ANSSI-FR/mdbook-checklist: mdbook preprocessor for generating checklists and indexes
cargo install mdbook-checklist
mdbook-checklist - crates.io: Rust Package Registry
mdbook-pagetoc: 添加业内目录
JorelAli/mdBook-pagetoc: A page table of contents for mdBook
mdbook-admonish: 使用新的css文件
相关资源
- tommilligan/mdbook-admonish: A preprocessor for mdbook to add Material Design admonishments.
- mdbook-admonish - crates.io: Rust Package Registry
- Overview - The mdbook-admonish book
- Admonitions - Material for MkDocs
All supported directives are listed below.
特别语法
自定义标题
内嵌代码
自定义样式
可折叠
常用格式
note
Rust is a multi-paradigm, general-purpose programming language designed for performance and safety, especially safe concurrency.
abstract, summary, tldr
Rust is a multi-paradigm, general-purpose programming language designed for performance and safety, especially safe concurrency.
info, todo
Rust is a multi-paradigm, general-purpose programming language designed for performance and safety, especially safe concurrency.
tip, hint, important
Rust is a multi-paradigm, general-purpose programming language designed for performance and safety, especially safe concurrency.
success, check, done
Rust is a multi-paradigm, general-purpose programming language designed for performance and safety, especially safe concurrency.
question, help, faq
Rust is a multi-paradigm, general-purpose programming language designed for performance and safety, especially safe concurrency.
warning, caution, attention
Rust is a multi-paradigm, general-purpose programming language designed for performance and safety, especially safe concurrency.
failure, fail, missing
Rust is a multi-paradigm, general-purpose programming language designed for performance and safety, especially safe concurrency.
danger, error
Rust is a multi-paradigm, general-purpose programming language designed for performance and safety, especially safe concurrency.
bug
Rust is a multi-paradigm, general-purpose programming language designed for performance and safety, especially safe concurrency.
example
Rust is a multi-paradigm, general-purpose programming language designed for performance and safety, especially safe concurrency.
quote, cite
Rust is a multi-paradigm, general-purpose programming language designed for performance and safety, especially safe concurrency.
github action
- rust-cargo-install · Actions · GitHub Marketplace
- ekalinin/github-markdown-toc: Easy TOC creation for GitHub README.md
- 设置token:Personal access tokens
- 给指定repository设置secret:repository -> settings -> secrets -> Actions
- 新建一个名为GH_MD_TOC的repository secret,将第一步的token设置进去
- 将这个secret设置为action环境变量
待完成
Substrate介绍与源码解读
Gavin Wook、Polkadot and Substrate
Gavin Wook与波卡跨链
所以对于开发人员来说,比起大家耳熟能详的v神(Vitalik Buterin),更重要的人是实际上撑起整个以太坊世界的灵魂人物Gavin Wood。更何况很多山寨币实际上就是在以太坊的模型上修修改改,所以在我看来Gavin Wood是撑起了当前半个区块链世界的人。
而Gavin Wood 离开了以太坊之后,开启的一个新项目叫做Polkadot(波卡),这个项目的目的就是跨链,为了把各个割裂的区块链孤岛能够联系一起 。虽然目前有很多的项目都号称自己在做跨链,但是目前在我看来唯一在推进,逻辑上是可推理,之后可能成功的跨链项目就只有波卡能够成功。(后半段可能存在一定误导性,Polkadot的跨链可能在大部分人理解下应该是分片的变种,也就是基于Substrate开发的区块链可以部署到Polkadot上,经过Polkadot平台互相沟通)。
从波卡到Substrate
而Gavin Wood 在开发的波卡的过程中,经过不断地思考,认为其实区块链发展这几年,大家做的很多事情都是相同的。
那么在以往的软件开发中,当大家发现大家都在做相同的事情的时候,就会将这件事情进行抽象,然后造“轮子”,将这些高层次的东西做封装,成为“开发框架”,将背后复杂的基础设施都封装起来,而使用这个“框架”的开发人员,就可以更加专注于自己的业务逻辑,而不必花费大量的精力去造“轮子”去完成那些每个链都要做的事情。
Gavin Wood 在开发波卡的中途先暂停了波卡的开发,将波卡及以太坊已有的成果进行抽象,命名为substrate作为区块链开发的基础框架,并把全部精力都转移到了substrate开发中。
跨链的重要性
另一方面,在软件开发领域或者互联网领域,大家其实都发现了占据了框架的地位实际上一定程度上占据了这个领域开发的生态,更何况对于跨链来说,当大家的链都比较同质化后,跨链会更加的方便。现在大家都把跨链当作区块链下一个引爆点,而跨链的属性界定了做“跨链”的人基本上只能一家独大,成为垄断地位。而接入跨链的链越多,这个跨链就越垄断( 因为大家使用跨链就是为了在不同的链之间兑换代币,能换的代币越多,使用这个跨链的人就越多,生态就越集中),
而Gavin Wood 提供的substrate框架又能解决大部分链都在重复解决的问题,所以大家就更倾向于使用substrate开发自己的链。
总体设计
常见区块链设计
目前所有的区块链系统几乎都是从比特币/以太坊模型演变而来。一般来说,一个区块链系统应该具有:
区块链系统基础部分
- 共识系统 (区块链分布式基石)
- p2p连接与广播系统
- 存储系统
- 交易池系统
- rpc系统(区块链与外界交互主要通道)
链的功能
链功能是区块链间相互竞争的关键部分. 与系统基础部分相比,这部分差异很大,提供的是除去区块链模型外,这条链能够提供的功能。另一方面在区块链升级中,一般来说系统基础部分改动较小,而链的功能部分改动较大,特别是许多链为了追求开发速度,一开始只能提供转账功能,在后续的版本中才慢慢升级其他功能
例如:
- 比特币的UTXO结构加上交易脚本
- 以太坊的虚拟机与智能合约
- eos的账户系统及虚拟机
- 有的山寨币特化部分智能合约或部分native层成为系统级功能:
- 提供随机数
- 提供质押对赌
- oracle数据输入
- 引入复杂密码学方案
- 等等。。。
Substrate理念
先认识一下:什么是区块链框架
简单来说,或者从本质上讲,区块链框架是一个(巨大的)工具和库的集合,用于构建一个完整的、可运行的、安全的、功能完整的(尽管是基本的)区块链。
区块链框架负责处理以下方面的大部分繁重工作:
- 共识P2P网络
- 帐户管理
- 基本的区块链逻辑(区块、交易等)
- 区块链交互的客户端
接着说说Substrate与web3
Substrate 可以被描述为一个区块链框架——具体来说,一个用于构建定制区块链的框架。这些区块链可以完全自主运行,这意味着它们不依赖任何外部技术来运行。
然而,Substrate 背后的公司 Parity(由以太坊联合创始人 Gavin Wood 共同创立)也建立了 Polkadot 网络。 Polkadot 本质上是一个分散的、基于协议的区块链平台,用于实现安全的跨区块链通信。
由于它们是由同一个人开发的,因此 Substrate 对与Polkadot的集成具有一流的支持,因此您使用Substrate创建的任何区块链都可以无缝连接到 Polkadot。
Substrate 还提供无分叉运行时升级——在不触发硬分叉的情况下升级区块链状态转换功能的能力。
用web框架、游戏引擎类比
一个更好的比较可能是一个成熟的游戏引擎(想想 Unity),它为你需要的一切功能提供基本实现,以及可能需要的许多扩展点,供自定义。
当然,这意味着已经在架构方面做出了一些决定:你将无法轻易更改。
根据你的用例,可能需要更多的可定制性,而框架可能会以某种方式对其进行限制。
这是标准的权衡:区块链框架可以节省你的时间,但代价是你不得不忍受的一些事情。
然而,正如我们将在下面更详细地探讨的那样,Substrate在这方面提供了一些灵活性。
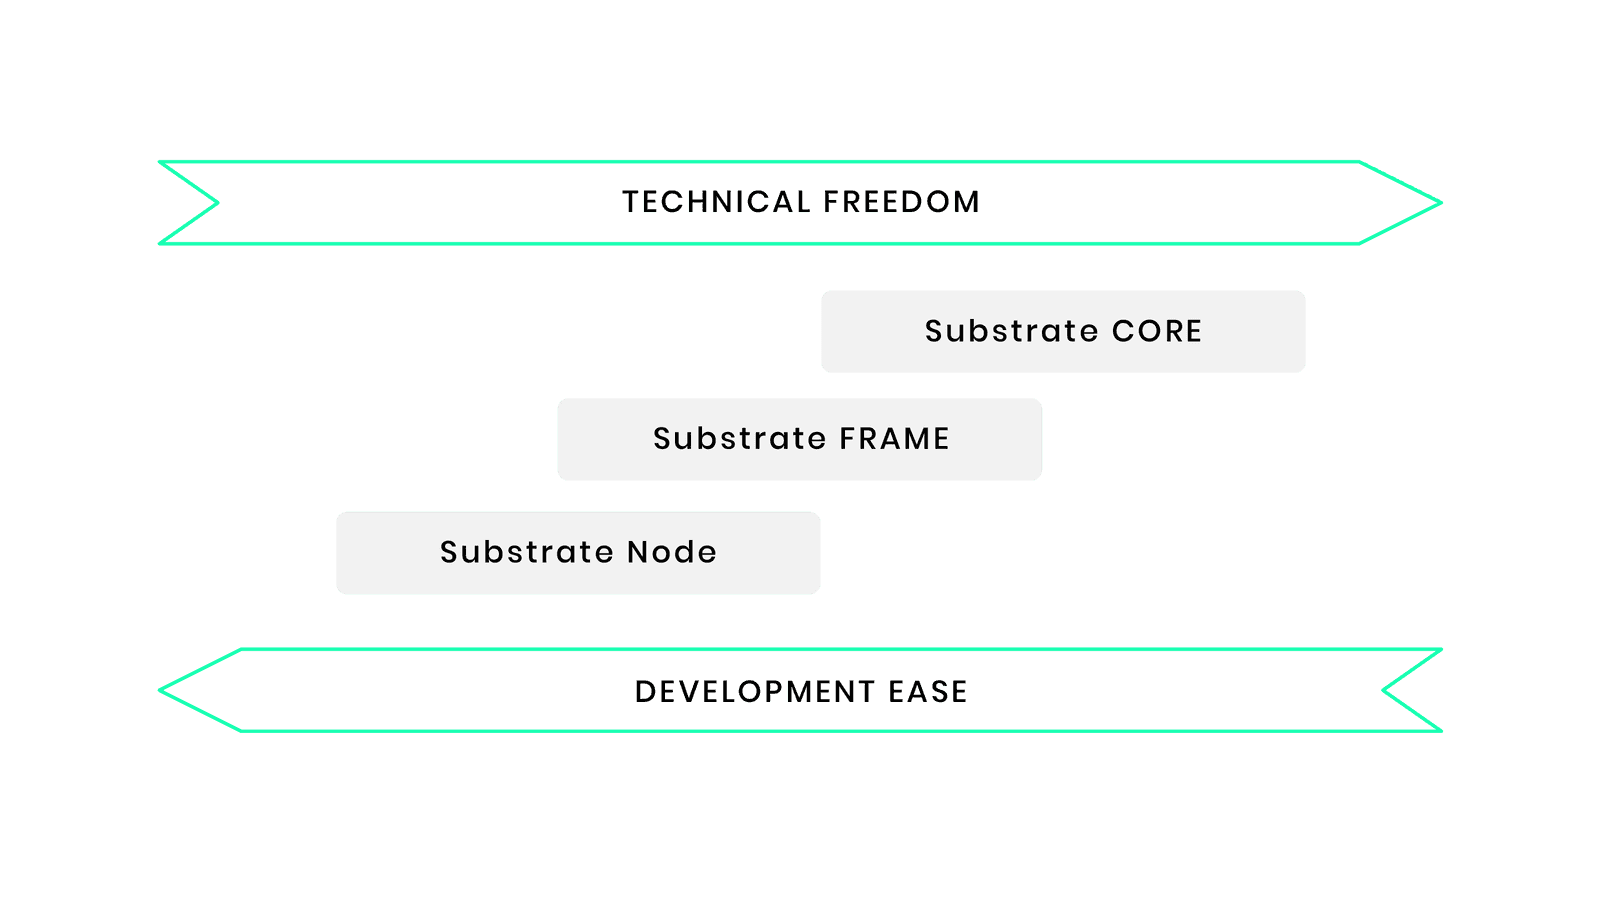
使您能够在多个阶段在更多的技术自由和易于开发之间进行选择。
Substrate的后端是用 Rust 构建的。它(以及 Parity 通常所做的大部分工作)也是完全开源的。
因此,您不仅可以使用 Substrate,还可以通过回馈和分叉其中的一部分来改进它,以根据您自己的需求进行定制。
Substrate Architecture
Gavin Wood 作为以太坊实际核心的开发者,自然早已对这套系统的框架了然于心,所以从Substrate框架提出的开始(2018年9月),就对区块链系统作出了2个关键的区分:
┌───────────────────────────────────────────────────────────────────────────────────────────────────────┐
│                                                                                                       │
│                                                                                                       │
│      ┌─────────────────┐     ┌─────────────────┐    ┌─────────────────┐    ┌─────────────────┐        │
│      │ fund management │     │     Account     │    │    Contract     │    │   Democratic    │        │
│      │    transfer     │     │     system      │    │       VM        │    │   referendum    │        │
│      └─────────────────┘     └─────────────────┘    └─────────────────┘    └─────────────────┘        │
│                                                                                                       │
│                                                  ######  #     # #     # ####### ### #     # #######  │
│      ┌─────────────────┐     ┌─────────────────┐ #     # #     # ##    #    #     #  ##   ## #        │
│      │     Equity      │     │      etc.       │ #     # #     # # #   #    #     #  # # # # #        │
│      │   calculation   │     │                 │ ######  #     # #  #  #    #     #  #  #  # #####    │
│      └─────────────────┘     └─────────────────┘ #   #   #     # #   # #    #     #  #     # #        │
│                                                  #    #  #     # #    ##    #     #  #     # #        │
│                                                  #     #  #####  #     #    #    ### #     # #######  │
├───────────────────────────────────────────────────────────────────────────────────────────────────────┤
│                                                                                                       │
│      ┌─────────────────┐     ┌─────────────────┐     ┌─────────────────┐    ┌─────────────────┐       │
│      │    Consensus    │     │ Network system  │     │     Trading     │    │                 │       │
│      │    mechanism    │     │      (p2p)      │     │      Pool       │    │       RPC       │       │
│      └─────────────────┘     └─────────────────┘     └─────────────────┘    │                 │       │
│                                                                             └─────────────────┘       │
│                                                             #####  ####### ######  #######            │
│      ┌─────────────────┐                                   #     # #     # #     # #                  │
│      │      etc.       │                                   #       #     # #     # #                  │
│      │                 │                                   #       #     # ######  #####              │
│      └─────────────────┘                                   #       #     # #   #   #                  │
│                                                            #     # #     # #    #  #                  │
│                                                             #####  ####### #     # #######            │
│                                                                                                       │
└───────────────────────────────────────────────────────────────────────────────────────────────────────┘
从Rust看Substrate
开发者只需要关注Runtime(链功能)
根据这样的划分,当开发者使用Substrate框架的时候,无需关心区块链基础功能也就是Core部分的工作,而只需关心自己链能够提供的功能,也就是Runtime部分的工作。
明晰Runtime
这里一直强调Runtime是“链的功能”有一些通俗与不严谨,这里使用一个更抽象的描述:
这个定义比较抽象,且由于需要对“世界状态”或类似概念有比较深入的了解才好解释,故不展开讲解。更严格来说,“需要对运行结果进行共识的功能组件”是“链的功能”的一个子集。
判断标准
这里有一个简单的判定标准判断某个功能是否应该放在Runtime内:
对于某个功能,若只改动一个节点的代码对于所有的逻辑运行的结果与其他不改动的节点运行的结果相同,则认为这个部分应该放在Runtime之外,如果运行结果不同,则认为应该放在Runtime之内。
举个例子:比如我改变了交易池的排序代码,使得对某个账户有利的交易能优先打包。这个改动会令自己这个节点产出的区块不公平的打包交易,但是只要打包出来的区块大家都可以认可,则所有节点共识的“状态的变化”仍然是一致的。很明显,这个功能组件不应该是Runtime的功能,因为它不会改变对于验证一个区块时的“状态变化”的验证。比如我改变了转账功能的代码,能给某个账户凭空增加钱,那么显然,这种改动对于这个改动过的节点执行的结果将会与其他节点不同,则共识不会通过。所以转账这个功能就应该放在Runtime当中,让所有节点执行的都是一致的。
这部分结合native与wasm后会容易理解
所以到底什么是Runtime,我认为使用“链上功能”来描述最为恰当,因为其隐含了对于执行结果的共识问题。
Substrate的Runtime
Substrate的Runtime当然没有止步于仅将区块链系统做了模块化划分,提供框架功能这一步,事实上,由于抽象出了Runtime,Substrate实现了以往所有区块链都无法实现的一个功能:区块链系统升级。
中心化升级流程
┌────────────────────────────────Centralized System Upgrading(Internet App)────────────────────────────────┐
│                                                                                                          │
│                                                                                                          │
│                         ┌───────────────────┐      ┌─────────────┐    ┌─────────────┐    ┌─────────────┐ │
│                     ┌──▶│    Update Code    │      │   Deploy    │    │   Upgrade   │    │ Centralized │ │
│     .─────────.     │   │(Backend/Frontend)─┼──────▶   Server    │───▶│  Sucessful  │────▶Upgrade Easy │ │
│    ╱           ╲    │   └───────────────────┘      └─────────────┘    └─────────────┘    └─────────────┘ │
│   ( Bug/Upgrade )───┤                                                 ┌─────────────┐                    │
│    `.         ,'    │                                                 │  Somebody   │                    │
│      `───────'      │                                              ┌─▶│   Upgrade   ├─┐                  │
│                     │   ┌───────────────────┐      ┌─────────────┐ │  └─────────────┘ │  ┌─────────────┐ │
│                     └──▶│    Update Code    │      │   Publish   │ │                  │  │ Fragmented  │ │
│                         │       (App)      ─┼──────▶  App Store  │─┤  ┌─────────────┐ ├─▶│   version   │ │
│                         └───────────────────┘      └─────────────┘ │  │  Somebody   │ │  └─────────────┘ │
│                                                                    └─▶│   Reject    │─┘                  │
│                                                                       └─────────────┘                    │
│                                                                                                          │
│                                                                                                          │
└──────────────────────────────────────────────────────────────────────────────────────────────────────────┘
对于中心化的互联网系统而言,由于代码与数据的控制权在自己手上,所以可以随时进行版本的升级与修改。但是即便如此,也只有网页H5,后台代码可以做到随时升级,在移动互联网中,app还是需要用户自行更新。其中android生态尤为突出,apk版本的碎片化一度是困扰开发者的难题。为了应对app应用的碎片化,推出了许多功能各异的框架能够用户在不更新app的情况下进行“热更新”,一度成为技术的热门追捧。这些热更新的框架本质上都是允许从后台下载一段更新代码,通过各种方式加载运行新的代码来完成。一般情况下通过这种热更新提供的功能都会带来一定的性能损耗以运行最新的热更新代码。但是即便是热更新,更新代码的控制权也同样处于中心化组织的手中。
无央化升级流程(原先)
┌───────────────────────────────────Decentralized System Upgrading(Blockchain Dapp)────────────────────────────────────┐
│                                                                                                 ┌─────────────┐      │
│                                                                                                 │   Upgrade   │      │
│                                                                                  ┌───Yes───────▶│  Sucessful  │      │
│                                                                                  │              └─────────────┘      │
│                                                                                  Λ                                   │
│                                                                                 ╱ ╲                                  │
│                                                                                ╱   ╲                                 │
│                                                                               ╱     ╲                                │
│                                                          ┌────────┐          ╱       ╲                               │
│                                                          │ Deploy │      Most deployments                            │
│                                              ┌──Support─▶│  Node  │─────▶(Under Byzantine                            │
│                                              │           └────────┘      Fault Tolerance)                            │
│                                              │                               ╲       ╱                               │
│                                              Λ                                ╲     ╱                                │
│                                             ╱ ╲                                ╲   ╱                                 │
│                                            ╱   ╲                                ╲ ╱                                  │
│                                           ╱     ╲                                V              ┌──────────────────┐ │
│     .─────────.      ┌─────────────┐     ╱       ╲                               │              │   Upgrade Fail   │ │
│    ╱           ╲     │ Update Node │    ╱ Running ╲                              └───No────────▶│(Cause Fragmented)│ │
│   ( Bug/Upgrade ─────▶    Code     ├────▶  Node    ▏                                            └──────────────────┘ │
│    `.         ,'     └─────────────┘    ╲ (Minner ╱                                                       ▲          │
│      `───────'                           ╲       ╱                                                        │          │
│                                           ╲     ╱                                                         │          │
│                                            ╲   ╱                                                          │          │
│     .─────────.                             ╲ ╱                                                           │          │
│  ,─'           '─.                           V                                                            │          │
│ ;    Community    :                          │           ┌────────┐                                       │          │
│ :    proposal     ;                          │           │ Reject │                                       │          │
│  ╲   (BIP/EIP)   ╱                           └───Reject─▶│ Deploy │───────────────────────────────────────┘          │
│   '─.         ,─'                                        └────────┘                                                  │
│      `───────'                                                                                                       │
└──────────────────────────────────────────────────────────────────────────────────────────────────────────────────────┘
区块链领域就大大不同了。 即便代码更新的权力在某个组织的手上,但是运行这些代码的人可不一定会听这个组织的指挥,无法容易的命令分散节点统一的进行新代码的部署更新。
比特币社区就是这个领域下的一个典型,由于比特币社区的分裂,部分人并不认同不更改区块大小而是采用隔离见证的方案,分裂出了BCH,对BTC的生态产生的极大的损害。ETH的升级同样也困难重重,每次升级都需要进行长时间的等待以防有节点未升级而产生的分叉。
EOS由于其中心化的特点使得升级稍微简单一些,但仍然出现了由于升级带来的分叉的恶性事件。我们可以形象把区块链下的系统升级称为“全球升级”,因为其要求分布式环境下的大部分节点都更新了代码才使得升级能够成功。相较于中心化控制的系统,区块链系统的升级困难重重且充满风险。
同时区块链的升级还有另一个问题:高度判断
一个区块链系统升级后,不得不在代码中加入许多的“高度判断”,以区分不同高度下运行的代码,保证同步能够正常执行,兼容老数据。这种做法很原始但是又无法绕开,给开发者带来极大的思维负担,且需要大量的测试来保证不出现Bug。
比如目前比特币的源码中就有许多的区块高度判定使得在同步老区块的时候执行老代码,新区块的时候执行新代码。而中心化系统的数据控制权在自己手上,并且也不存在需要从某个数据源同步的情况,所以完全不需要担心这个问题。
Substrate的不同
Substrate横空而出,推出了目前区块链领域最完美的升级方案。其采用“链上代码”的思想,将整个Runtime都做成了可直接更新的组件,让所有节点能够强制运行最新的Runtime代码。
简单来说,Runtime在Substrate框架下,将会用同一份代码编译出两份可执行文件:
- 一份Rust的本地代码,我们一般称为native代码,native与其他代码无异,是这个执行文件中的二进制数据,直接运行。在Substrate的相关代码以native命名
- 一份wasm的链上代码,我们一般成为wasm代码,wasm被部署到链上,所有人可获取,wasm通过构建一个wasm的运行时环境执行 。在Substrate的相关代码以wasm命名 在节点启动的时候可以选择执行策略,使用native, possible,wasm或者both。不同的执行策略会执行不同的执行文件
由于这两份代码是由相同的代码编译出来的,所以其执行逻辑完全相同 (有一些很小的暗坑要注意)。其中wasm将会部署到链上,所有人都可以获取到,也就是说即使本地运行的不是最新版本的节点,只要同步了区块,一定可以获取到最新的wasm代码。
换句话说,一个写在Runtime内部的代码,也就是代表这条链功能性的代码,存在两份,分别是native与wasm。wasm代码被部署到链上,是“链上数据”,可以通过同步区块所有人统一获取并执行。这样就可以保证在区块链中所有矿工执行的都是最新的代码。
这里需要强调,代码的部署可以通过“民主提议”,“sudo控制权限”,“开发者自定一种部署条件”等方式进行,到底哪种方式“更区块链”,“更合理”,不在本文讨论范围内,这与这条链的设计目的相关。Substrate只是提供了这种“热更新”的强大机制,如何使用这种机制是这条链的问题。
以太坊合约更新策略
由于以太坊部署一个合约后,其地址已经被固定,且数据完全存储在这个合约地址下,若这个合约需要升级功能或出现Bug,将会带来许多的问题(比如许多垃圾山寨币的ERC20合约有溢出漏洞,被攻击后损失惨重,只能通过重新部署合约,** 并将老合约的数据重新导入的方式**进行合约升级,且此时的合约地址只能使用新的了)。
许多开发人员不断探索后发展出了如下的以太坊合约升级方式:
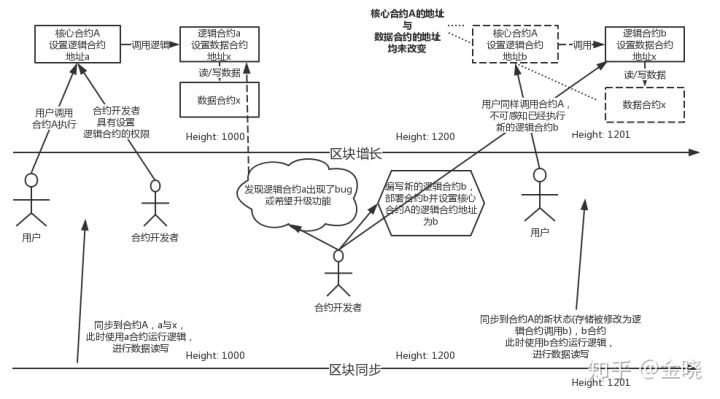
熟悉以太坊的开发人员应该很容易理解上图表达的意思。
其核心思想是将一个合约拆分成为“逻辑合约”与“数据合约”,并使用一个“核心合约”将它们串在一起,这个核心合约就是用户的入口。
由于以太坊部署后的地址是固定的,所以将逻辑合约做成一个独立的合约,并将其地址设置在核心合约当中。那么只要更改核心合约中设置的地址,就可以更改核心合约执行的逻辑了。
并且由于以太坊的合约部署后都存在于“世界状态”当中,那么在同步区块时,老数据就会自动使用老的逻辑合约执行,而新的数据使用新的逻辑合约执行。
Substrate对应‘合约更新策略’
那么将Substrate的框架对应过来,其中:
- “核心合约”的部分就是节点采用wasm执行去从“状态”存储中加载出最新的合约代码
- “逻辑合约”的部分就是这条链的Runtime
- “数据合约”的部分就是这条链自己的状态数据
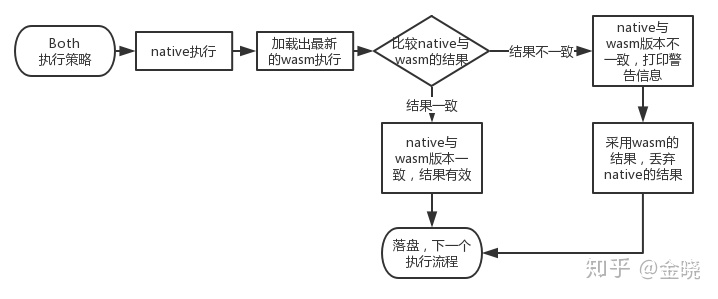
由此可见,由于wasm代码的存在,可以保证即使节点没有更新到最新版本,仍然能够以最新的代码运行,保证不会因为代码的不同而分叉。同时在节点同步老数据的过程中也不会因为本地代码是最新的而导致同步出错
项目结构

客户端架构
架构图
┏━━━━━━━━━━━━━━━━━━━━━━━━━━━━━━━━━━━━━━━━━━━━━━━━━━━━━━━━━━━━━━━━━━━━━━━━━━━━━━━━━━━━━━━━━━┓
┃         ___ _   _ ___ ___ _____ ___    _ _____ ___    ___ _    ___ ___ _  _ _____        ┃
┃        / __| | | | _ ) __|_   _| _ \  /_\_   _| __|  / __| |  |_ _| __| \| |_   _|       ┃
┃        \__ \ |_| | _ \__ \ | | |   / / _ \| | | _|  | (__| |__ | || _|| .` | | |         ┃
┃        |___/\___/|___/___/ |_| |_|_\/_/ \_\_| |___|  \___|____|___|___|_|\_| |_|         ┃
┃                                                                                          ┃
┃                                                                                          ┃
┃     ┌───────────────┐     ┌──────────────────────────────────────────────────────────┐   ┃
┃     │               │     │                                                          │   ┃
┃     │               │     │                                                          │   ┃
┃     │               │     │                           RPC                            │   ┃
┃     │               │     │                                                          │   ┃
┃     │      P2P      │     │                                                          │   ┃
┃     │    NETWORK    │     └──────────────────────────────────────────────────────────┘   ┃
┃     │               │     ┌────────────────────────────────────────┐ ┌───────────────┐   ┃
┃     │               │     │                                        │ │               │   ┃
┃     │               │     │            ┌───────────────┐           │ │               │   ┃
┃     │               │     │            │               │           │ │   CONSENSUS   │   ┃
┃     └───────────────┘     │            │     Wasm      │           │ │               │   ┃
┃          .───────.        │            │    Runtime    │           │ │               │   ┃
┃       ,─'         '─.     │            │               │           │ └───────────────┘   ┃
┃      ╱               ╲░   │            └───────────────┘           │                     ┃
┃     ;     NATIVE      :░  │                                        │ ┌───────────────┐   ┃
┃     :     RUNTIME     ;░░ │                                        │ │               │   ┃
┃      ╲               ╱░░░ │                STORAGE                 │ │               │   ┃
┃       ╲             ╱░░░  │                                        │ │   TELEMETRY   │   ┃
┃        '─.       ,─'░░░   │                                        │ │               │   ┃
┃          ░`─────'░░░░░    │                                        │ │               │   ┃
┃             ░░░░░░░       └────────────────────────────────────────┘ └───────────────┘   ┃
┃                                                                                          ┃
┗━━━━━━━━━━━━━━━━━━━━━━━━━━━━━━━━━━━━━━━━━━━━━━━━━━━━━━━━━━━━━━━━━━━━━━━━━━━━━━━━━━━━━━━━━━┛
现在我们知道了 Substrate 是什么,让我们对框架、它的移动部分以及我们可以用来创建自定义区块链的扩展点进行高级概述。 由于我们在这里处理的是去中心化的点对点系统,所以我们谈论的基本单元是节点,这是我们的区块链运行的地方。 该节点在客户端内部运行,并提供系统运行所需的所有基本组件,例如p2p网络、区块链的存储、块处理和共识的逻辑,以及从外部与区块链交互的能力。
模块说明
substrate客户端是基于substrate实现的区块链的节点客户端(可以理解为全节点), 它主要由以下几个组件组成(以下也就是告诉我们实现一条链由哪几部分组成):
存储
用来维持区块链系统所呈现的状态演变。substrate提供了的存储方式是一种简单有效的key-value对存储机制的方式。
Runtime
这里就可以回答上面的问题,什么是runtime?runtime定义了区块的处理方式,主要是状态转换的逻辑。在substrate中,runtime code被编译成wasm作为区块链存储状态的一部分。
p2p网络
允许客户端和其它网络参与者进行通信。
共识
提供了一种逻辑,能使网络参与者就区块链的状态达成一致。 substrate 支持提供自定义的共识引擎。
RPC
远程过程调用。
telemetry (遥测)
通过嵌入式Prometheus服务器的方式对外展示(我理解应该是类似于区块链浏览器一样的东西,或者是提供信息给区块链浏览器展示)。
Tree Level1
首先来看看项目的整理结构:
 tree -L 1 | pbcopy                                                                                                                                                                                                                        ─╯
.
├── Cargo.lock
├── Cargo.toml
├── HEADER-APACHE2
├── HEADER-GPL3
├── LICENSE-APACHE2
├── LICENSE-GPL3
├── README.md
├── bin
├── client
├── docker
├── docs
├── frame
├── primitives
├── rustfmt.toml
├── scripts
├── shell.nix
├── test-utils
└── utils

9 directories, 9 files
用Cargo组织代码
Substrate非常明显使用Cargo来组织代码:
- 项目根目录的Cargo.toml会用workspace+members导入各子模块
[ workspace ]
  resolver = "2"

  members = [...]
- 各子模块之间也用Cargo.toml来相互导入使用
[ dependencies ]
  sc-consensus = { version = "0.10.0-dev", path = "../../client/consensus/common" }
主要部分介绍:Node、Frame、Core
Substrate Node:
我们将从 Substrate Node 开始。这是我们可以开始的最高级别;
它提供了最多的预建功能和最少的技术自由度。它是完全可运行的,包括所有基本组件的默认实现,例如:
- 账户管理
- 特权访问
- 共识
- …
我们可以自定义链的创世块(即初始状态)以开始。 在这里,我们可以运行节点并熟悉 Substrate 提供的开箱即用的功能,玩转状态并与正在运行的区块链交互以熟悉。
另一种实现相同目的的方法是使用 Substrate Playground,您可以在其中查看后端和前端模板以熟悉它们。 然而,一旦我们准备好真正构建自己的区块链,我们最好降低一层并使用 FRAME。
tree bin -L 2 | pbcopy                                                                                                                                                                                                                       ─╯
bin
├── node
│   ├── bench
│   ├── cli
│   ├── executor
│   ├── inspect
│   ├── primitives
│   ├── rpc
│   ├── runtime
│   └── testing
├── node-template: 使用Substrate写项目的基础模版
│   ├── LICENSE
│   ├── README.md
│   ├── docker-compose.yml
│   ├── docs
│   ├── node
│   ├── pallets
│   ├── runtime
│   ├── scripts
│   └── shell.nix
└── utils
    ├── chain-spec-builder
    └── subkey

18 directories, 4 files
重点说说node、pallets和runtime
│ ├── node: 链的一些基础功能的实现(或者说比较底层的实现,如网络、rpc,搭建链的最基础的code) │ ├── pallets: 放置的就是各个pallet,也就是业务相关的模块 │ ├── runtime: 可以简单理解为把所有pallet组合到一起,也就是业务相关的逻辑
三者的关系大致如下:
┏━━━━━━━━━━━━━━━━━━━━━━━━━━━━━━━━━━━━━━━━━━━━━━━━━━━━━━━━━━━━━━━━━━━━━━━━━━━━━━━━━━━━━━━━━━┓
┃             ___ _   _ ___ ___ _____ ___    _ _____ ___   _  _  ___  ___  ___             ┃
┃            / __| | | | _ ) __|_   _| _ \  /_\_   _| __| | \| |/ _ \|   \| __|            ┃
┃            \__ \ |_| | _ \__ \ | | |   / / _ \| | | _|  | .` | (_) | |) | _|             ┃
┃            |___/\___/|___/___/ |_| |_|_\/_/ \_\_| |___| |_|\_|\___/|___/|___|            ┃
┃                                                                                          ┃
┃                                                                                          ┃
┃                                                                                          ┃
┃  ┏━━━━━━━━━━━━━━━━━━━━━━━━━━━━━━━━━━━━━━━━━━━━━━━━━━━━━━━━━━━━━━━━━━━━━━━━━━━━━━━━━━━━━┓ ┃
┃  ┃                         ___ _   _ _  _ _____ ___ __  __ ___                         ┃ ┃
┃  ┃                        | _ \ | | | \| |_   _|_ _|  \/  | __|                        ┃ ┃
┃  ┃                        |   / |_| | .` | | |  | || |\/| | _|                         ┃ ┃
┃  ┃                        |_|_\\___/|_|\_| |_| |___|_|  |_|___|                        ┃ ┃
┃  ┃                                                                                     ┃ ┃
┃  ┃                                                                                     ┃ ┃
┃  ┃                                                                                     ┃ ┃
┃  ┃                                                                                     ┃ ┃
┃  ┃    ┌───────────────┐    ┌───────────────┐    ┌───────────────┐   ┌───────────────┐  ┃ ┃
┃  ┃    │               │    │               │    │               │   │               │  ┃ ┃
┃  ┃    │   pallet 1    │    │   pallet 2    │    │      ...      │   │   pallet n    │  ┃ ┃
┃  ┃    │               │    │               │    │               │   │               │  ┃ ┃
┃  ┃    └───────────────┘    └───────────────┘    └───────────────┘   └───────────────┘  ┃ ┃
┃  ┃                                                                                     ┃ ┃
┃  ┗━━━━━━━━━━━━━━━━━━━━━━━━━━━━━━━━━━━━━━━━━━━━━━━━━━━━━━━━━━━━━━━━━━━━━━━━━━━━━━━━━━━━━┛ ┃
┗━━━━━━━━━━━━━━━━━━━━━━━━━━━━━━━━━━━━━━━━━━━━━━━━━━━━━━━━━━━━━━━━━━━━━━━━━━━━━━━━━━━━━━━━━━┛
当然,对于pallets来说,在runtime中使用的pallet,有些是我们自己开发的pallet,有些是substrate中已经开发好的pallet,甚至还有些是pallet是第三方开发的pallet。
Substrate FRAME
FRAME (Framework for Runtime Aggregation of Modularized Entities) 是一个框架,用于从现有库构建 Substrate 运行时(Runtime) ,并具有高度的自由度来确定我们的区块链逻辑。
我们基本上是从 Substrate 的预构建节点模板开始,可以添加所谓的托盘(pallet, Substrate 库模块的名称)来定制和扩展我们的链。
在这个抽象级别,我们还能够完全自定义我们区块链的逻辑、状态和数据类型。这当然是大多数旨在接近 Substrate 的基本定制项目在易于开发和技术自由之间利用两全其美的地方。
我们仍然需要在它们到来时采用一些默认值——或者更确切地说,因为它们可以被配置——但是如果我们从根本上想要做不同的事情,我们可以从 Core 开始再降低一步。
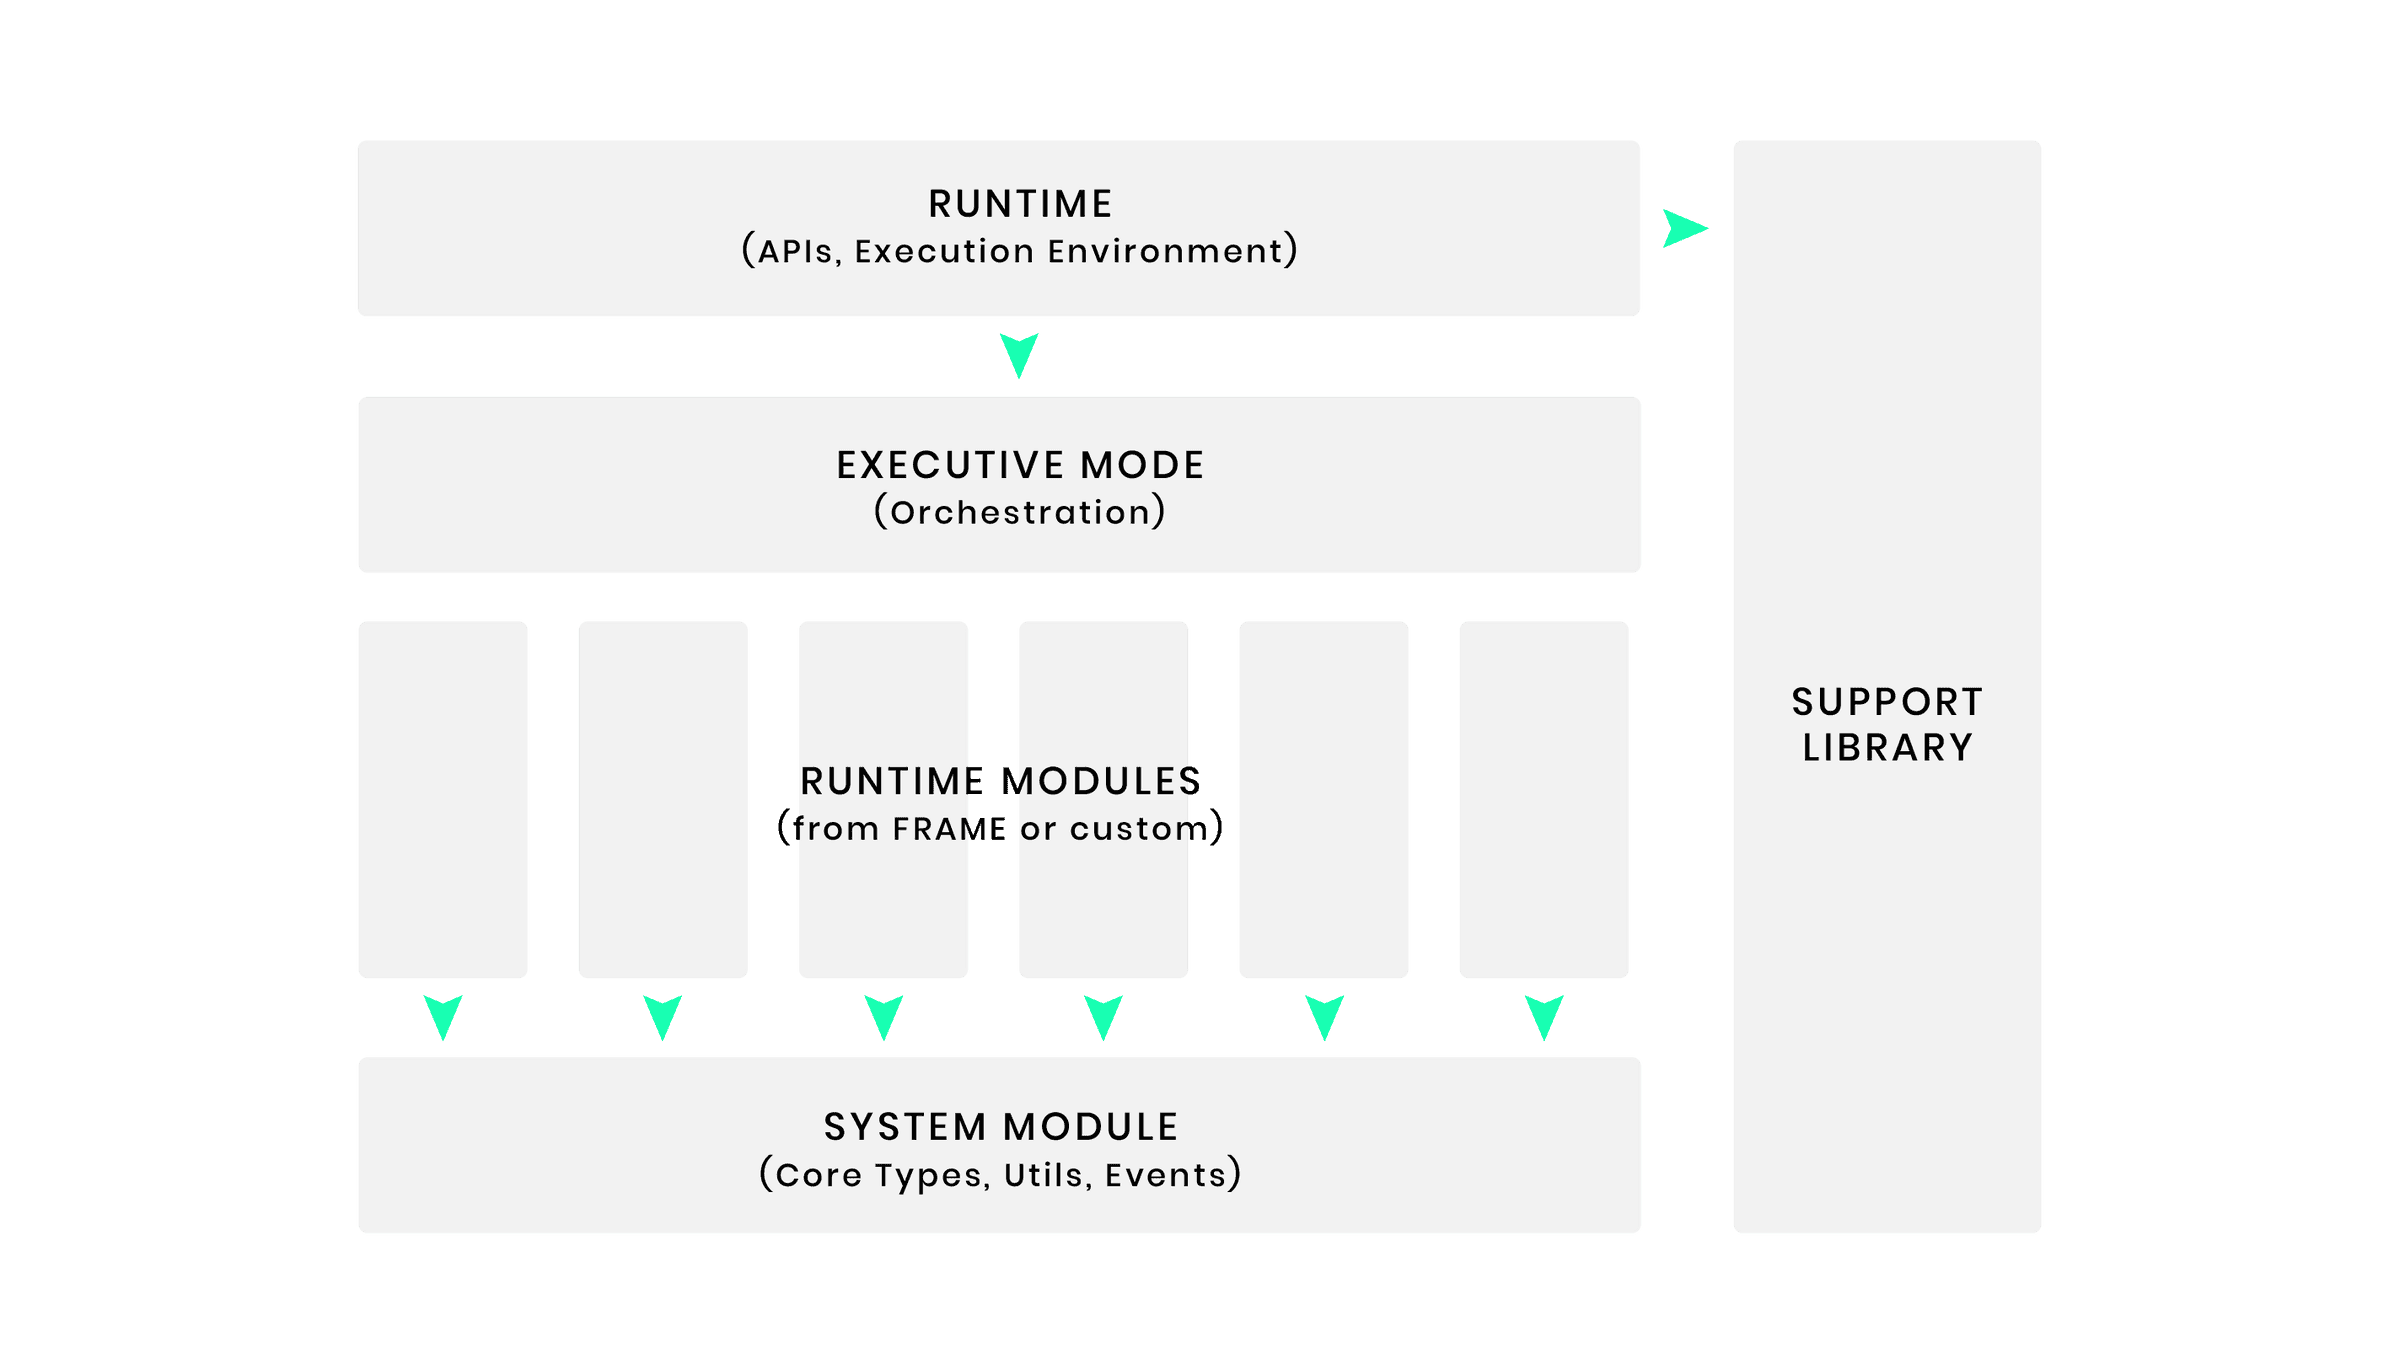
The Framework for Runtime Aggregation of Modularized Entities (FRAME) is a set of modules and support libraries that simplify runtime development. In Substrate , these modules are called Pallets, each hosting domain-specific logic to include in a chain’s runtime.
FRAME also provides some helper modules to interact with important Substrate Primitives that provide the interface to the core client.
The following diagram shows the architectural overview of FRAME and its support libraries:
tree frame -L 1 | pbcopy
frame
├── alliance: The Alliance Pallet provides a collective that curates a list of accounts and URLs, deemed by the voting members to be unscrupulous actors.
├── assets: A simple, secure module for dealing with fungible assets. The Assets module provides functionality for asset management of fungible asset classes with a fixed supply
├── atomic-swap: A module for atomically sending funds.
├── aura: The Aura module extends Aura consensus by managing offline reporting.
├── authority-discovery: This module is used by the client/authority-discovery to retrieve the current set of authorities.
├── authorship
├── babe
├── bags-list
├── balances: The Balances module provides functionality for handling accounts and balances.
├── beefy
├── beefy-mmr
├── benchmarking
├── bounties
├── child-bounties
├── collective
├── contracts
├── conviction-voting
├── democracy
├── election-provider-multi-phase
├── election-provider-support
├── elections-phragmen
├── examples
├── executive
├── gilt
├── grandpa
├── identity
├── im-online
├── indices
├── lottery
├── membership
├── merkle-mountain-range
├── multisig
├── nicks
├── node-authorization
├── nomination-pools
├── offences
├── preimage
├── proxy
├── randomness-collective-flip
├── ranked-collective
├── recovery
├── referenda
├── remark
├── scheduler
├── scored-pool
├── session
├── society
├── staking
├── state-trie-migration
├── sudo
├── support
├── system
├── timestamp
├── tips
├── transaction-payment
├── transaction-storage
├── treasury
├── try-runtime
├── uniques
├── utility
├── vesting
└── whitelist

62 directories, 0 files
Substrate Core(client)
Substrate Core 本质上意味着我们可以以任何我们想要的方式实现我们的运行时,只要它以 WebAssembly 为目标并遵守 Substrate 块创建的基本法则。
然后,我们可以使用这个运行时并在 Substrate 节点中运行它。
说到 Substrate 的生态系统,有一个充满活力(充满活力)的开发者社区,他们在自己的项目中使用 Substrate,其中许多人通过共享自己的托盘(pallet)来回馈生态系统。
您可以通过使用诸如 Substrate Market 之类的站点或仅在托管 crates.io: Rust Package Registry 的任何地方找到托盘(pallet),因为 Substrate 托盘本质上是自包含的 Rust 库,您可以将其集成到您的 Substrate 项目中, 并根据需要进行配置。
与任何其他库一样,建议首先审核代码,并了解依赖外部代码与编写自己的代码之间的权衡。
在玩了一点预建节点之后,我们应该专注于 FRAME,学习如何通过在 Substrate 模板节点之上构建自定义区块链。这也是许多精彩教程的起点。
 tree client -L 1 | pbcopy                                                                                                                                                                                                                    ─╯
client
├── allocator
├── api
├── authority-discovery
├── basic-authorship
├── beefy
├── block-builder
├── chain-spec
├── cli
├── consensus
├── db
├── executor
├── finality-grandpa
├── informant
├── keystore
├── network
├── network-gossip
├── offchain
├── peerset
├── proposer-metrics
├── rpc
├── rpc-api
├── rpc-servers
├── service
├── state-db
├── sync-state-rpc
├── sysinfo
├── telemetry
├── tracing
├── transaction-pool
└── utils

30 directories, 0 files
其他
primitives
tree primitives -L 1 | pbcopy
primitives
├── api
├── application-crypto
├── arithmetic
├── authority-discovery
├── authorship
├── beefy
├── block-builder
├── blockchain
├── consensus
├── core
├── database
├── debug-derive
├── externalities
├── finality-grandpa
├── inherents
├── io
├── keyring
├── keystore
├── maybe-compressed-blob
├── merkle-mountain-range
├── npos-elections
├── offchain
├── panic-handler
├── rpc
├── runtime
├── runtime-interface
├── sandbox
├── serializer
├── session
├── staking
├── state-machine
├── std
├── storage
├── tasks
├── test-primitives
├── timestamp
├── tracing
├── transaction-pool
├── transaction-storage-proof
├── trie
├── version
└── wasm-interface

42 directories, 0 files
scripts/ci
tree scripts/ci | pbcopy
scripts/ci
├── common
│   └── lib.sh
├── deny.toml
├── docker
│   ├── subkey.Dockerfile
│   └── substrate.Dockerfile
├── github
│   ├── check_labels.sh
│   └── generate_changelog.sh
├── gitlab
│   ├── check_runtime.sh
│   ├── check_signed.sh
│   ├── ensure-deps.sh
│   ├── pipeline
│   │   ├── build.yml
│   │   ├── check.yml
│   │   ├── publish.yml
│   │   └── test.yml
│   ├── publish_draft_release.sh
│   └── skip_if_draft.sh
├── monitoring
│   ├── alerting-rules
│   │   ├── alerting-rule-tests.yaml
│   │   └── alerting-rules.yaml
│   └── grafana-dashboards
│       ├── README_dashboard.md
│       ├── substrate-networking.json
│       └── substrate-service-tasks.json
├── node-template-release
│   ├── Cargo.toml
│   └── src
│       └── main.rs
└── node-template-release.sh

10 directories, 23 files
utils
tree utils -L 1 | pbcopy
utils
├── build-script-utils
├── fork-tree
├── frame
├── prometheus
└── wasm-builder

5 directories, 0 files
功能逻辑
特色代码
参考资源
online-book
- paritytech/substrate: Substrate: The platform for blockchain innovators
- Architecture | Substrate_
- substrate轻松学
fragment
- 链块与分散的数据 - 知乎
- 区块链与substrate
- substrate 源码解析与运用 - 介绍 - 知乎
- Substrate区块链开发 - 知乎
- Substrate Ecosystem | Substrate_
- Substrate blockchain development: Core concepts - LogRocket Blog:对Substrate的简要介绍
- Playground | Substrate_
- Substrate Market
- crates.io: Rust Package Registry
- Quick start | Substrate Docs
- Tutorials | Substrate Docs
- Projects | Substrate_: 一些基于Substrate建立的项目,值得参考
- Build the Substrate Kitties Chain | Substrate_: 教你建立一个nft平台
- FRAME | Substrate_
- The Substrate Guide I Wish I Had. Fractal’s blockchain lead Shelby… | by Fractal | Fractal | Medium
- How-to quick reference guides | Substrate Docs
Runtime
- 剖析Substrate Runtime - 知乎
基于Substrate开发自己的运行时模块,会遇到一个比较大的挑战,就是理解Substrate运行时(Runtime)。 本文首先介绍了Runtime的架构,类型,常用宏,并结合一个实际的演示项目,做了具体代码分析,以帮助大家更好地理解在Substrate中它们是如何一起工作的。
local
漫话Rust
话题
为什么觉得 Rust 难上手,尤其是生命周期? - 知乎
因为其他语言上手真的就只是上手而已,你还得买《Effective Xxxx》甚至《More Effective Xxxx》,以及《Xxx并发编程》《深入理解Xxx虚拟机》等等各种书籍来学习各种避坑、省力、debug技巧。而Rust的上手是把这些技巧直接掺在上手过程里了,编译器以及配套工具(比如错误提示里的help,fmt、clippy)逼着你把代码写对,上手Rust等于同时被迫学会了这一堆技巧。
- 学习 rust 上手难一般是因为缺乏丰富的 Cpp 经验。因此,大家会对【胖指针】【瘦指针】【虚表 vtable 】等基础概念缺少深刻的理解。而这些概念正是区分 rust 中【编译期间-抽象 — 单态化】与【运行期间-抽象 —
trait Object】的认知“门槛”。 - 另一方面,学习lifetime 上手难是因为大家已经习惯了“颐指气使”地向计算机“发号施令”和下达指示了。
- 但是, lifetime 完全是另一码事。就【生命周期】而言, rustc 的角色是【仲裁者】,而不是【执行者】。
【生命周期·标注】被设计用来:由 @程序员 向【仲裁者 rustc 】表述自己的代码设计意图(这些意图通过直接扫描代码不容易被揣测出来)。然后,再由【仲裁者】判断你的代码意图是否可行,因为代码首先得足够安全。
所以,你不能命令 rustc :我要求某某变量一定得活多长时间(一切皆可操控,那是 Cpp);而是,询问 rustc :我如此设计代码,想让某某变量活这么长时间,你看行得通吗?若 rustc 判定行不通,那么一个编译错误就等着你了。
比如说,函数的【生命周期_泛型参数】是被用来将
- 引用类型的函数入参的生命周期与
- 引用类型的函数返回值的生命周期关联起来。
以便,在对代码做【静态分析】时,编译器能够根据(已知)入参推断出函数返回值的生命周期。
这是帮助编译器理解咱们代码的“脚注”,而不是给编译器下达的“指示”。得和
rustc“商量”着来。
底层抽象
介绍
从计算机组成原理了解到操作系统,当一个程序开始运行的时候,不论是可执行程序还是命令行,都会从创建进程,申请进程资源开始,再到堆栈(stack/heap) 的使用,申请与释放资源。这一系列操作对于编程来说重要性不言而喻,只不过根据编程语言的高级程度不同,开发者需要掌握的知识也有不同。
而在rust语言编程中,内存的管理方式及其重要。所以这一层主要先介绍虚拟内存管理以及相关出现的内容安全问题,接着介绍rust是如何通过所有权、作用域和生命周期,引申出借用、移动语义、复制语义等一系列内容来解决内存安全问题。
Rust语言架构
Rust语言版本说明
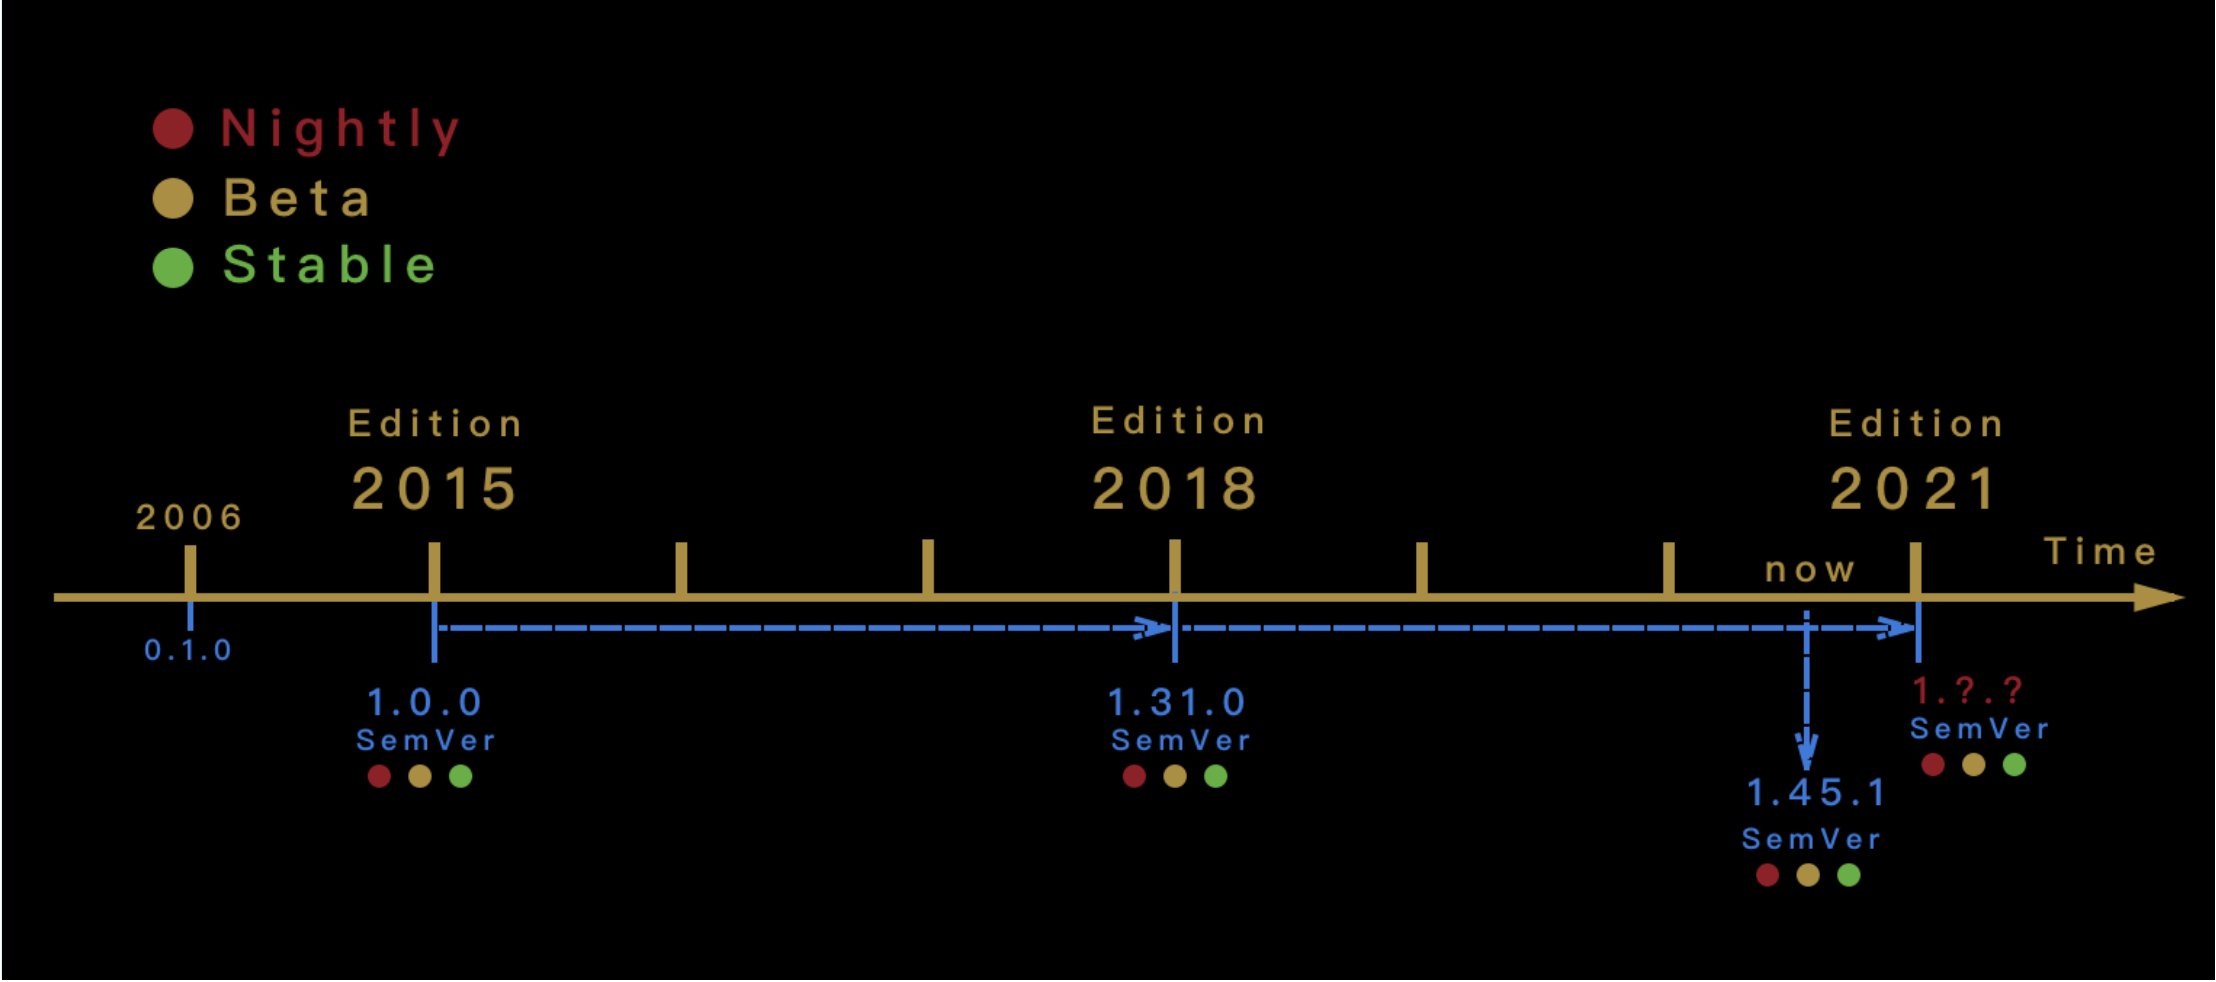
Rust编译步骤
Rust编译过程与宏展开
这里主要参考下列内容
- RustcRustc/rustc-dev-guide-zh: Rustc Dev Guide 中文翻译
- About this guide - Guide to Rustc Development
- Rust编译器专题 | 图解 Rust 编译器与语言设计 Part 1 - Rust精选
参考资源
online-book
fragment
local
内存管理与内存安全
参考
online-book
fragment
local
所有权三件套:所有权、借用与生命周期
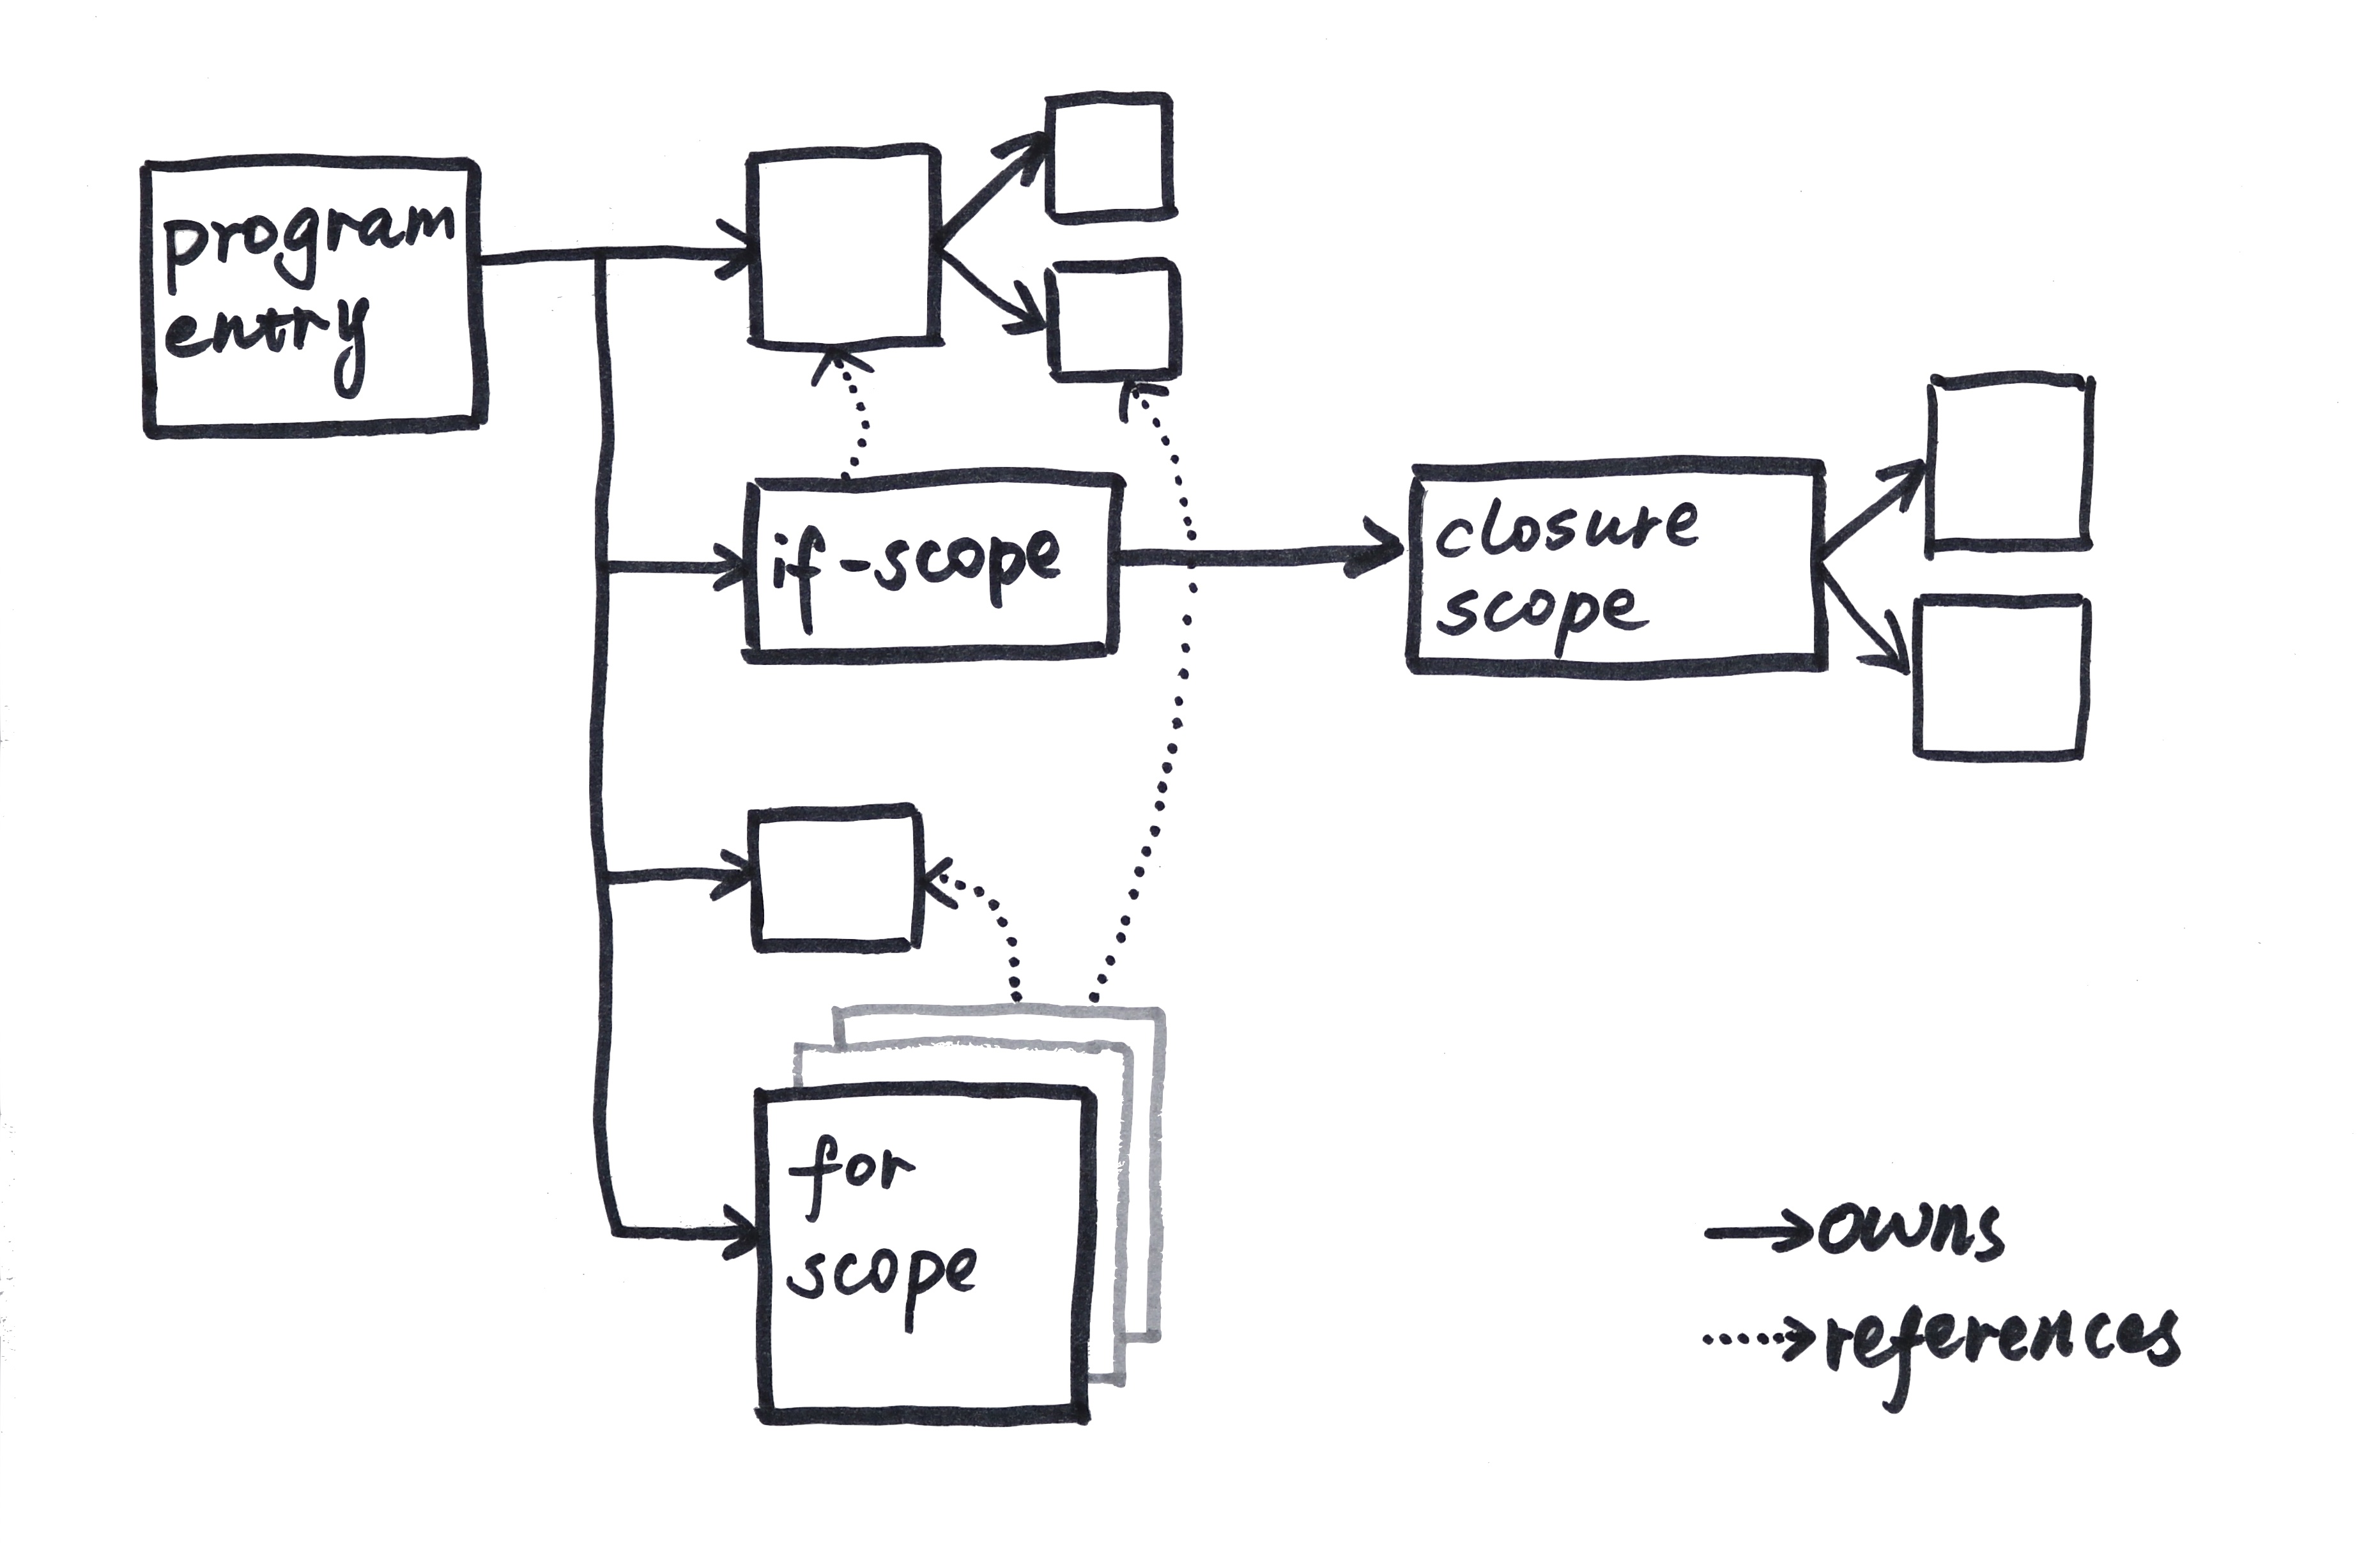
- 所有权三件套:所有权、借用与生命周期
综述
┌───────────────────────────────────┐
│                                   │
│                                   │
│         .───────.       ┌──────┐  │
│       ,'         `.     │Borrow│  │
│     ,'             `.   └──────┘  │
│    ;   ┌─────────┐   :            │
│    │   │OwnerShip│   │            │
│    │   └─────────┘   │            │
│    :     ┌─────┐     ; ┌────────┐ │
│     ╲    │Scope│    ╱  │Lifetime│ │
│      `.  └─────┘  ,'   └────────┘ │
│        `.       ,'                │
│          `─────'                  │
│                                   │
│                                   │
└───────────────────────────────────┘
所有权、作用域、借用与生命周期是 Rust 的内存安全及其零成本抽象原则的核心。 它们让 Rust 能够在编译期检测程序中内存安全违规,在离开作用域时自动释放相关资源等情况。 所有权有点类似核心原则,而借用和生命周期是对语言类型系统的扩展。在代码的不同上下文中加强或有时放松所有权原则,可确保编译期内存管理正常运作。
所有权语义模型
所有权与内存管理
所有权
资源所有者
程序中资源的真正所有者的概念因语言而异。这里的含义是通过资源, 主要包含下列内容:
- 共同引用在堆或堆栈上保存值的任何变量
- 或者是包含打开文件描述符、数据库连接套接字、网络套接字及类似内容的变量。
从它们存在到完成程序调用及其之后的时间,都会占用一些内存。
资源所有者负责释放
资源所有者的一个重要职责就是明智地释放它们使用的内存,因为如果无法在适当的位置和时间执行取消内存分配,就可能导致内存泄漏。
动态语言靠GC在运行期处理
在使用 Python 等动态语言编程时,可以将多个所有者或别名添加到 list 对象中,从而使用执行该对象的众多变量之一添加或删除 list 中的项目。变量不需要关心如何释放对象使用过的内存,因为 GC 会处理这些事情,并且一旦指向对象的所有引用都消失,GC 就会释放相关的内存。
静态语言在编译期规定
对于 C/C++/Golang之类的编译语言,在智能指针出现之前,程序库对代码使用完毕的相关资源 API 的调用方或者被调用方是否负责释放内存有明确的规定。存在这些规则是因为编译器不会在这些语言中强制限定所有权。在 C++中不使用智能指针仍然有可能出现问题。在C++中,存在多个变量指向堆上的某个值是完全没问题的(尽管我们不建议这么做) ,这就是所谓的别名。由于具有指向资源的多个指针或别名的灵活性,程序员会遇到各种各样的问题,其中之一就是 C++中的迭代器失效问题。
具体而言,当给定作用域中资源的其他不可变别名相对存在至少一个可变别名时,就会出现问题
Rust的所有权规则
Rust 试图为程序中值的所有权设定适当的语义。Rust 的所有权规则遵循以下原则。
- 使用 let 语句创建值或资源,并将其分配给变量时,该变量将成为资源的所有者。
- 当值从一个变量重新分配给另一个变量时, 值的所有权将转移至另一个变量, 原来的变量将失效以便另作他用。
- 值和变量在其作用域的末尾会被清理、释放。
揣摩所有权含义
需要注意的是,Rust 中的值只有一个所有者,即创建它们的变量。其理念很简单,但是它的含义值得揣摩:
// ownership_basics.rs

#[derive(Debug)]
struct Foo(u32);

fn main() {
    // 根据所有权规则, foo 是 Foo 实例的所有者
    let foo = Foo(2048);
    /*
        bar 成为Foo 实例的新所有者, 而旧的 foo 是一个废弃变量.
        经过此变动之后不能在其他任何地方使用
    */
    let bar = foo; // value moved here
    /*
        每当我们将变量分配给某个其他变量或从变量读取数据时,Rust 会默认移动变量指向的值。
        所有权规则可以防止你通过多个访问点来修改值,这可能导致访问已被释放的变量.
        即使在单线程上下文中,使用允许多个值的可变别名的语言也是如此
    */
    println!("Foo is {:?}", foo);  // value borrowed here after move
    println!("Bar is {:?}", bar);
}
每当我们将变量分配给某个其他变量或从变量读取数据时,Rust 会默认移动变量指向的值。所有权规则可以防止你通过多个访问点来修改值,这可能导致访问已被释放的变量,即使在单线程上下文中,使用允许多个值的可变别名的语言也是如此
作用域:所有权考虑因素
为了分析某个值何时超出作用域,所有权规则还会考虑变量的作用域
- 在 Rust 的背景下, 所有权与作用域协同工作。
- 因此,作用域只不过是变量和值存在的环境。你声明的每个变量都与作用域有关。
- 代码中的作用域是由一对花括号表示的。无论何时使用块表达式都会创建一个作用域,即任何以花括号开头和结尾的表达式。
- 此外,作用域支持互相嵌套,并且可以在子作用域中访问父作用域的元素,但反过来不行
多作用域的情况分析
// scopes.rs

/*
由于函数可以创建新的作用域, 因此 main 函数引入了根级别作用域 0,
在代码中定义为 level_0_str
*/
fn main() {
    let level_0_str = String::from("foo");
    /*
        在 0 级作用域中, 创建了一个新的作用域,即作用域 1,
        并且带有一个花括号,其中包含变量level_1_number。
    */
    {
        let level_1_number = 9;
        /*
            在 1 级作用域中, 创建了一个块表达式, 它成为 2 级作用域。
            在其中, 声明了另一个变量 level_2_vector,
            以便可以将 level_1_number 添加到其中,
            而level_1_number 来自其父级作用域 1
        */
        {
            let mut level_2_vector = vec![1, 2, 3];
            level_2_vector.push(level_1_number);    // can access
        } // level_2_vector goes out of scope here

        level_2_vector.push(4);    // no longer exists
    } // level_1_number goes out of scope here
} // level_0_str goes out of scope here
作用域是推断所有权时的一个重要属性
作用域还会被用来推断后续介绍的借用和生命周期。
- 当作用域结束时,拥有值的任何变量都会运行相关代码以取消分配该值,并且其自身在作用域之外是无效的。
- 特别是对在堆上分配的值,drop 方法会被放在作用域结束标记}之前调用。
- 这类似于在 C 语言中调用 free 函数,但这里是隐式的, 并且可以避免程序员忘记释放值。
- drop 方法来自 Drop 特征,它是为 Rust 中大部分堆分配类型实现的,可以轻松地自动释放资源。
引入移动和复制语义
结合作用域判断一下下列代码是否正确
// ownership_primitives.rs

fn main() {
    let foo = 4623;
    /*
        4623 的所有权不会从 foo 转移到 bar,但 bar 会获得4623 的单独副本。
        看起来基元类型在 Rust 中会被特殊对待,它们会被移动而不是复制。
        这意味着根据我们在 Rust 中使用的类型,存在不同的所有权语义,这将引入移动和复制语义的概念
    */
    let bar = foo;
    println!("{:?} {:?}", foo, bar);
}
语义是什么意思
以移动语义为例,在 Rust 中,变量绑定默认具有移动语义。但这究竟意味着什么?要理解这一点,我们需要考虑如何在程序中使用变量。我们创建值或资源并将它们分配给变量,以便在程序中可以方便地引用它们。这些变量是指向值所在内存地址的名称。现在,诸如读取、赋值、添加及将它们传递给函数等对变量的操作,在访问变量指向值的方式上可能具有不同的语义或含义。在静态类型语言中,这些语义大致分为移动语义和复制语义。
移动语义:变量访问或重新分配时默认
通过变量访问或重新分配给变量时移动到接收项的值表示移动语义。
由于Rust 的仿射类型系统,它默认会采用移动语义。仿射类型系统的一个突出特点是值或资源只能使用一次,而 Rust 通过所有权规则展示此属性。
复制语义
默认情况下,通过变量分配或访问,以及从函数返回时复制的值(例如按位复制)具有复制语义。这意味着该值可以使用任意次数,每个值都是全新的。
使用Copy特征更改语义
Rust 中的移动语义有时会受到限制。幸运的是,通过实现 Copy 特征可以更改类型的行为以遵循复制语义。基元和其他仅适用于堆栈的数据类型在默认情况下实现了上述特征,这也是前面的基元代码能够正常工作的原因
// making_copy_types.rs

#[derive(Copy, Debug)]  // the trait `Clone` is not implemented for `Dummy`
struct Dummy;

fn main() {
    let a = Dummy;
    let b = a;
    println!("{:?}", a);
    println!("{:?}", b);
}
Copy 特征依赖于Clone 特征
Clone 是 Copy 的父级特征, 任何实现 Copy 特征的类型必须实现 Clone。
// making_copy_types.rs

// 可以在派生注释中的 Copy 旁边添加 Clone 特征来让该示例通过编译
#[derive(Copy, Clone, Debug)]
struct Dummy;

fn main() {
    let a = Dummy;
    let b = a;
    println!("{:?}", a);
    println!("{:?}", b);
}
区别一下Copy与Clone trait
Copy 和 Clone 特征传达了在代码中使用类型时如何进行复制的原理。
|特征|复制方式|复制内容|使用场景| |::----|:--:--------|:--:--------|:--:--------| |Copy|隐式,自动化特征|堆栈|可以在堆栈上单独表示的小型值| |Clone|显式调用clone|堆+栈|在堆上还包含一个值作为其表示的一部分|
Copy
- Copy 特征通常用于可以在堆栈上完全表示的类型, 也就是说它们自身没有任何部分位于堆上。
- 如果出现了这种情况,那么 Copy 将是开销很大的操作,因为它必须从堆中复制值。这直接影响到赋值运算符的工作方式。
- 如果类型实现了 Copy,则从一个变量到另一个变量的赋值操作将隐式复制数据。
Clone
Clone 特征用于显式复制, 并附带 clone 方法, 类型可以实现该方法以获取自身的副本
Clone 有一个名为 clone 的方法,用于获取接收者的不可变引用,即&self,并返回相同类型的新值。用户自定义类型或任何需要提供能够复制自身的包装器类型,应通过实现clone 方法来实现 Clone 特征
一个通过 Clone 特征复制类型的示例
// explicit_copy.rs

// 在 derive 属性中添加了一个 Clone 特征。
#[derive(Clone, Debug)]
struct Dummy {
    items: u32,
}

fn main() {
    let a = Dummy { items: 54 };
    // 有了Clone, 我们就可以在 a 上调用 clone 方法来获得它的新副本
    let b = a.clone();
    println!("a: {:?}, b: {:?}", a, b);
}
Copy与Clone的使用原则
何时在类型上实现 Copy
可以在堆栈上单独表示的小型值如下所示。
- 如果类型仅依赖于在其上实现了 Copy 特征的其他类型, 则 Copy 特征是为其隐式实现的。
- Copy 特征隐式影响赋值运算符的工作方式。 使用 Copy 特征构建自定义外部可见类型需要考虑它是否会对赋值运算符产生影响。 如果在开发的早期阶段, 你的类型是Copy,后续将它移除之后则会影响使用该类型进行赋值的所有环节。你可以通过这种方式轻松地破坏 API。
何时在类型上实现 Clone。
- Clone 特征只是声明一个 clone 方法,需要被显式调用。
- 如果你的类型在堆上还包含一个值作为其表示的一部分, 那么可选择实现 Clone 特征,这也需要向复制堆数据的用户明确表示。
- 如果要实现智能指针类型(例如引用计数类型) ,那么应该在类型上实现 Clone 特征,以便仅复制堆栈上的指针。
所有权使用场景
重要的是我们能够识别它和编译器给出的错误提示信息
let绑定示例
将参数传递给函数
如果将参数传递给函数,那么相同的所有权规则也同样有效
// ownership_functions.rs

fn take_the_n(n: u8) {}

fn take_the_s(s: String) {}

fn main() {
    let n = 5;
    let s = String::from("string");
    // take_the_n 函数能够正常工作,是因为 u8(基元类型)实现了 Copy 特征
    take_the_n(n);
    /*
        String 并没有实现 Copy 特征,因此值的所有权在 take_the_s 函数中会发生移动。
        当函数返回时,相关值的作用域也随之结束,并且会在 s 上调用 drop 方法,
        这会释放 s 所使用的堆内存。
        因此,在函数调用结束后 s 将失效
        使用clone即可通过编译:take_the_s(s.clone())
    */
    take_the_s(s);

    println!("n is {}", n);
    println!("s is {}", s);
}
如果我们只需要变量 s 的读取访问权限,那么可以让该代码正常工作的另一种方法是将字符串 s 传递回 main 函数
// ownership_functions_back.rs

fn take_the_n(n: u8) {}

// 添加了一个返回类型
fn take_the_s(s: String) -> String {
    println!("inside function: {}", s);
    // 并将传递的字符串返回给调用者
    s
}

fn main() {
    let n = 5;
    let s = String::from("string");

    take_the_n(n);
    let s = take_the_s(s);

    println!("n is {}", n);
    println!("s is {}", s);
}
match表达式
在 match 表达式中,移动类型默认也会被移动
// ownership_match.rs

#[derive(Debug)]
enum Food {
    Cake,
    Pizza,
    Salad,
}

#[derive(Debug)]
struct Bag {
    food: Food,
}

fn main() {
    let bag = Bag { food: Food::Cake };
    match bag.food {
        Food::Cake => println!("I got cake"),
        a => println!("I got {:?}", a) // value partially moved here
    }

    println!("{:?}", bag); // value borrowed here after partial move
}
impl代码块
impl 代码块中,任何以 self 作为第一个参数的方法都将获取调用该方法的值的所有权。这意味着对值调用方法后,你无法再次使用该值
// ownership_methods.rs

struct Item(u32);

impl Item {
    fn new() -> Self {
        Item(1024)
    }
    /*
        以 self 作为第 1 个参数的实例方法。
        在调用之后, 它将在方法内移动, 并在函数作用域结束时被释放。
        后续我们将不能再使用它
    */
    fn take_item(self) {
        // does nothing
    }
}

fn main() {
    let it = Item::new(); // move occurs because `it` has type `Item`, which does not implement the `Copy` trait
    it.take_item(); // `it` moved due to this method call
    println!("{}", it.0); // value borrowed here after move
}
闭包
闭包接收不同的值取决于在其内部使用变量的方式
// ownership_closures.rs

#[derive(Debug)]
struct Foo;

fn main() {
    let a = Foo;

    /*
        Foo 的所有权在闭包中已经默认移动到了 b,
        用户将无法再次访问 a。
    */
    // let closure = move || {
    let closure = || {
        let b = a;
    };

    println!("{:?}", a);
}
借用: 通过引用规避所有权规则限制
为何需要借用/引用
Rust的所有权规则非常严格, 因为它只允许我们使用类型一次。 如果函数只需要对值的读取访问权限,那么我们需要再次从函数返回值,或者在它传递给函数之前复制它。如果类型没有实现 Clone 特征,那么后者可能无法实现其目的。 复制类型看起来似乎很容易绕过所有权规则,但是由于 Clone 总是复制类型,可能会调用内存分配器 API,这是一种涉及系统调用,并且开销高昂的操作,因此它无法满足零成本抽象承诺的所有要点。 随着移动语义和所有权规则的实施,在 Rust 中编写程序很快就会变得困难重重。幸运的是,我们引入了借用和引用类型的概念,它们放宽了规则所施加的限制,但仍然能够在编译期确保兼容所有权规则。
借用的概念是规避所有权规则的限制。进行借用时,你不会获取值的所有权,而是根据需要提供数据。这是通过借用值,即获取值的引用来实现的。为了借用值,我们需要将运算符&放在变量之前,&表示指向变量的地址。
借用 or 引用?
两种借用方式
不可变借用:&
当我们在类型之前使用运算符&时,就会创建一个不可变借用。
// ownership_basics.rs

#[derive(Debug)]
struct Foo;

fn main() {
    let foo = Foo;
    /*
        注意变量 foo 之前的&。我们借用 foo 并将借用结果分配给 bar。
        bar 的类型为&Foo, 这是一种引用类型。
        作为一个不可变借用,我们不能通过 bar 改变 Foo 中的值
     */
    let bar = &foo;
    println!("Foo is {:?}", foo);
    println!("Bar is {:?}", bar);
}
可变借用:&mut
可以使用&mut 运算符对某个值进行可变借用。 通过可变借用, 你可以改变该值。
// mutable_borrow.rs

fn main() {
    // 可变借用需要可变变量,所以这里会报错,可以加上mut
    let a = String::from("Owned string");
    /*
        用&mut a 创建了一个该值的可变借用。
        这并没有将 a 移动到 b
        只是可变地对它借用。
    */
    let a_ref = &mut a;
    a_ref.push('!');
}
可变借用可以改变值,但是不能销毁该值,因为它不是所有者。 如果a 在借用它的代码行之前被销毁,则借用失效
{{#check 检查是否更新 | 借用失效情况并不存在}}
// exclusive_borrow.rs

fn main() {
    let mut a = String::from("Owned string");
    let a_ref = &mut a;
    a_ref.push('!');
    println!("{}", a);
}
四种借用情况
指针引用
access to non-owned memory
references guard referents
raw pointers
借用规则
通过引用来维护单一的所有权语义。这些规则如下所示
- 一个引用的生命周期可能不会超过其被引用的时间。 这是显而易见的, 因为如果它的生命周期超过其被借用的时间,那么它将指向一个垃圾值(被销毁的值) 。
- 如果存在一个值的可变借用,那么不允许其他引用(可变借用或不可变借用)在该作用域下指向相同的值。可变借用是一种独占性借用。
- 如果不存在指向某些东西的可变借用, 那么在该作用域下允许出现对同一值的任意数量的不可变借用
如果违反借用规则
函数中的借用
// borrowing_functions.rs

// 接收可变借用作为参数
fn take_the_n(n: &mut u8) {
    *n += 2;
}

fn take_the_s(s: &mut String) {
    s.push_str("ing");
}

fn main() {
    // 变量绑定必须是可变
    let mut n = 5;
    let mut s = String::from("Borrow");
    // 因为函数内做了修改,所以调用时也需要使用可变借用
    take_the_n(&mut n);
    take_the_s(&mut s);

    println!("n changed to {}", n);
    println!("s changed to {}", s);
}
匹配中的借用
// ownership_match.rs

#[derive(Debug)]
enum Food {
    Cake,
    Pizza,
    Salad
}

#[derive(Debug)]
struct Bag {
    food: Food
}

fn main() {
    let bag = Bag { food: Food::Cake };
    match bag.food {
        Food::Cake => println!("I got cake"),
        // 以 ref 作为前缀。
        // 关键字 ref 可以通过引用来匹配元素,而不是根据值来捕获它们。
        ref a => println!("I got {:?}", a)
    }

    println!("{:?}", bag);
}
从函数返回引用:
// return_func_ref.rs

fn get_a_borrowed_value() -> &u8 { // expected named lifetime parameter
    let x = 1;
    &x
}

fn main() {
    let value = get_a_borrowed_value();
}
基于借用规则的方法类型
借用规则还规定了如何定义类型的固有方法和特征的实例方法。以下是它们接收实例的方式,并且是根据限制由少到多排列的。
- &self 方法:这些方法只对其成员具有不可变的访问权限。
- &mut self 方法:这些方法能够可变地借用 self 实例。
- self 方法:这些方法拥有调用它的实例的所有权,并且类型在后续调用时将失效。
对于自定义类型,相同的借用规则也适用于其作用域成员。
生命周期:针对引用附加的信息
从变量生命周期开始
生命周期限定
生命周期注解
生命周期省略(Lifetime Elision)
销毁(Destructors)
智能指针
所有权共享
参考资源
online-book
- What is Ownership? - The Rust Programming Language
- 生命周期省略规则(Lifetime elision) - The Rust Reference
- Destructors - The Rust Reference
- Lifetime elision - The Rust Reference
- Understanding Ownership - The Rust Programming Language
fragment
local
类型系统起源
我们为什么需要在语言中使用类型?
这是一个很好的问题,可以作为理解编程语言类型系统的契机。
1. 从二进制数据格式到汇编
作为程序员,我们知道为计算机编写的程序在最底层是以 0 和 1 组成的二进制数据格式表示的。实际上,最早的计算机必须使用机器代码手动编程。最终,程序员意识到这样做非常容易出错,并且乏味、耗时。对大部分人来说,在二进制层面操作和推断这些实体是不切实际的。 到了 20 世纪 50 年代, 编程社区提出了机器代码助记符的概念, 这些助记符变成了今天我们熟知的汇编语言。
2. 从汇编到编程语言,类型系统应运而生
然后,编程语言应运而生,它们被编译成汇编代码,并允许编程人员编写人类可理解的代码,以方便计算机将其编译成机器代码。然而,大家平时所说的语言表达某些语义比较模糊,因此需要制定一套规则和条件,来表述用类似人类语言编写的计算机程序中可能或不可能存在的内容,即程序语义。这使得我们提出了类型和类型系统的理念。
3. 再来认真看看类型系统
类型是一组具名的可能值。例如,u8 是一种可能包含 0~255 的正数值类型。类型提供了一种方法来弥合我们创建的这些实体的底层表示与心理模型之间的差距。除此之外, 类型还为我们提供了表示实体的意图、行为和约束的方法:
它们定义了用户通过类型能够(不能够) 做什么。 例如, 它没有定义将字符串类型的值和数值类型的值相加的结果是什么。
4. 类型系统其实是一组规则
从类型来看,语言设计者构建了类型系统,这些系统是一组规则,用于管理不同类型在编程语言中的交互。它们可以用作推断程序的工具,并有助于确保程序能够正常运行并符合规范。类型系统根据其表达力进行限定,这仅表示你可以使用类型表达逻辑的程度,以及程序中的不变量。
例如 Haskell 是一种高级语言,它具有非常丰富的表现力的类型系统,而C 语言是一种低级语言,它只为我们提供了很少的基于类型的抽象。Rust 试图在这两个极端之间找到一种平衡。
5. 类型系统是对内存管理/安全的抽象
动态类型大小
类型布局
内部可变性
子类型与协变
强制转换(type coercions)
参考资料
online-book
- Dynamically Sized Types - The Rust Reference
- Type layout - The Rust Reference
- Interior mutability - The Rust Reference
- Subtyping and Variance - The Rust Reference
- Type coercions - The Rust Reference
fragment
local
基础内置类型
基元类型
序列类型
自定义类型
函数类型
指针类型
特征类型
参考资源
online-book
fragment
local
集合类型
参考资源
online-book
fragment
local
自定义类型
参考资源
online-book
fragment
local
泛型、特征及特征对象

- 泛型、特征及特征对象
泛型
从代码复用出发
函数作用不足
一直以来,函数的实现方式就是基于c语言的goto指令:
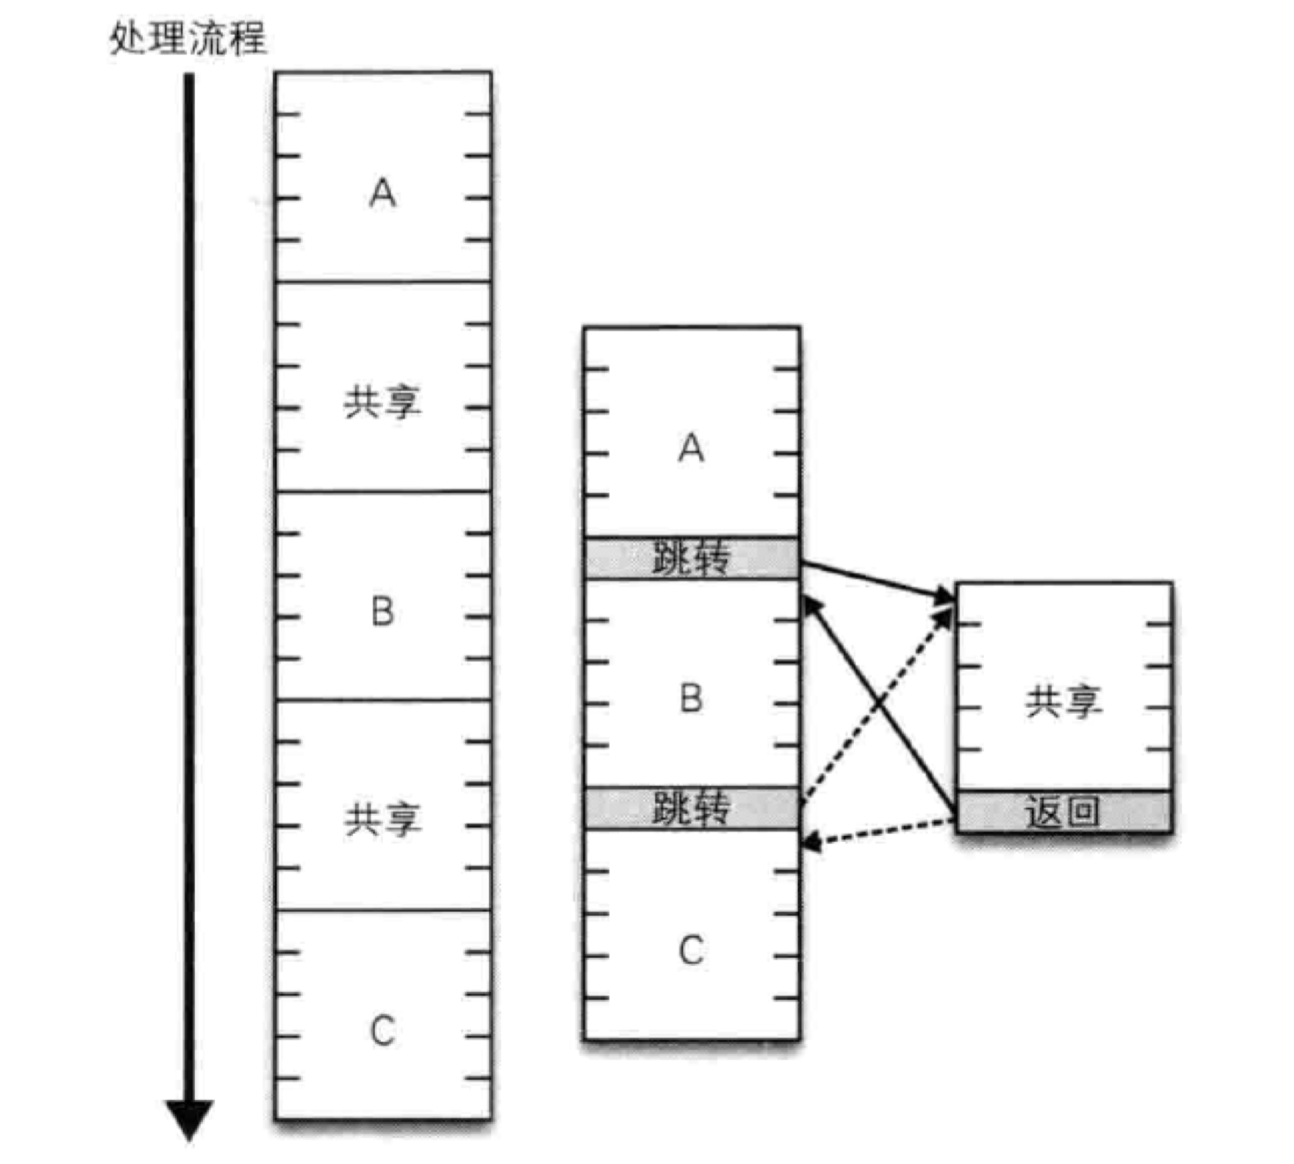
通过进一步强化,就得到函数的实现方式:
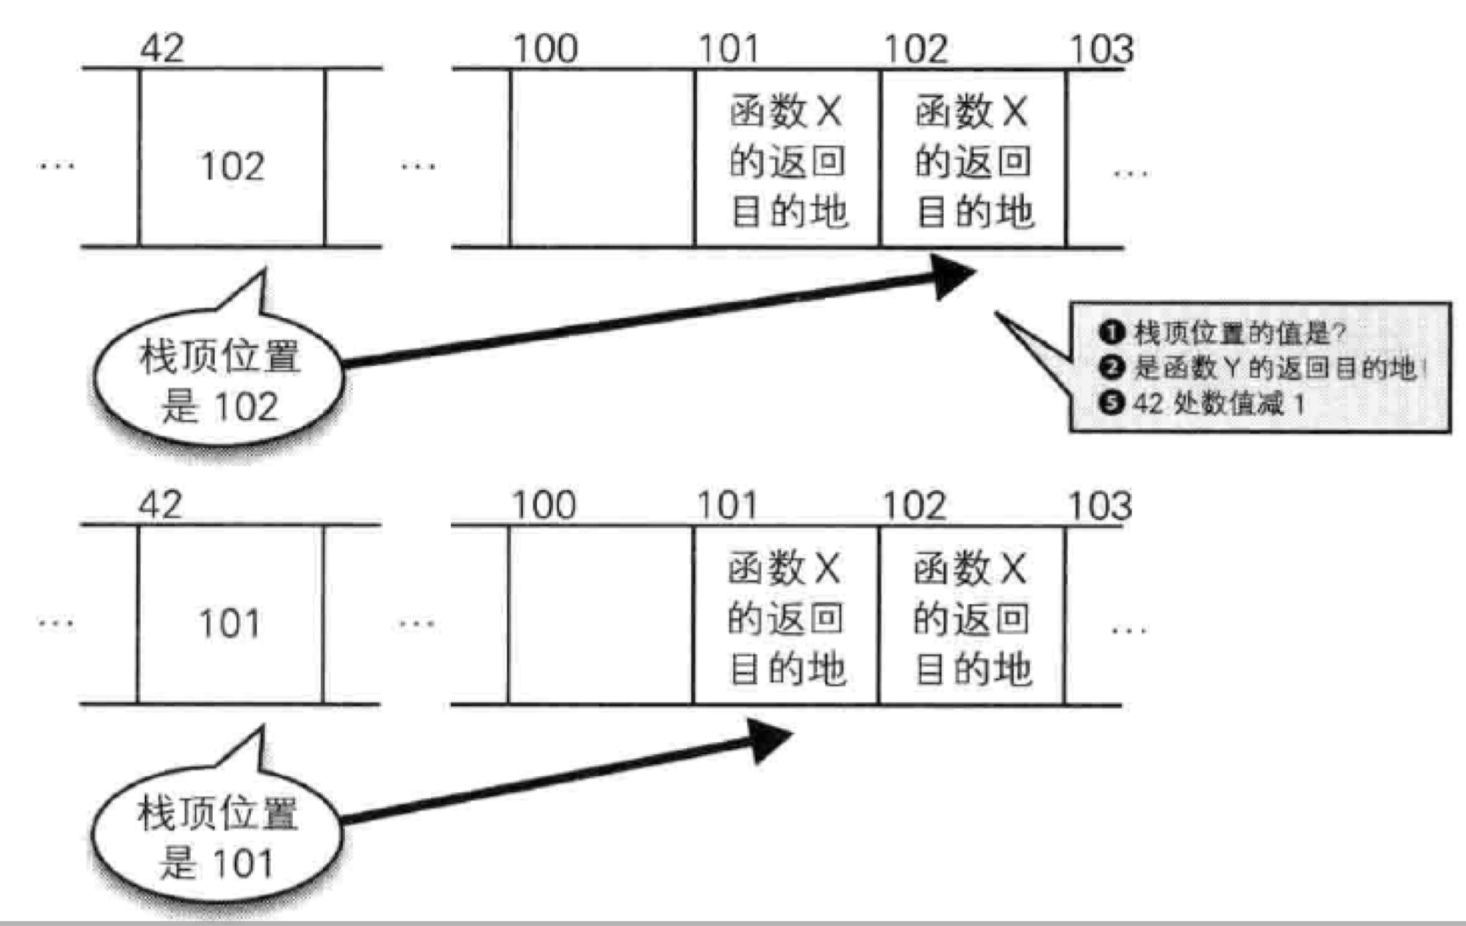
但是也就这样了,函数只能实现流程上的复用,不能实现类型上的复用。这一点其实在python、js这些动态类型语言上面就不存在这个问题。对于Rust这种静态类型语言,对函数入参类型要求十分严格,于是泛型就应运而生。
静态类型语言还需要泛型来复用代码
泛型编程是一种仅适用于静态类型编程语言的技术。它首次出现在 ML 语言中,是一种静态类型的函数式语言。
像 Python 这样的动态语言采用的是简单类型 (duck typing) , 其中的 API 是根据它们可以做什么,而不是它们是什么来处理参数的,因此不依赖于泛型。
泛型是语言设计特性的一部分, 可以实现代码复用, 并遵循不重复自己的原则 (Don’t Repeat Yourself,DRY) 。采用这种技术,你可以使用类型占位符来编写算法、函数、方法及类型, 并在这些类型上指定一个类型变量( 使用单个字母,通常是 T、K 或 V) ,告知编译器在任何代码中实例化它们时要填充的实际类型。这些类型被称为泛型或元素。单个字母(例如类型 T)被称为泛型参数。当你使用或实例化任何泛型元素时,它们会被替换成诸如 u32 这样的具体类型。
泛型本质上是一种单态化
每次将泛型元素与具体类型一起使用时,都会在编译时用类型变量 T 生成该代码的特定副本,并将其替换为具体类型。这种在编译时生成包含具体类型的专用函数的过程被称为单态化,这是执行与多态函数相反的过程。
泛型使用方式
在使用泛型时,应该多去考虑它与不同元素结合使用的场景背后的思维方式。泛型可以与结构体、枚举、函数、特征、方法及代码实现块。它们的一个共同特征是泛型的参数是由一对尖头括号分隔,并包含于其中。
泛型函数
为了创建泛型函数,我们需要将泛型参数放在函数名之后和圆括号之前,如下所示:
// generic_function.rs

fn give_me<T>(value: T) {
    let _ = value;
}

fn main() {
    let a = "generics";
    let b = 1024;
    give_me(a);
    give_me(b);
}
泛型结构体
// generic_struct.rs

struct Container<T> {
    item: T,
}

impl<T> Container<T> {
    fn new(item: T) -> Self {
        Container { item }
    }
}

impl Container<u32> {
    fn sum(item: u32) -> Self {
        Container { item }
    }
}

fn main() {
    // todo
}
泛型枚举体
// generic_enum.rs

enum Transmission<T> {
    Signal(T),
    NoSignal,
}

fn main() {
    // stuff
}
泛型特征
泛型方法
impl: 泛型实现块
泛型实现
当为任何泛型编写 impl 代码块时,都需要在使用它之前声明泛型参数。T 就像一个变量—— 一个类型变量,我们需要先声明它 impl代码块实际上意味着我们正在为所有类型 T 实现这些方法,它们会出现在 Container
中。这个 impl 代码块是一个泛型实现。 因此,生成的每个具体 Container 都将有这些方法。
// generic_struct_impl.rs

struct Container<T> {
    item: T,
}

impl<T> Container<T> {
    fn new(item: T) -> Self {
        Container { item }
    }
}

fn main() {
    // stuff
}
专门化泛型
在这里, 由于 u32 是作为具体类型存在的, 因此我们不需要 impl 之后的
, 这是 impl 代码块的另外一个特性,它允许你通过独立实现方法来专门化泛型。 现在,我们也可以通过将 T 替换为任何具体类型来为 Container 编写更具体的 impl 代码块。以下就是它的实例:
impl Container<u32> {
    fn sum(item: u32) -> Self {
        Container { item }
    }
}
指定类型进行实例化
每当我们进行实例化时, 编译器需要在其类型签名中知道 T 的具体类型以便替换,这为其提供了将泛型代码单态化的类型信息。 而具体类型的确定主要有三种方式:
- 大多数情况下,具体类型是基于类型的实例化推断.
- 对泛型函数调用某些方法来接收具体类型。
- 在极个别情况下, 我们需要通过使用
turbofish (::<>)运算符输入具体类型来替代泛型以便辅助编译器识别。
基于类型实例化推断
这是最常见的方式,主要基于类型特征(trait)。
泛型函数调用某些方法
// using_generic_func.rs

use std::str;

fn main() {
    let num_from_str = str::parse::<u8>("34").unwrap();
    println!("Parsed number {}", num_from_str);
}
turbofish: ::<>
- 如果没有任何类型特征,代码将无法编译:👇
fn main() {
    let a = Vec::new();
}
- 这时可以用下列三种方式指定
// using_generic_vec.rs

fn main() {
    // providing a type
    let v1: Vec<u8> = Vec::new();

    // or calling method
    let mut v2 = Vec::new();
    v2.push(2); // v2 is now Vec<i32>

    // or using turbofish
    let v3 = Vec::<u8>::new(); // not so readable
}
特征
从多态和代码复用的角度来看: 接口、鸭子类型还是特征?
从多态和代码复用的角度来看, 在代码中将类型的共享行为和公共属性与其自身隔离通常是一个好主意,并且能拥有专属于自己的方法。在这样做时,我们允许不同类型通过通用属性互相关联,使我们能够为 API 编程,使其参数更通用或更具包容性。
这意味着我们可以接收具有这些通用属性的类型,而不仅限于某种特定类型。
接口
类似 Java 和 C#的面向对象编程语言中,接口表达了相同的理念,我们可以在其中定义多种类型能够实现的共享行为。例如,我们可以使用单个 sort 函数接收实现 Comparable 或者 Comparator 接口的元素列表,而不是使用多个 sort 函数接收整数值列表,以及用其他函数接收字符串值列表。这使得我们可以将任何可比较(Comparable)的内容传递给 sort 函数。
鸭子类型
而Python同样有明确的特性,被称为“鸭子类型“.
“当看到一只鸟走起来像鸭子、游泳起来像鸭子、叫起来也像鸭子,那么这只鸟就可以被称为鸭子。”
在鸭子类型中,关注点在于对象的行为,能做什么;而不是关注对象所属的类型。例如,在不使用鸭子类型的语言中,我们可以编写一个函数,它接受一个类型为“鸭子”的对象,并调用它的“走”和“叫”方法。在使用鸭子类型的语言中,这样的一个函数可以接受一个任意类型的对象,并调用它的“走”和“叫”方法。如果这些需要被调用的方法不存在,那么将引发一个运行时错误。任何拥有这样的正确的“走”和“叫”方法的对象都可被函数接受的这种行为引出了以上表述,这种决定类型的方式因此得名。
鸭子类型通常得益于“不”测试方法和函数中参数的类型,而是依赖文档、清晰的代码和测试来确保正确使用。
在常规类型中,我们能否在一个特定场景中使用某个对象取决于这个对象的类型,而在鸭子类型中,则取决于这个对象是否具有某种属性或者方法——即只要具备特定的属性或方法,能通过鸭子测试,就可以使用。
特征
Rust也有一个类似且功能强大的结构,被称为特征。Rust中的特征以多种形式存在, 我们将介绍一些最常见的形式并了解一些与它们简单交互的方式。此外,当特征与泛型搭配使用时,可以限制传递到 API 的参数范围。我们将会对特征进行比较深入的了解。
特征到底是什么?
特征的多种表现形式
标记(特征)
简单(特征)
泛型(特征)
关联类型(特征)
继承(特征)
一些常用内置特征
自动特征(Auto Traits)
Send & Sync
Unpin、 UnwindSafe & RefUnwindSafe
Debug
这个特征有助于在控制台上输出类型以便进行调试。在组合类型的情况下,类型将以类似 JSON 的格式输出,其中带有花括号和其他括号,如果类型是字符串,将会用引号标识。这适用于 Rust 中的大多数内置类型。
PartialEq 和 Eq
这些特征允许两个元素相互比较以验证是否相等
Copy和Clone
这些特征定义了类型的复制方式。 简而言之,当在任何自定义类型上自动派生时,这些特征允许用户从实例创建新的副本:
- 可以在实现 Copy 时隐式创建
- 也可以在实现 Clone 时通过调用 clone() 显式创建。
请注意,Copy 依赖于在类型上实现的 Clone 特征
Display
Add
Into 和 From
Drop
Deref & DerefMut
SizedSpecial types and traits - The Rust Reference
一个完整例子
// complex/src/lib.rs

use std::ops::Add;

/*
将#[derive(Default)] 属性实现为一个过程宏,可以自动实现它修饰的类型的特征。
此自动派生要求任何自定义类型的字段(例如结构体或枚举)本身必须实现 Default 特征。
使用它们继承特征仅适用于结构体、枚举及联合。
*/
#[derive(Default, Debug, PartialEq, Copy, Clone)]
struct Complex<T> {
    // Real part
    re: T,
    // Complex part
    im: T,
}

impl<T> Complex<T> {
    // new 函数实际上并不是一个特殊的构造函数(如果你只了解带有构造函数的语言),
    // 而是社区采用的一个常用名称(作为创建新类型实例的方法名) 。
    fn new(re: T, im: T) -> Self {
        Complex { re, im }
    }
}

// 来自 std::ops 模块的 Add 特征允许我们使用“+”运算符将两个复数相加
/*
1. impl<T: Add<T, Output=T>表示我们正在为泛型 T 实现 Add,其中 T 实现 Add<T, Output=T>。
2. <T, Output=T>部分表示 Add 特征的实现必须具有相同的输入和输出类型
3. Add for Complex<T>部分表示为 Complex<T>类型实现 Add 特征
4. T:Add 表示必须实现 Add 特征。如果没有实现,那么我们不能使用“+”运算符
*/
impl<T: Add<T, Output=T>> Add for Complex<T> {
    type Output = Complex<T>;
    // Add 特征提供的核心功能,是我们在两种实现类型之间使用“+”运算符时调用的方法。
    // 它是一个实例方法,通过值获取 self 并接收 rhs 作为参数,即特征定义中的 RHS。
    fn add(self, rhs: Complex<T>) -> Self::Output {
        Complex { re: self.re + rhs.re, im: self.im + rhs.im }
    }
}

// 来自 std::convert 模块的 Into 和 From 特征使用户能够根据其他类型创建复数类型
/*
1. 如果我们可以从内置基元类型 (例如双元素元组) 构造 Complex 类型
   其中第 1 个元素是实部,第 2 个元素是虚部,将会很方便。
   我们可以通过实现 From 特征来达到此目的。
2. 此特征定义了一个 from 方法, 为我们提供了在类型之间进行转换的一般方法
3. 第一个<T>是泛型 T 的声明, 第二个和第三个<T>是泛型类型 T 的用途。 我们会根据(T,T) 类型创建它
*/
impl<T> From<(T, T)> for Complex<T> {
    /*
        当我们实现它时, 只需要用我们希望实现它的类型替换 T 并实现 from 方法,
        然后我们就可以在相关类型上调用该方法。
        这是一个将 Complex 值转换为双元素元组类型的实现, Rust本身就能识别它
    */
    fn from(value: (T, T)) -> Complex<T> {
        Complex { re: value.0, im: value.1 }
    }
}

use std::fmt::{Formatter, Display, Result};

// Display 特征能够输出人类可读版本的复数类型
impl<T: Display> Display for Complex<T> {
    fn fmt(&self, f: &mut Formatter) -> Result {
        // 为了让用户能够以数学符号的形式查看复数类型
        write!(f, "{} + {}i", self.re, self.im)
    }
}

// 一个简单的初始化测试用例。
#[cfg(test)]
mod tests {
    use crate::Complex;

    #[test]
    fn complex_basics() {
        let first = Complex::new(3, 5);
        let second: Complex<i32> = Complex::default();
        assert_eq!(first.re, 3);
        assert_eq!(first.im, 5);
        assert!(second.re == second.im);
    }

    #[test]
    fn complex_addition() {
        let a = Complex::new(1, -2);
        let b = Complex::default();
        let res = a + b;
        assert_eq!(res, a);
    }

    #[test]
    fn complex_from() {
        let a = (2345, 456);
        let complex = Complex::from(a);
        assert_eq!(complex.re, 2345);
        assert_eq!(complex.im, 456);
    }

    #[test]
    fn complex_display() {
        let my_imaginary = Complex::new(2345, 456);
        println!("{}", my_imaginary);
    }
}
// 最后使用cargo test -- --nocapture执行
特征区间:泛型+特征
引出特征区间
首先看一下如下代码:
// trait_bounds_intro.rs

struct Game;

struct Enemy;

struct Hero;
/*
在 Game 类型上我们有一个泛型函数 load,它可以接收任何游戏实体,
并通过任意 T 调用 init()将其加载到我们的游戏世界中。
但是,这个示例无法通过编译
*/
impl Game {
    fn load<T>(&self, entity: T) {
        entity.init(); // method not found in `T`
    }
}

fn main() {
    let game = Game;
    game.load(Enemy);
    game.load(Hero);
}
- 因此, 任何类型为 T 的泛型函数都不能知道或默认假定 init()方法存在于 T 之上。
- 如果确实如此,那么它根本不是泛型,并且它们只能接收具有 init()方法的类型。
- 因此,有一种方法可以让编译器知道这一点,并约束 load 通过特征能够接收的类型集,这就需要用到特征区间。
我们可以定义一个名为 Loadable 的特征,并在我们的 Enemy 和 Hero 类型上实现它。
// trait_bounds_intro.rs

struct Game;

struct Enemy;

struct Hero;

trait Loadable {
    fn init(&self);
}
/*
我们分别为 Enemy 和 Hero 实现了 Loadable,还修改了 load 方法
*/
impl Loadable for Enemy {
    fn init(&self) {
        println!("Enemy loaded");
    }
}

impl Loadable for Hero {
    fn init(&self) {
        println!("Hero loaded");
    }
}

impl Game {
    /*
        我们必须在泛型声明旁边放置几个符号来指定特征,我们称之为特征区间
    */
    fn load<T: Loadable>(&self, entity: T) {
        entity.init();
    }
}

fn main() {
    let game = Game;
    game.load(Enemy);
    game.load(Hero);
}
- 注意, “:Loadable”部分表明了我们指定特征范围的方式。特征区间允许我们限制泛型 API 可以接收的参数范围。
代码单体化
- 指定泛型元素上的绑定的特征类似于我们为变量指定类型的方式
- 但是此处的变量是泛型 T,类型是某些特征。例如 T:SomeTrait。
- 定义泛型函数时几乎总是会用到特征区间。
- 如果定义的泛型函数中的 T 不包含任何特征区间,我们就不能通过任何方法调用,因 Rust 不知道给定方法实现的方式。
- 它需要知道 T 是否具有某个 foo 方法,以便将代码单体化
// trait_bounds_basics.rs

// 我们有一个方法 add_thing,它可以添加任何类型 T。
fn add_thing<T>(fst: T, snd: T) {
    // 编译器向用户建议在 T 上添加特征区间 Add
    // help: consider restricting type parameter `T`
    let _ = fst + snd;
}

fn main() {
    add_thing(2, 2);
}
修正后
// trait_bound_basics_fixed.rs

use std::ops::Add;

// 代码修改之后,我们将“:Add”添加到了 T 的后面,之后代码通过了编译
fn add_thing<T: Add>(fst: T, snd: T) {
    let _ = fst + snd;
}

fn main() {
    add_thing(2, 2);
}
指定特征区间的四个方法
区间内泛型: fn fn_name<T: target_trait>(val: T)
#![allow(unused)]
fn main() {
// 指定特征区间的一种方法, 它会接收任何实现了 Display 特征的类型
fn show_me<T: Display>(val: T) {
    //可以使用{}格式化字符串,因为有Display特征区间
    printin!("{}", val);
}
}
- 这是在泛型函数的类型签名的长度较短时声明特征区间的常见语法。
- 在指定类型的特征区间时,此语法也有效
where语句: 当第一种方法签名过长时使用
#![allow(unused)]
fn main() {
pub fn parse<F>(&self) -> Result<F, <F as FromStr>::Err>
    where F: FromStr { ... }
}
注意“where F: FromStr”部分告诉我们 F 类型必须实现 FromStr 特征。where 语句将特征区间和函数签名解耦,并使其可读
使用“+“组合多个特征
- 先看一下标准库中 HashMap 类型的 impl 代码块:
#![allow(unused)]
fn main() {
// HashMap 键类型的 K 必须实现 Hash 特征和 Eq 特征
impl<K: Hash + Eq, V> HashMap<K, V, RandomState>
{}
}
- 一个更加具体的例子
// traits_composition.rs

trait Eat {
    fn eat(&self) {
        println!("eat");
    }
}

trait Code {
    fn code(&self) {
        println!("code");
    }
}

trait Sleep {
    fn sleep(&self) {
        println!("sleep");
    }
}

// 创建了一个新的特征 Programmer,它由 3 个特征组合而成:Eat、Code、 Sleep。
// 通过这种方式, 我们对类型设置了约束:
// 因此如果类型 T 实现了 Programmer, 那么它必须实现上述所有特征
trait Programmer: Eat + Code + Sleep {
    fn animate(&self) {
        self.eat();
        self.code();
        self.sleep();
        println!("repeat!");
    }
}

struct Bob;

impl Programmer for Bob {}

impl Eat for Bob {}

impl Code for Bob {}

impl Sleep for Bob {}

fn main() {
    Bob.animate();
}
使用impl特征语法: 闭包常用
// impl_trait_syntax.rs

use std::fmt::Display;

/*
直接使用了 impl Display,而不是指定 T:Display。这是 impl 特征语法。
这为我们返回复杂或不方便表示的类型(例如函数的闭包)提供了便利
*/
fn show_me(val: impl Display) {
    println!("{}", val);
}

fn main() {
    show_me("Trait bounds are awesome");
}
如果没有这种语法,则必须使用 Box 智能指针类型将其放在指针后面返回,这涉及堆分配。 闭包的底层结构由实现了一系列特征的结构体组成。Fn(T) -> U 特征就是其中之一
闭包使用示例:
// impl_trait_closure.rs
// 它接收两个数字,并返回将这两个数字相加的闭包
fn lazy_adder(a: u32, b: u32) -> impl Fn() -> u32 {
    move || a + b
}

fn main() {
    // 调用 lazy_adder,传入两个数字。
    // 这会在 lazy_adder 中创建一个闭包,但不会对其进行求值
    let add_later = lazy_adder(1024, 2048);
    println!("{:?}", add_later());
}
还可以在入参和返回使用:
// impl_trait_both.rs

use std::fmt::Display;

/*
1. 会接收任何 Display 特征的参数
2. 返回的类型是 impl Display
*/
fn surround_with_braces(val: impl Display) -> impl Display {
    format!("{{{}}}", val)
}

fn main() {
    println!("{}", surround_with_braces("Hello"));
}
- 通常建议将特征区间的 impl 特征语法用做函数的返回类型。
- 在参数位置使用它意味着我们不能使用 turbofish 运算符。
- 如果某些相关代码使用 turbofish 运算符来调用软件包中的某个方法,那么可能导致 API 不兼容。
- 只有当我们没有可用的具体类型时才应该使用它, 就像闭包那样。
特征区间的使用场景
在类型上使用:不建议
// trait_bounds_types.rs

use std::fmt::Display;

// 写法一:区间内泛型
struct Foo<T: Display> {
    bar: T,
}

// 写法二:where语句解耦
struct Bar<F>
    where
        F: Display,
{
    inner: F,
}

fn main() {}
不过,我们并不鼓励在类型上使用特征区间,因为它对类型自身施加了限制。 通常, 我们希望类型尽可能是泛型,从而允许我们使用任何类型创建实例,并使用函数或方法中的特征区间对其行为进行限制。
泛型函数+impl代码块
// trait_bounds_functions.rs

use std::fmt::Debug;

trait Eatable {
    fn eat(&self);
}

// 指定类型必须是 Debug,以便其可以在方法内部输出到控制台
#[derive(Debug)]
struct Food<T>(T);

#[derive(Debug)]
struct Apple;

// 为了让 apple 是“可食用”的,我们实现了 Food 的 Eatable 特征
impl<T> Eatable for Food<T>
    where
        T: Debug,
{
    fn eat(&self) {
        println!("Eating {:?}", self);
    }
}

// 注意 eat 的特点,类型 T 必须实现 Eatable 特征。
fn eat<T>(val: T)
    where
        T: Eatable,
{
    val.eat();
}

fn main() {
    let apple = Food(Apple);
    eat(apple);
}
特征对象: 多态特征类型
分发(dispatch)
分发是一个从面向对象编程范式中借鉴的概念,主要用于描述被称为多态的上下文中的一种特性。 在面向对象程序设计(Object-Oriented Programming,OOP)中,当 API 是泛型或者接收实现为接口的参数时,必须弄清楚参数在传递给 API 的类型实例上调用什么方法实现。多态的上下文中的方法解析过程被称为分发,调用该方法被称为分发化(dispatching) 。
分发方式:静态 or 动态
在支持多态的主流语言中,分发可以通过以下任意一种方式进行。
- 静态分发:编译期决定
当在编译期决定要调用的方法时,它被称为静态分发或早期绑定。方法的签名用于决定调用的方法,所有这些都在编译期决定。在 Rust 中,泛型展示了这种形式的分发, 因为即使泛型函数可以接收许多参数, 也会在编译期使用具体类型生成函数的专用副本。
2.动态分发: 运行期决定,资源开销更大
在面向对象的语言中,有时直到运行时才能确定调用的方法。这是因为具体类型被隐藏,并且只有接口方法可用于调用该类型。 在 Java 中,当函数只有参数时就是这种情况,即接口。 这种情况只能通过动态分发来处理。在动态分发过程中,可通过对 vtable 接口的实现列表进行查找,并调用该方法来动态确定相关方法。vtable 是一个函数指针列表,指向每个类型的实现方法。由于方法调用过程中存在额外的间接指针引用,所以这需要更多的资源开销
区别特征区间与特征对象
|特征使用方式|分发方式|实现方式|绑定时期|| |:----:------------|:--:--------|:--:--------|:--:--------|--| |特征区间|静态分发|限定泛型|编译期(早期绑定)|| |特征对象|动态分发|胖指针|运行期多态(后期绑定)||
特征对象具体说说
指定为实现某个特征
特征对象是一种创建多态 API 的方法,可以将参数指定为实现某个特征的东西,而不是泛型或具体类型。这种方法被声明为实现某个特征 API,即特征对象。
用胖指针实现
特征对象类似 C++中的虚方法。特征对象实现为胖指针,并且是不定长类型,这意味着它们只能在引用符号(&)后面使用。特征对象胖指针具有指向与对象关联的实际数据的第一指针,而第二指针指向虚拟表(vtable) ,它是在固定偏移处为每个对象的方法保留一个函数指针的结构体。
是Rust执行动态分发的方式
特征对象是 Rust 执行动态分发的方式,我们没有实际的具体类型信息。通过跳转到vtable 并调用适当的方法完成方法解析。
特征对象的另一个用例是,它们允许用户对可以具有多种类型的集合进行操作,但是在运行时需要额外的间接指针引用开销
// trait_objects.rs

use std::fmt::Debug;

#[derive(Debug)]
struct Square(f32);

#[derive(Debug)]
struct Rectangle(f32, f32);

trait Area: Debug {
    fn get_area(&self) -> f32;
}

impl Area for Square {
    fn get_area(&self) -> f32 {
        self.0 * self.0
    }
}

impl Area for Rectangle {
    fn get_area(&self) -> f32 {
        self.0 * self.1
    }
}

fn main() {
    /*
        shapes 的元素类型是&dyn Area,这是一种表示为特征的类型。
        特征对象是由 dyn Area 表示的, 意味着它是指向 Area 特征某些实现的指针。
        特征对象形式的类型允许用户在集合类型(例如 Vec)中存储不同类型

        Square 和 Rectangle 会隐式转换成特征对象,因为我们给它们推送了一个引用。
        我们还可以通过手动转换某个特征对象来构造一个类型,但这是一种比较少见的情况.
        只有在编译器自身无法将类型作为特征对象转换时使用。
    */
    let shapes: Vec<&dyn Area> = vec![&Square(3f32), &Rectangle(4f32, 2f32)];
    for s in shapes {
        println!("{:?}", s);
    }
}
不定长类型只能作为引用创建
请注意,我们只能创建在编译时知道类型尺寸的特征对象。
dyn Trait 是一个不定长类型,只能作为引用创建。我们还可以通过将特征对象置于其他指针类型之后来创建特征对象,例如 Box、Rc、Arc 等
// dyn_trait.rs

use std::fmt::Display;

fn show_me(item: &dyn Display) {
    println!("{}", item);
}

fn main() {
    show_me(&"Hello trait object");
}
总结特征、特征区间和特征对象
特征和泛型通过单态化(早期绑定)或运行时多态(后期绑定)提供了两种代码复用的方式。 何时使用它们取决于具体情况和相关应用程序的需求:
- 通常,错误类型会被分配到动态分发的序列,因为它们应该是很少被执行的代码路径。
- 单态化对小型的应用场景来说非常方便,但是缺点是导致了代码的膨胀和重复,这会影响缓存效率,并增加二进制文件的大小。
但是,在这两个选项中,静态分发应该是首选,除非系统对二进制文件大小存在严格的限制。
参考资源
online-book
- Advanced Traits - The Rust Programming Language
- Trait and lifetime bounds - The Rust Reference
- Special types and traits - The Rust Reference
- Generic Types, Traits, and Lifetimes - The Rust Programming Language
- Advanced Traits - The Rust Programming Language
fragment
local
编程语言语法概述
前言
其实编程语言的语法本质上就分成三部分:确定使用什么类型、类型可以用的操作、通用逻辑操作。不过语法又不是这么简单,它担负着两方面的作用:
-
与编译器交互:因为这些语法在编译器内部都有对应的操作,涉及一系列繁杂的自动化操作。所以当编写语法可以通过编译,至少说明程序可以跑起来。 这一点在rust中尤其明显,毕竟rust是出了名的“面向编译器”开发语言,编译器对语法的要求可以算作“苛刻”。但是这样也有好处,就是潜移默化之中,编程思维也被调整一番。
-
与编程人员交互:这里主要指编程需要可读且易读。这和代码质量息息相关,这里的编程人员不仅包括第一个写出这段代码的人,还包括后续开发以及协作的开发人员。
参考资源
online-book
fragment
local
语言细节与对比
::与.
UFCS/FQS与turbofish
&*与deref
关联类型、GAT与泛型参数
type vs use
impl vs impl TraitName for
trait与trait object
<>与()
静态分发与动态分发
注释与文档(rustdoc)
注释方法
rustdoc使用
参考资源
online-book
fragment
local
词法关键字扫盲
1. 关键字
严格关键字
#![allow(unused)]
fn main() {
as / break / const / continue / crate / if / else / struct / enum / true / false / fn / for / in / let / loop / impl / mod / match / move mut / pub / ref / return / self / Self / static / super /trait / type / unsafe /use / where / while / async /await/dyn/main
}
弱关键字
#![allow(unused)]
fn main() {
abstract / become / box / do / final / macro / override / priv / typeof / unsized / virtual / yield / try
}
保留字
- 2018 Edition:union,’static
- 2015 Edition:dyn
被保留的关键字不代表将来一定会使用
2. 标识符
3. 注释
//!, /!, //!!, /!!, /…/, //, ////, /…*/
4. 空白: \n、\t、tab
任何形式的空白字符在RuSt中只用于分隔标记,没有语义意义。
5. 词条
- 语言项(item)
- 块(block)
- 语句(Stmt)
- 表达式(Expr)
- 模式(Pattern)
- 关键字(Keyword)
- 标识符(Ident)
- 字面量(Literal)
- 生命周期(Lifetime)
- 可见性(Vis)
- 标点符号(Punctuation)
- 分隔符(delimiter)
- 词条树(Token Tree)
- 属性(Attribute)
路径: ::, ::<>
参考资源
online-book
fragment
local
绑定、赋值与匹配模式
参考资源
online-book
- Patterns - The Rust Reference
- Enums and Pattern Matching - The Rust Programming Language
- Patterns and Matching - The Rust Programming Language
fragment
local
逻辑判断与循环
参考资源
online-book
fragment
local
语句与表达式
参考资源
online-book
fragment
local
代码质量:异常、测试与日志
错误处理
RUST_BACKTRACE的用法
- 1 : 打印简略错误信息
- full: 打印详细错误信息
设置环境变量
export RUST_BACKTRACE=1
echo $RUST_BACKTRACE
临时设置使用
RUST_BACKTRACE=1 cargo run
RUST_BACKTRACE=full mdbook serve
参考资源
online-book
fragment
local
设计抽象
参考资源
online-book
fragment
local
编程范式
参考资源
online-book
fragment
local
函数式编程
参考资源
online-book
- Functional Language Features: Iterators and Closures - The Rust Programming Language
- Advanced Functions and Closures - The Rust Programming Language
fragment
local
面向对象编程
参考资源
online-book
fragment
local
泛型编程
参考资源
online-book
fragment
local
设计模式
参考资源
online-book
fragment
local
项目模块管理及扩展
对于一门编程语言,是否能够成为工程化开发工具的主要标准在于两点:
- 包管理、模块管理
- 扩展工具是否方便加入
这里面包含一些通用的设计抽象,因此专门作为单独的一层。
参考资源
online-book
fragment
local
模块系统相关:Workspace、Package、Crate、Module
- 模块系统相关:Workspace、Package、Crate、Module
- 厘清Workspace、Package、crate和module的关系
- Package: 包含Cargo.toml
- workspace与package
- 具体对比package和crate
- [在Cargo.toml的[bin]/[lib]中指明](#在cargotoml的binlib中指明)
- 再来对比workspace、package和crate
- module
- 整理说一下rust的模块系统
- 联想对比
- module tree
- 模块使用方式
- 参考资源
- 厘清Workspace、Package、crate和module的关系
厘清Workspace、Package、crate和module的关系
Package: 包含Cargo.toml
package就是cargo new的产物,里面包含一个cargo.toml,包名就写在里面的package里。比如substrate的一个包代码:
[package]
name = "sc-allocator"
version = "4.1.0-dev"
authors = ["Parity Technologies <admin@parity.io>"]
edition = "2021"
license = "Apache-2.0"
homepage = "https://substrate.io"
repository = "https://github.com/paritytech/substrate/"
description = "Collection of allocator implementations."
documentation = "https://docs.rs/sc-allocator"
readme = "README.md"

[package.metadata.docs.rs]
targets = ["x86_64-unknown-linux-gnu"]

[dependencies]
log = "0.4.17"
thiserror = "1.0.30"
sp-core = { version = "6.0.0", path = "../../primitives/core" }
sp-wasm-interface = { version = "6.0.0", path = "../../primitives/wasm-interface" }
- package表明该package的基本信息
- dependencies表示该package依赖的其他package
workspace与package
- workspace+members: 并发代表当前package包含的所有subpackage,只是指明一个工作区的所有package
A Cargo.toml file can simultaneously define a package and a workspace to which it belongs, but that package is still a member of that workspace, not the other way around.
具体对比package和crate
在Cargo.toml的[bin]/[lib]中指明
再来对比workspace、package和crate
Generally, a package exposes only one crate. Most library crates don’t even have an associated binary crate(s) in their package. It’s due to this that package/crate terminology is often used interchangeably; for lib crates it is in the 90% case. Package is also a generic term that people not familiar with Rust’s ecosystem can understand, where crate is a Rust-specific piece of jargon.
The two concepts are still meaningfully different – while conventionally package and lib crate have the same name ( modulo hyphens vs underscores), this is not required in any way – but for the most part there isn’t an appreciable difference unless you’re paying attention to the weeds and edge cases.
module
在rust中,module(模块)更多还是一种逻辑上的概念,主要使用mod关键字,下面会具体说说
#![allow(unused)]
fn main() {
mod say {
    pub fn hello() {
        println!("Hello, world!");
    }
}
}
整理说一下rust的模块系统
联想对比
- golang的模块系统
- python/js的模块系统
- mdbook的所有文章只能挂到SUMMARY才能生成链接。
module tree
- module Tree只有一个入口(根),src/main.rs或src/lib.rs
- 默认情况下,lib.rs和main.rs的crate都和cargo.toml里面的[package].name同名
- 但是cargo.toml里面可以给crate重命名:[lib]重命名lib.rs, [binary]重命名main.rs
模块使用方式
目录模块
tree -L 2                                                                                                      ─╯
.
├── foo
│   └── bar.rs
├── foo.rs
└── main.rs

1 directory, 3 files
- foo/bar.rs
pub struct Bar; // 导出给foo.rs使用

impl Bar {
    pub fn hello() {
        println!("Hello from Bar !");
    }
}
- foo.rs
mod bar; // 使用同名目录foo下的文件模块foo/bar.rs

pub use self::bar::Bar; // 再次指定导入bar::Bar

pub fn do_foo() {
    println!("Hi from foo!");
}
嵌套导入
// nested_imports.rs
// 使用{}嵌套导入
use std::sync::{Arc, Mutex, mpsc::{channel, Sender, Receiver}};

fn consume(_tx: Sender<()>, _rx: Receiver<()>) { }

fn main() {
    let _ = Arc::new(Mutex::new(40));
    let (tx, rx) = channel();
    consume(tx, rx);
}
pub/crate导出
Rust 中元素的隐私性是从模块层面开始的。作为程序库的作者,要从模块向用户公开一些内容可以使用关键字 pub。
但是对于有一些元素,我们只想暴露给软件包中的其他模块,而不是用户。
在这种情况下,我们可以对元素使用 pub(crate)修饰符,这允许元素仅在软件包内部暴露
参考资源
online-book
- Visibility and privacy - The Rust Reference
- pub(in path), pub(crate), pub(super), and pub(self) - The Rust Reference
- Managing Growing Projects with Packages, Crates, and Modules - The Rust Programming Language
- Modules - Rust By Example
- Crates - Rust By Example
fragment
-
- 项目(Packages):一个 Cargo 提供的 feature,可以用来构建、测试和分享包
- 包(Crate):一个由多个模块组成的树形结构,可以作为三方库进行分发,也可以生成可执行文件进行运行
- 模块(Module):可以一个文件多个模块,也可以一个文件一个模块,模块可以被认为是真实项目中的代码组织单元
-
Workspaces - The Cargo Book 默认情况下,一个Cargo.toml只能指明一个package,但是在workspace里面就可以指明多个(此时可以理解为这个package包含多个subpackage),比如substrate的根cargo:
[workspace]
resolver = "2"

members = [
    "bin/node-template/node",
]
[profile.dev.package]
blake2 = { opt-level = 3 }
A crate is the [lib] or [[bin]] tables in the Cargo.toml. At most one lib crate may be present, but an arbitrary number of bin crates may be present.
You won’t see these tables added explicitly too often, because they’re implicitly present if you have src/lib.rs (lib crate) and/or src/main.rs (bin crate).
# Example of customizing the library in Cargo.toml.
[lib]
crate-type = ["cdylib"]
bench = false
# Example of customizing binaries in Cargo.toml.
[[bin]]
name = "cool-tool"
test = false
bench = false

[[bin]]
name = "frobnicator"
required-features = ["frobnicate"]
- 一个包是一个或多个提供一组功能的 crates。一个package包含一个 Cargo.toml 文件,该文件描述了如何构建这些crate。
- crate 可以是二进制 crate 或库 crate。
- 二进制 crate 是可以编译成可执行文件的程序,可以运行,例如命令行程序或服务器。
它们必须有一个名为 main 的函数,该函数定义了可执行文件运行时会发生什么。到目前为止,我们创建的所有 crate 都是二进制 crate。
- 库 crates 没有 main 函数,它们不会编译为可执行文件。它们定义了旨在与多个项目共享的功能。
例如,我们在第 2 章中使用的 rand crate 提供了生成随机数的功能。
- 下面是一些规则:
- 一个包最多可以包含一个库 crate。它可以包含任意数量的二进制 crate,但它必须至少包含一个 crate(库或二进制)。
- 当我们输入cargo new时,Cargo 创建了一个 Cargo.toml 文件,cargo将会给我们一个package。
- 查看 Cargo.toml 的内容,没有提到 src/main.rs,因为 Cargo 遵循一个约定,即 src/main.rs 是与包同名的二进制 crate 的 crate 根。
- 同样,Cargo 知道如果包目录包含 src/lib.rs,则该包包含一个与包同名的库 crate,并且 src/lib.rs 是它的 crate 根。
Cargo 将 crate 根文件传递给 rustc 以构建库或二进制文件。
- 在这里,我们有一个只包含 src/main.rs 的包,这意味着它只包含一个名为 my-project 的二进制 crate。
- 如果一个包包含 src/main.rs 和 src/lib.rs,它有两个 crate:一个二进制文件和一个库,两者都与包同名。
通过将文件放在 src/bin 目录中,一个包可以有多个二进制 crate:每个文件都是一个单独的二进制crate
-
Rust的模块化系统: 包Packages, 箱Crates, 和模块Modules - 知乎 包 Packages: Cargo提供的让我们创建, 测试和分享Crates的工具. 箱 Crates: 提供类库或可执行文件的模块树 模块 Modules and use: 管理和组织路径, 及其作用域和访问权限 路径 Paths: 如结构体(structs), 函数(function), 或模块(module)等事物的命名方式
Module System
一个问题几乎总会由许多小问题组成。module system是为了定义清楚各个小问题的边界。这样更容易和更方便的管理问题。而大问题的解法,就是把小问题的解法组合起来。
project,package, crate, module这些概念感觉相似。实际上,一个package/project可以包含多个 binary crates和一个或者零个library binary。一个crate可以包含多个module。可以认为package就是一个project,一个crate就是一个暴露给外界的逻辑单元,一个module就是一个小问题的解法。
当project里面有lib.rs说明这个project是一个library crate,这个library的名字是project的名字。main.rs/main2.rs都可以直接使用这个library crate。我们可以认为bin文件夹里面是单独的crate,它们默认导入了这个library crate。
一个crate就是一个暴露给外界的逻辑单元,一个module就是一个小问题的解法
关于找不到模块: 这就是module tree的体现,be explicit。所有模块都需要添加到crate root(src/main.rs或者src/lib.rs)里面。也就是要显示地指明module tree的结构。这也就是我们经常在main.rs/lib.rs里面看到许多mod xxx的原因。比如这里的代码
它们的存在就是为了将project里面的modules 加到这个crate里面。比如在main.rs 里面看到mod channel,就是将module channel加进crate的module tree来。
相关引用: Mentally Modelling Modules - In Pursuit of Laziness
-
Clear explanation of Rust’s module system 作者通过举例,详细介绍了rust编译器与程序猿看到的不同项目结构。
-
The confusion around Rust’s modules reminds me of the different ways that people… | Hacker News The confusion around Rust’s modules reminds me of the different ways that people learn how to use car indicators. Some people learn that you push the stalk up to indicate your intent to turn left, or down to turn right. And then they might eventually learn that in a European car, you push the stalk down to turn left, and up to turn right. And then of course some of these people get confused when switching between different cars. Yes, I’ve seen plenty of people on the road who indicate one direction and then turn another. It’s… kind of frightening .
The other way of learning to use car indicators is much simpler: push the stalk in the direction that you would turn the wheel. Of course this still leaves the possibility that some people will push the wrong stalk, and briefly activate their windshield wipers . But it’s a much easier mistake to notice, and the consequences are minor.
Back to Rust’s modules. I keep seeing articles trying to offer a simple or clear explanation of how they work, that end up unnecessarily complicated in a way that feels a lot like the “up/down” model of car indicators. The explanation that makes the basics of Rust modules clear to me is this:
-
Child modules must always be declared in the parent module, or they don’t exist.
-
The content of child modules may be defined either inline in the parent as
mod child { ... }, or in a file with a relative path of ‘./child.rs’ or ‘./child/mod.rs’.
Did I miss anything important?
Without this basic explanation up-front, I have no idea what to do with the stream of information I’m reading in a lengthy article on the topic – I’ve been given no scaffolding onto which to bolt all the details and examples. So this is the “bottom line” that I would like to see “up front” in descriptions of Rust’s modules.
Other misunderstandings, e.g., around item visibility, are explained really well by the compiler if you get them mixed up, so I’m not sure how much value there is in mixing them in to articles about how modules are structured before those two basic facts are presented.
The processing of that source file may result in other source files being loaded as modules. It is not that one source file makes up a crate: it’s that starting from that one source file, you can find all the files making up the crate, as opposed to other compilation models where the compiler might be given many file names to start from.
其实从代码完整性考虑,crate确实就是编译的最小基本单位。因为它不仅指一个源码文件(xx.rs),而是包含这个源码文件里面引入的所有其他module。这个时候,rustc才会开始编译这个crate
The exact things hosted on crates.io are crates inside packages. A crate is the output artifact of the compiler. The compilation model centers on artifacts called crates. Each compilation processes a single crate in source form, and if successful, produces a single crate in binary form: either an executable or some sort of library. A package is an artifact managed by Cargo, the Rust package manager.
local
Cargo与crate生命周期

- Cargo与crate生命周期
- Cargo.toml细说
- Rust程序运行方式总结
- 参考资源
cargo : 用生命周期理解Cargo指令系列
新建
cargo new
cargo init
开发
cargo clean
cargo doc
依赖管理
cargo check
该命令用来快速检查当前代码是否可以通过编译,但是不去生成真正可执行的程序。这样可以加快我们的检查速度。
cargo fix
cargo fetch
cargo search/install/uninstall
从crates.io拉取安装
cargo install
从源码进行安装
cargo install <Cargo.toml path> –debug –locked
cargo report
cargo generate-lockfile
cargo locate-project
cargo metadata
cargo pkgid
cargo tree
cargo update
cargo vendor
cargo verify-project
测试
cargo test
cargo bench
运行
cargo run
cargo watch
每保存一次都自动编译,需要安装crate
cargo expand
构建
cargo rustc
cargo build
cargo build --release
该命令将会在 target/release/目录下生成优化过的可执行程序。这样生成的可执行程序拥有更好的性能。
cargo rustdoc
发布
cargo login
cargo owner
cargo package
cargo publish
cargo yank
维护
分区
Cargo.toml细说
Rust程序运行方式总结
脚本
项目
参考资源
online-book
fragment
local
cargo与rustc
- cargo与rustc
rustc
rustc是什么
全称应该是“rust complier“, 是 Rust 编程语言的编译器,由项目本身提供。编译器获取源代码并生成二进制代码,作为库或可执行文件。
基础使用
rustc target_file.rs
rustc与cargo的关系
这其实就类似前端webpack.config和package.json的关系, cargo在运行时会默认调用rustc指令。
cargo style
cargo可以看作是基于rustc的“管理框架“,主要还是对于项目用到的包的管理。
这里可以看到具体有哪些功能
cargo essential structure
但是对于大多数场景下,一般采用如下的项目结构
$ tree use-benchmarking -L 2                                                                                                                                                                                                             ─╯
use-benchmarking
├── Cargo.toml
├── README.md
└── src
    ├── benchmarking.rs
    ├── lib.rs
    ├── mock.rs
    ├── tests.rs
    └── weights.rs

1 directory, 7 files
.cargo 扩展
除了cargo, 它的全局相关配置文件都会放在$HOME/.cargo目录下,这里值得看看
tree overview
tree -L 1 $HOME/.cargo                                                                                                                                                                                                                 ─╯
├── bin # 安装的二进制相关可执行文件
├── env # rustup的环境变量设置脚本
├── git
└── registry
bin
tree -L 1 $HOME/.cargo/bin                                                                                                                                                                                                             ─╯
├── cargo -> /usr/local/bin/rustup-init
├── cargo-clippy -> /usr/local/bin/rustup-init
├── cargo-fmt -> /usr/local/bin/rustup-init
├── cargo-miri -> /usr/local/bin/rustup-init
├── clippy-driver -> /usr/local/bin/rustup-init
├── mdbook
├── mdbook-admonish
├── mdbook-checklist
├── mdbook-mermaid
├── mdbook-pdf
├── mdbook-rss
├── mdbook-template
├── rls -> /usr/local/bin/rustup-init
├── rust-gdb -> /usr/local/bin/rustup-init
├── rust-lldb -> /usr/local/bin/rustup-init
├── rustc -> /usr/local/bin/rustup-init
├── rustdoc -> /usr/local/bin/rustup-init
├── rustfmt -> /usr/local/bin/rustup-init
└── rustup -> /usr/local/bin/rustup-init

0 directories, 19 files
env
#!/bin/sh
# rustup shell setup
# affix colons on either side of $PATH to simplify matching
case ":${PATH}:" in
    *:"$HOME/.cargo/bin":*)
        ;;
    *)
        # Prepending path in case a system-installed rustc needs to be overridden
        export PATH="$HOME/.cargo/bin:$PATH"
        ;;
esac
git
tree -L 3 $HOME/.cargo/git                                                                                                                                                                                                             ─╯
/Users/kuanhsiaokuo/.cargo/git
├── checkouts
│   ├── substrate-7e08433d4c370a21
│   │   ├── 174735e
│   │   ├── 257cdb5
│   │   ├── 279593d
│   │   ├── 3348e14
│   │   ├── 346471d
│   │   ├── 4d28ebe
│   │   ├── 7ba4e4c
│   │   ├── 7eb671f
│   │   ├── 814752f
│   │   ├── 852bab0
│   │   ├── b6c1c1b
│   │   └── bf9683e
│   └── unveil-rs-403565214a7cc66c
│       └── 3d8e9ad
└── db
    ├── substrate-7e08433d4c370a21
    │   ├── FETCH_HEAD
    │   ├── HEAD
    │   ├── config
    │   ├── description
    │   ├── hooks
    │   ├── info
    │   ├── objects
    │   └── refs
    └── unveil-rs-403565214a7cc66c
        ├── FETCH_HEAD
        ├── HEAD
        ├── config
        ├── description
        ├── hooks
        ├── info
        ├── objects
        └── refs

27 directories, 8 files
registry
tree -L 2 $HOME/.cargo/registry                                                                                                                                                                                                        ─╯
/Users/kuanhsiaokuo/.cargo/registry
├── cache
│   └── github.com-1ecc6299db9ec823
├── index
│   └── github.com-1ecc6299db9ec823
└── src
    └── github.com-1ecc6299db9ec823

6 directories, 0 files
Cargo 与 git 的关联!
cargo tree
- Cargo.toml是分等级的,最外层的Cargo.toml里面可以只用一个members,然后里面列出内部包含的其他packages
最外层的Cargo.toml
[workspace]
members = [
    "node",
    "pallets/template",
    "runtime",
]
[profile.release]
panic = "unwind"
- 然后内部的其他packages就需要列出用到的[dependencies]
- dependencies的完整使用参数如下:
[dependencies]
pallet-aura = { version = "4.0.0-dev", default-features = false, git = "https://github.com/paritytech/substrate.git", branch = "polkadot-v0.9.24" }
[dependencies.pallet-aura]
version = "4.0.0-dev"
default-features = false
git = "https://github.com/paritytech/substrate.git"
branch = "polkadot-v0.9.24"
这里的branch也可以用tag(git tag)
git
上面dependencie里面的git+branch/tag唯一确定了一份代码,cargo下载对应的git代码之后,会从最外层Cargo.toml顺着members一层层找到[package]如下所示的Cargo.toml来确定对应的依赖包
[package]
name = "pallet-aura"
version = "4.0.0-dev"
authors = ["Parity Technologies <admin@parity.io>"]
edition = "2021"
license = "Apache-2.0"
homepage = "https://substrate.io"
repository = "https://github.com/paritytech/substrate/"
description = "FRAME AURA consensus pallet"
readme = "README.md"
关于依赖冲突问题
目前Cargo无法解决依赖冲突问题,一般都会是因为dependencies里面的git+branch/tag对应的依赖更新导致。
应用场景: substrate添加pallet
Cargo相关问题解决
版本冲突:failed to select a version for the requirement
Apparently, Cargo can sometimes get into a state where its local registry cache will corrupt itself, and Cargo won’t be able to discover new versions of the dependencies. To resolve this, delete the ~/.cargo/registry folder and run the build command again.
- 修改dependencies cargo install 出现需求版本选择失败怎么办–Qiita
Cargo项目结构
基础说明

- cargo.toml和cargo.lock文件总是位于项目根目录下。
- 源代码位于src目录下。
- 默认的库入口文件是src/lib.rs。
- 默认的可执行程序入口文件是src/main.rs。
- 其他可选的可执行文件位于src/bin/*.rs(这里每一个rs文件均对应一个可执行文件)。
- 外部测试源代码文件位于tests目录下。
- 示例程序源代码文件位于examples。
- 基准测试源代码文件位于benches目录下。
cargo.toml和cargo.lock
cargo.toml和cargo.lock是cargo项目代码管理的核心两个文件,cargo工具的所有活动均基于这两个文件。
cargo.toml是cargo特有的项目数据描述文件,对于猿们而言,cargo.toml文件存储了项目的所有信息,它直接面向rust猿,猿们如果想让自己的rust项目能够按照期望的方式进行构建、测试和运行,那么,必须按照合理的方式构建’cargo.toml’。
而cargo.lock文件则不直接面向猿,猿们也不需要直接去修改这个文件。lock文件是cargo工具根据同一项目的toml文件生成的项目依赖详细清单文件,所以我们一般不用不管他,只需要对着cargo.toml文件撸就行了。
构建、清理、更新以及安装
领会了toml描述文件的写法,是一个重要的方面。另一个重要的方面,就是cargo工具本身为我们程序猿提供的各种好用的工具。如果大家感兴趣,自己在终端中输入’cargo –help’查看即可。
- 其中开发时最常用的命令就是’cargo build’,用于构建项目。
- 此外,’cargo clean’命令可以清理target文件夹中的所有内容;
- ’cargo update’根据toml描述文件重新检索并更新各种依赖项的信息,并写入lock文件,例如依赖项版本的更新变化等等;
- ’cargo install’可用于实际的生产部署。这些命令在实际的开发部署中均是非常有用的。
main.rs 和 lib.rs
┏━━━━━━━━━━━━━━━━━━━━━━━━━━━━━━━━━━━━━━━━━━━━━━━━━━━━━━━━━━━━━━━━━━━━━━━━━━━━━━┓
┃                                     _                                        ┃
┃                          _ __  __ _(_)_ _    _ _ ___                         ┃
┃                         | '  \/ _` | | ' \ _| '_(_-<                         ┃
┃                         |_|_|_\__,_|_|_||_(_)_| /__/                         ┃
┃                                                                              ┃
┃ _                 _ _                             _             _   _        ┃
┃| |_  __ _ _ _  __| | |___ ___  _ _ _  _ _ _  _ _ (_)_ _  __ _  | |_| |_  ___ ┃
┃| ' \/ _` | ' \/ _` | / -_|_-< | '_| || | ' \| ' \| | ' \/ _` | |  _| ' \/ -_)┃
┃|_||_\__,_|_||_\__,_|_\___/__/ |_|  \_,_|_||_|_||_|_|_||_\__, |  \__|_||_\___|┃
┃                                                         |___/                ┃
┃                                                                              ┃
┃                       _ __ _ _ ___  __ _ _ _ __ _ _ __                       ┃
┃                      | '_ \ '_/ _ \/ _` | '_/ _` | '  \                      ┃
┃                      | .__/_| \___/\__, |_| \__,_|_|_|_|                     ┃
┃                      |_|           |___/                                     ┃
┃                                                                              ┃
┃1. cargo new --bin                                                            ┃
┃- Calling the command line parsing logic with the argument values             ┃
┃- Setting up any other configuration                                          ┃
┃- Calling a run function in lib.rs           ┏━━━━━━━━━━━━━━━━━━━━━━━━━━━━━━━━┻━━━━━━━━━━━━━━━━━━━━━━━━━━━━━━━━━━━━━━━━━━━━━┓
┃- Handling the error if run returns an error ┃All are rust basic entry:       ╳    _ _ _                                    ┃
┃                                             ┃1. main.rs is the running entry ╳   | (_) |__   _ _ ___                       ┃
┃                                             ┃2. lib.rs is the library entry  ╳   | | | '_ \_| '_(_-<                       ┃
┃                                             ┃╳╳╳╳╳╳╳╳╳╳╳╳╳╳╳╳╳╳╳╳╳╳╳╳╳╳╳╳╳╳╳╳    |_|_|_.__(_)_| /__/                       ┃
┗━━━━━━━━━━━━━━━━━━━━━━━━━━━━━━━━━━━━━━━━━━━━━┫                                                                              ┃
                                              ┃   _                 _ _               _ _   _   _          _           _     ┃
                                              ┃  | |_  __ _ _ _  __| | |___ ___  __ _| | | | |_| |_  ___  | |___  __ _(_)__  ┃
                                              ┃  | ' \/ _` | ' \/ _` | / -_|_-< / _` | | | |  _| ' \/ -_) | / _ \/ _` | / _| ┃
                                              ┃  |_||_\__,_|_||_\__,_|_\___/__/ \__,_|_|_|  \__|_||_\___| |_\___/\__, |_\__| ┃
                                              ┃                                                                  |___/       ┃
                                              ┃        __   _   _          _           _          _     _                 _  ┃
                                              ┃   ___ / _| | |_| |_  ___  | |_ __ _ __| |__  __ _| |_  | |_  __ _ _ _  __| | ┃
                                              ┃  / _ \  _| |  _| ' \/ -_) |  _/ _` (_-< / / / _` |  _| | ' \/ _` | ' \/ _` | ┃
                                              ┃  \___/_|    \__|_||_\___|  \__\__,_/__/_\_\ \__,_|\__| |_||_\__,_|_||_\__,_| ┃
                                              ┃                                                                              ┃
                                              ┃                                                                              ┃
                                              ┃                                                                              ┃
                                              ┃                                                                              ┃
                                              ┃                                                                              ┃
                                              ┃                                                                              ┃
                                              ┃                                                                              ┃
                                              ┃                                                                              ┃
                                              ┃                                                                              ┃
                                              ┃                                                                              ┃
                                              ┗━━━━━━━━━━━━━━━━━━━━━━━━━━━━━━━━━━━━━━━━━━━━━━━━━━━━━━━━━━━━━━━━━━━━━━━━━━━━━━┛
-
包(package)创建规则:
- 一个包中至多只能包含一个库Crate。
- 包中可以包含任意多个二进制Crate。
- 包中至少包含一个 crate,无论是库的还是二进制的。
- 包中应该包含一个 Cargo.toml 配置文件,用来说明如何去构建这些 crate。
示例一:cargo new –bin 创建一个包含 二进制Crate 的包 示例二:cargo new –lib 创建一个包含库(lib)crate的包 示例三:–lib和–bin不可以同时使用,这种情况下可以示例一的基础上自己创建一个lib.rs文件
- 一般情况下,我们将与程序运行相关的代码放在 main.rs 文件,其他真正的任务逻辑放在 lib.rs 文件中。
-
Rust modules confusion when there is main.rs and lib.rs - Stack Overflow
这里有人详细介绍了只有lib.rs/main.rs的情况下,执行cargo run的情况。没有main.rs的时候,cargo run会告诉你:error: a bin target must be available for
cargo run
A common pattern, even for binary-only crates, is to declare a “library” providing the majority of functionality, and then have main.rs just implement argument parsing and use that library. This allows for integration tests written against the library, which might otherwise be hard to do with only main.rs.
-
Main.rs and lib.rs at same level - help - The Rust Programming Language Forum
这里有人跟着官方文档制作命令行工具时发现同样的疑惑点,底下有人引用了这个链接
The organizational problem of allocating responsibility for multiple tasks to the main function is common to many binary projects. As a result, the Rust community has developed a process to use as a guideline for splitting the separate concerns of a binary program when main starts getting large. The process has the following steps:
- Split your program into a main.rs and a lib.rs and move your program’s logic to lib.rs.
- As long as your command line parsing logic is small, it can remain in main.rs.
- When the command line parsing logic starts getting complicated, extract it from main.rs and move it to lib.rs.
The responsibilities that remain in the main function after this process should be limited to the following:
- Calling the command line parsing logic with the argument values
- Setting up any other configuration
- Calling a run function in lib.rs
- Handling the error if run returns an error
This pattern is about separating concerns:
- main.rs handles running the program
- and lib.rs handles all the logic of the task at hand.
Because you can’t test the main function directly, this structure lets you test all of your program’s logic by moving it into functions in lib.rs. The only code that remains in main.rs will be small enough to verify its correctness by reading it. Let’s rework our program by following this process.
Note that the main.rs does not declare any modules with mod, it only imports them with use (the distinction between the two is something a lot of new Rust programmers struggle with!).
The reason for this is that, in projects with both a lib.rs and a main.rs:
Cargo effectively treats lib.rs as the root of your crate, and main.rs as a seperate binary that depends on your crate.
main.rs is always the root of your binary, and lib.rs is always the root of your library.
The important things to realize are:
- These two roots are compiled seperately, and have their own entirely seperate module structure.
- When you use the mod keyword, you are creating a module, not importing a module.
- You almost never want to have multiple mod statements for a single file, as you’ll be duplicating the content.
- If you want to use something from an existing module or from a library, that’s what the use keyword is for.
Let’s walk through your example:
- In lib.rs, you use mod to declare that your library has two top level modules, cli and internal. There are corresponding files in the right place in your project, so Cargo knows how to link it all up. This part is fine, and what you intended to happen!
- However, when you write mod lib in your main.rs, you’re not importing your library! You’re actually declaring that your binary has it’s own top level module, which just happens to be called lib. Cargo then sees that there is a file called lib.rs in the folder, and links that in, even though that’s not what you intended. It then sees that the lib.rs file has two mod statements and treats these as submodules of the binary’s lib module. The files aren’t in the right place for that to work, so compilation fails.
- So the root cause of your issue is that you’ve effectively told the compiler to create your module structure twice, once in your library and once in your binary.
- You really only meant to define these modules in your library, and then use them into your binary.
实际应用:Substrate的substrate-node-template
根据官方文档知道,substrate是各种lib包,那么开发时如何运行呢?
区别cargo run与cargo build
在node包里面存在main.rs
- 根Cargo.toml里面告诉cargo,这个项目总共有三个包
[workspace]
members = [
    "node",
    "pallets/template",
    "runtime",
]
[profile.release]
panic = "unwind"
- 然后cargo找到包含main.rs的node包作为入口
 tree -L 2 node                                                                                                                                                                                                                         ─╯
node
├── Cargo.toml
├── build.rs
└── src
    ├── chain_spec.rs
    ├── cli.rs
    ├── command.rs
    ├── command_helper.rs
    ├── lib.rs
    ├── main.rs
    ├── rpc.rs
    └── service.rs

1 directory, 10 files
- node/main.rs里面使用了文件名crate
//! Substrate Node Template CLI library.
#![warn(missing_docs)]

mod chain_spec;
#[macro_use]
// 对应service.rs
mod service;
// 对应cli.rs
mod cli;
// 对应command.rs
mod command;
// 对应command_helper.rs
mod command_helper;
// 对应rpc.rs
mod rpc;

fn main() -> sc_cli::Result<()> {
    command::run()
参考资源
online-book
fragment
local
Rust扩展工具介绍
Cargo子命令系列: cargo install
cargo-watch
cargo-edit
cargo-deb
cargo-outdated
rustup系列: rust component add <tool_name>
clippy
rustc
rustfmt
参考资源
online-book
fragment
local
任务抽象
参考资源
online-book
fragment
local
并发
参考资源
online-book
fragment
local
从IO模型开始
- 从IO模型开始
1. 同步/异步、阻塞/非阻塞概念区别
同步和异步,关注的是消息通信机制。(调用者视角)
- 同步,发出一个调用,在没有得到结果之前不返回。
- 异步,发出一个调用,在没有得到结果之前返回。
阻塞和非阻塞,关注的是程序等待调用结果的状态。(被调用者视角)
- 阻塞,在调用结果返回之前,线程被挂起。
- 非阻塞,在调用结果返回之前,线程不会被挂起。
阻塞,与系统调用有关。
2. 同步/异步IO 模型分类
3. 同步阻塞I/O (blocking I/O)
输入操作两个阶段:
- 进程等待内核把数据准备好;这个阶段可以阻塞也可非阻塞,设置socket属性。
- 阻塞: recvfrom 阻塞线程直到返回数据就绪的结果。
- 非阻塞:立即返回一个错误,轮询直到数据就绪。
- 从内核缓冲区向进程缓冲区复制数据。(一直阻塞)
异步I/O,recvfrom总是立即返回,两个阶段都由内核完成。
4. I/O 多路复用(I/O Multiplexing )
IO多路复用是一种同步IO模型,实现一个线程可以监视多个文件句柄。
支持I/O多路复用的系统调用有 select/pselect/poll/epoll,本质都是同步I/O,因为数据拷贝都是阻塞的。 通过 select/epoll 来判断数据报是否准备好,即判断可读可写状态。
5. epoll: 同步阻塞/非阻塞模型
epoll三个函数
- epoll_create(int size) : 内核产生一个epoll实例数据结构,并返回一个epfd
- epoll_ctl(int epfd, int op, int fd, struct epoll_event *event):将被监听的描述符添加到红黑树或从红黑树中删除或者对监听事件进行修改。
- epoll_wait(int epfd, struct epoll_event *events, int maxevents, int timeout): 阻塞等待注册的事件发生,返回事件的数目,并将触发的事件写入events数组中
epoll 两种触发机制:
- 水平触发机制(LT)。缓冲区只要有数据就触发读写。epoll 默认工作方式。select/poll只支持该方式。
- 边缘触发机制(ET)。缓冲区空或满的状态才触发读写。nginx 使用该方式,避免频繁读写。
惊群问题:
当多个进程/线程调用epoll_wait时会阻塞等待,当内核触发可读写事件,所有进程/线程都会进行响应,但是实际上只有一个进程/线程真实处理这些事件。 Liux 4.5 通过引入 EPOLLEXCLUSIVE 标识来保证一个事件发生时候只有一个线程会被唤醒,以避免多侦听下的惊群问题。
6. 异步 I/O 模型: io_uring
Linux AIO 实现的并不理想,所以引入了新的异步I/O接口 io_uring。
io_uring接口通过两个主要数据结构工作:
- 提交队列条目(sqe)
- 完成队列条目(cqe)
这些结构的实例位于内核和应用程序之间的共享内存单生产者单消费者环形缓冲区中。
参考:
https://thenewstack.io/how-io_uring-and-ebpf-will-revolutionize-programming-in-linux/
https://cor3ntin.github.io/posts/iouring/#io_uring
因为处理 I/O 复用的编程模型相当复杂,为了简化编程,引入了下面两种模型:
1. Reactor(反应器) 模式
对应同步I/O,被动的事件分离和分发模型。服务等待请求事件的到来,再通过不受间断的同步处理事件,从而做出反应。
2. Preactor(主动器) 模式
对应异步I/O,主动的事件分离和分发模型。这种设计允许多个任务并发的执行,从而提高吞吐量;并可执行耗时长的任务(各个任务间互不影响)。
Reactor Model:
三种实现方式:
- 单线程模式。 accept()、read()、write()以及connect()操作 都在同一线程。
- 工作者线程池模式。非 I/O 操作交给线程池处理
- 多线程模式。主Reactor (master) ,负责网络监听 , 子Reactor(worker) 读写网络数据。
读写操作流程:
- 应用注册读写就绪事件和相关联的事件处理器
- 事件分离器等待事件发生
- 当发生读写就绪事件,事件分离器调用已注册的事件处理器
- 事件处理器执行读写操作
参与者:
- 描述符(handle):操作系统提供的资源,识别 socket等。
- 同步事件多路分离器。开启事件循环,等待事件的发生。封装了 多路复用函数 select/poll/epoll等。
- 事件处理器。提供回调函数,用于描述与应用程序相关的某个事件的操作。
- 具体的事件处理器。事件处理器接口的具体实现。使用描述符来识别事件和程序提供的服务。
- Reactor 管理器。事件处理器的调度核心。分离每个事件,调度事件管理器,调用具体的函数处理某个事件。
参考资源
online-book
fragment
local
多线程并发模型
参考资源
online-book
- Fearless Concurrency - The Rust Programming Language
- Final Project: Building a Multithreaded Web Server - The Rust Programming Language
fragment
local
异步模型
参考资源
online-book
fragment
local
元编程
参考资源
online-book
fragment
local
协议抽象
参考资源
online-book
fragment
local
多语言编程
参考资源
online-book
fragment
local
计算机网络
参考资源
online-book
fragment
local
源码解剖学习
整体思路
通用图表工具
俯瞰:径向图(radial tree)
解剖:结构图
逻辑:时序图/流程图
实现:代码设计
文件级别
crate级别
crates级别
源自<Rust编程第一课>
libp2p源码学习
libp2p is a networking stack and library modularized out of The IPFS Project, and bundled separately for other tools to use.
libp2p is the product of a long, and arduous quest of understanding – a deep dive into the internet’s network stack, and plentiful peer-to-peer protocols from the past. Building large scale peer-to-peer systems has been complex and difficult in the last 15 years, and libp2p is a way to fix that. It is a “network stack” – a protocol suite – that cleanly separates concerns, and enables sophisticated applications to only use the protocols they absolutely need, without giving up interoperability and upgradeability. libp2p grew out of IPFS, but it is built so that lots of people can use it, for lots of different projects.
Learn more about libp2p at libp2p.io and docs.libp2p.io.
Specification
主要介绍p2p网络相关知识
Implementations
libp2p目前有5种语言实现版本:go、js、rust、python、cpp 不过rust版本才是核心,Central repository for work on libp2p
go
- go-libp2p in Go
js
- js-libp2p in Javascript, for Node and the Browser
rust
Central repository for work on libp2p
- rust-libp2p in Rust
python
- py-libp2p in Python
cpp
- cpp-libp2p in C++
Community Discussion
Please visit our discussion forums at discuss.libp2p.io to get help, ask questions about the past, present, and future of libp2p, and more.
frame/executive解剖
类型定义
pub type CheckedOf<E, C> = <E as Checkable<C>>::Checked;
pub type CallOf<E, C> = <CheckedOf<E, C> as Applyable>::Call;
pub type OriginOf<E, C> = <CallOf<E, C> as Dispatchable>::Origin;
特殊结构体定义(PhantomData)
/// Main entry point for certain runtime actions as e.g. `execute_block`.
///
/// Generic parameters:
/// - `System`: Something that implements `frame_system::Config`
/// - `Block`: The block type of the runtime
/// - `Context`: The context that is used when checking an extrinsic.
/// - `UnsignedValidator`: The unsigned transaction validator of the runtime.
/// - `AllPalletsWithSystem`: Tuple that contains all pallets including frame system pallet. Will be
///   used to call hooks e.g. `on_initialize`.
/// - `OnRuntimeUpgrade`: Custom logic that should be called after a runtime upgrade. Modules are
///   already called by `AllPalletsWithSystem`. It will be called before all modules will be called.
pub struct Executive<
	System,
	Block,
	Context,
	UnsignedValidator,
	AllPalletsWithSystem,
	OnRuntimeUpgrade = (),
>(
	PhantomData<(
		System,
		Block,
		Context,
		UnsignedValidator,
		AllPalletsWithSystem,
		OnRuntimeUpgrade,
	)>,
);
定义并实现许多方法
substrate/frame/executive/src/lib.rs
			AllPalletsWithSystem,
			COnRuntimeUpgrade,
		>::execute_block(block);
	}
}

impl<
		System: frame_system::Config + EnsureInherentsAreFirst<Block>,
		Block: traits::Block<Header = System::Header, Hash = System::Hash>,
		Context: Default,
		UnsignedValidator,
		AllPalletsWithSystem: OnRuntimeUpgrade
			+ OnInitialize<System::BlockNumber>
			+ OnIdle<System::BlockNumber>
			+ OnFinalize<System::BlockNumber>
			+ OffchainWorker<System::BlockNumber>,
		COnRuntimeUpgrade: OnRuntimeUpgrade,
	> Executive<System, Block, Context, UnsignedValidator, AllPalletsWithSystem, COnRuntimeUpgrade>
where
	Block::Extrinsic: Checkable<Context> + Codec,
实现trait中定义的方法
-
typealias vsuse- help - The Rust Programming Language Forum -
类型转换:
-
where与impl语法的对比:
substrate/frame/executive/src/lib.rs
- 下列trait限定的意思:
- 为Executive结构体实现ExecuteBlock这个trait的方法
- for Executive<…>:Executive本身是个结构体,用到了这些类型
- impl<…>:这些类型分别有哪些trait限定,要用到关联类型限定的,就放在where子句中
- where子句:主要先约束好关联类型Block::Extrinsic,给后面的使用
- 总结impl与where子句:这里将简单情况放在impl中,将复杂的关联类型限定放在where子句中。
- 关于CheckedOf、CallOf、OriginOf这三个:
- impl中的UnsignedValidator用到CallOf, CallOf用到CheckedOf
- (问题)OriginOf的用途
impl<
		System: frame_system::Config + EnsureInherentsAreFirst<Block>,
		Block: traits::Block<Header = System::Header, Hash = System::Hash>,
		Context: Default,
		UnsignedValidator,
		AllPalletsWithSystem: OnRuntimeUpgrade
			+ OnInitialize<System::BlockNumber>
			+ OnIdle<System::BlockNumber>
			+ OnFinalize<System::BlockNumber>
			+ OffchainWorker<System::BlockNumber>,
		COnRuntimeUpgrade: OnRuntimeUpgrade,
	> ExecuteBlock<Block>
	for Executive<System, Block, Context, UnsignedValidator, AllPalletsWithSystem, COnRuntimeUpgrade>
// where
//	  Block::Extrinsic: Checkable<Context> + Codec,
//	  <Block::Extrinsic as Checkable<Context>>::Checked: Applyable + GetDispatchInfo,
//	  <Block::Extrinsic as Checkable<Context>>::Checked as Applyable>::Call: Dispatchable<Info = DispatchInfo, PostInfo = PostDispatchInfo>,
//	  <Block::Extrinsic as Checkable<Context>>::Checked as Applyable>::Call: From<Option<System::AccountId>>,
//	  UnsignedValidator: ValidateUnsigned<Call = <Block::Extrinsic as Checkable<Context>>::Checked as Applyable>::Call>,
where
	Block::Extrinsic: Checkable<Context> + Codec,
	CheckedOf<Block::Extrinsic, Context>: Applyable + GetDispatchInfo,
	CallOf<Block::Extrinsic, Context>:
		Dispatchable<Info = DispatchInfo, PostInfo = PostDispatchInfo>,
	OriginOf<Block::Extrinsic, Context>: From<Option<System::AccountId>>,
	UnsignedValidator: ValidateUnsigned<Call = CallOf<Block::Extrinsic, Context>>,
{
	fn execute_block(block: Block) {
		Executive::<
			System,
			Block,
			Context,
frame/executive语法点
静态->泛型->trait->trait bound->trait object: struct、enum和impl
核心思路
- 所有权、借用、切片
- 泛型、trait、生命周期
从静态语言开始
每个方法都需要指定特定类型
为了复用,加入泛型
可以用泛型指定所有类型,就不需要重复写同样的方法
为了范围,加入接口/trait
其实写方法就是为了写特定操作,那么不如把操作作为重点,于是就有了接口
泛型+trait限定会导致编译的包膨胀,于是考虑trait对象
特征和泛型通过单态化(早期绑定)或运行时多态(后期绑定)
提供了两种代码复用的方式。何时使用它们取决于具体情况和相关应用程序的需求。通常,错误类型会被分配到动态分发的序列,因为它们应该是很少被执行的代码路径。单态化对小型的应用场景来说非常方便,但是缺点是导致了代码的膨胀和重复,这会影响缓存效率,并增加二进制文件的大小。但是,在这两个选项中,静态分发应该是首选,除非系统对二进制文件大小存在严格的限制。
为了隐私,加入pub
一、泛型-Generic Types
泛型由来
泛型本质上是对多类型的抽象,因为对于静态语言来说需要指明类型,对于那些很多类型通用的函数,不能一个个地写出来,那样编写、维护很麻烦。这个时候就需要用泛型了。
#![allow(unused)]
fn main() {
fn largest_i32(list: &[i32]) -> &i32 {
    let mut largest = &list[0];

    for item in list {
        if item > largest {
            largest = item;
        }
    }

    largest
}

fn largest_char(list: &[char]) -> &char {
    let mut largest = &list[0];

    for item in list {
        if item > largest {
            largest = item;
        }
    }

    largest
}


fn largest<T>(list: &[T]) -> &T {
    let mut largest = &list[0];

    for item in list {
        if item > largest {
            largest = item;
        }
    }

    largest
}

}
泛型使用
范型结构体
#![allow(unused)]
fn main() {
struct Point<T, U> {
    x: T,
    y: U,
}
}
范型枚举体
#![allow(unused)]

fn main() {
enum Result<T, E> {
    Ok(T),
    Err(E),
}
}
范型方法(impl)
注意,这里不是泛型函数。本质是因为方法是需要调用者,也就是某个对象;而函数是自己调用。
struct Point<T> {
    x: T,
    y: T,
}

impl<T> Point<T> {
    fn x(&self) -> &T {
        &self.x
    }
}

fn main() {
    let p = Point { x: 5, y: 10 };

    println!("p.x = {}", p.x());
}
泛型的性能表现
区分一下类的组合与trait的组合
#![allow(unused)]
fn main() {
struct Point<X1, Y1> {
    x: X1,
    y: Y1,
}

}
#![allow(unused)]
fn main() {
pub fn notify(item: &(impl Summary + Display)) {}
}
二、Trait
A trait defines functionality a particular type has and can share with other types. We can use traits to define shared behavior in an abstract way. We can use trait bounds to specify that a generic type can be any type that has certain behavior.
Traits are similar to a feature often called interfaces in other languages, although with some differences.
关键字
定义
trait
实现
impl
与实现方法的区别
Implementing a trait on a type is similar to implementing regular methods. The difference is that after impl, we put the trait name we want to implement, then use the for keyword, and then specify the name of the type we want to implement the trait for. Within the impl block, we put the method signatures that the trait definition has defined. Instead of adding a semicolon after each signature, we use curly brackets and fill in the method body with the specific behavior that we want the methods of the trait to have for the particular type.
举例
pub trait Summary {
    fn summarize(&self) -> String;
}

pub struct NewsArticle {
    pub headline: String,
    pub location: String,
    pub author: String,
    pub content: String,
}

impl Summary for NewsArticle {
    fn summarize(&self) -> String {
        format!("{}, by {} ({})", self.headline, self.author, self.location)
    }
}

pub struct Tweet {
    pub username: String,
    pub content: String,
    pub reply: bool,
    pub retweet: bool,
}

impl Summary for Tweet {
    fn summarize(&self) -> String {
        format!("{}: {}", self.username, self.content)
    }
}


use aggregator::{Summary, Tweet};

fn main() {
    let tweet = Tweet {
        username: String::from("horse_ebooks"),
        content: String::from(
            "of course, as you probably already know, people",
        ),
        reply: false,
        retweet: false,
    };

    println!("1 new tweet: {}", tweet.summarize());
}
限制:孤儿原则
we can’t implement external traits on external types. For example, we can’t implement the Display trait on Vec
常用方式
在trait定义中编写默认方法逻辑
作为函数入参:
&impl
#![allow(unused)]
fn main() {
pub fn notify(item: &impl Summary) {
    println!("Breaking news! {}", item.summarize());
}
}
语法糖:trait限定(trait bounds)
使用T代称
#![allow(unused)]
fn main() {
pub fn notify<T: Summary>(item1: &T, item2: &T) {}
}
使用“+”组合继承
#![allow(unused)]
fn main() {
pub fn notify(item: &(impl Summary + Display)) {}
}
使用where后置
#![allow(unused)]
fn main() {
fn some_function<T, U>(t: &T, u: &U) -> i32
    where T: Display + Clone,
          U: Clone + Debug
{}

}
作为函数出参
#![allow(unused)]
fn main() {
fn returns_summarizable() -> impl Summary {
    Tweet {
        username: String::from("horse_ebooks"),
        content: String::from(
            "of course, as you probably already know, people",
        ),
        reply: false,
        retweet: false,
    }
}
}
条件出参
#![allow(unused)]
fn main() {
fn returns_summarizable(switch: bool) -> impl Summary {
    if switch {
        NewsArticle {
            headline: String::from(
                "Penguins win the Stanley Cup Championship!",
            ),
            location: String::from("Pittsburgh, PA, USA"),
            author: String::from("Iceburgh"),
            content: String::from(
                "The Pittsburgh Penguins once again are the best \
                 hockey team in the NHL.",
            ),
        }
    } else {
        Tweet {
            username: String::from("horse_ebooks"),
            content: String::from(
                "of course, as you probably already know, people",
            ),
            reply: false,
            retweet: false,
        }
    }
}
}
泛型trait多态
根据泛型的trait设定不同函数
#![allow(unused)]
fn main() {
use std::fmt::Display;

struct Pair<T> {
    x: T,
    y: T,
}

impl<T> Pair<T> {
    fn new(x: T, y: T) -> Self {
        Self { x, y }
    }
}

impl<T: Display + PartialOrd> Pair<T> {
    fn cmp_display(&self) {
        if self.x >= self.y {
            println!("The largest member is x = {}", self.x);
        } else {
            println!("The largest member is y = {}", self.y);
        }
    }
}
}
三、Trait Objects
A trait object is an opaque value of another type that implements a set of traits. The set of traits is made up of an object safe base trait plus any number of auto traits.
关键字
dyn Trait
Before the 2021 edition, the dyn keyword may be omitted .
存在形式
#![allow(unused)]
fn main() {
dyn Trait
dyn Trait + Send
dyn Trait + Send + Sync
dyn Trait + 'static
dyn Trait + Send + 'static
dyn Trait +
dyn 'static + Trait.
dyn (Trait)
}
举例
trait Printable {
    fn stringify(&self) -> String;
}

impl Printable for i32 {
    fn stringify(&self) -> String { self.to_string() }
}

fn print(a: Box<dyn Printable>) {
    println!("{}", a.stringify());
}

fn main() {
    print(Box::new(10) as Box<dyn Printable>);
}
面向对象编程应用(trait objects + struct/enum)
We can use trait objects in place of a generic or concrete type.
Wherever we use a trait object, Rust’s type system will ensure at compile time that any value used in that context will implement the trait object’s trait. Consequently, we don’t need to know all the possible types at compile time.
We’ve mentioned that, in Rust, we refrain from calling structs and enums “objects” to distinguish them from other languages’ objects.
In a struct or enum, the data in the struct fields and the behavior in impl blocks are separated, whereas in other languages, the data and behavior combined into one concept is often labeled an object.
However, trait objects are more like objects in other languages in the sense that they combine data and behavior.
But trait objects differ from traditional objects in that we can’t add data to a trait object. Trait objects aren’t as generally useful as objects in other languages: their specific purpose is to allow abstraction across common behavior.
- trait objects
#![allow(unused)]
fn main() {
pub struct Screen {
    // This vector is of type Box<dyn Draw>
    // which is a trait object; it’s a stand-in for any type inside a Box that implements the Draw trait.
    pub components: Vec<Box<dyn Draw>>,
}

impl Screen {
    pub fn run(&self) {
        for component in self.components.iter() {
            component.draw();
        }
    }
}
}
- trait bounds
#![allow(unused)]
fn main() {
pub struct Screen<T: Draw> {
    pub components: Vec<T>,
}

// If you’ll only ever have homogeneous collections,
// using generics and trait bounds is preferable because
// the definitions will be monomorphized at compile time to use the concrete types.
impl<T> Screen<T>
    where
        T: Draw,
{
    pub fn run(&self) {
        for component in self.components.iter() {
            component.draw();
        }
    }
}
}
- static or dynamic dispatch
- trait限定:静态分发,编译期确定,对应实现了trait限定的类型
- trait对象:动态分发,编译器指针,运行期确定具体类型
#![allow(unused)]
fn main() {
pub fn trait_object() {
    #[derive(Debug)]
    struct Foo;
    trait Bar {
        fn baz(&self);
    }
    impl Bar for Foo {
        fn baz(&self) { println!("{:?}", self) }
    }
    fn static_dispatch<T>(t: &T) where T: Bar {
        t.baz();
    }
    fn dynamic_dispatch(t: &Bar) {
        t.baz();
    }
    let foo = Foo;
    static_dispatch(&foo);
    dynamic_dispatch(&foo);
}

}
trait objects 其实就是鸭子类型
在编译期编译器就知道你的类型是否具有指定的动作,提前检查
This concept—of being concerned only with the messages a value responds to rather than the value’s concrete type—is similar to the concept of duck typing in dynamically typed languages:
if it walks like a duck and quacks like a duck, then it must be a duck!
In the implementation of run on Screen in Listing 17-5, run doesn’t need to know what the concrete type of each component is.
It doesn’t check whether a component is an instance of a Button or a SelectBox, it just calls the draw method on the component.
By specifying Box
as the type of the values in the components vector, we’ve defined Screen to need values that we can call the draw method on.
The advantage of using trait objects and Rust’s type system to write code similar to code using duck typing is that:
- we never have to check whether a value implements a particular method at runtime or worry about getting errors if a value doesn’t implement a method but we call it anyway.
- Rust won’t compile our code if the values don’t implement the traits that the trait objects need.
四、trait object 与 trait bound的对比
Recall in the “Performance of Code Using Generics” section in Chapter 10 our discussion on the monomorphization process performed by the compiler when we use trait bounds on generics: the compiler generates nongeneric implementations of functions and methods for each concrete type that we use in place of a generic type parameter. The code that results from monomorphization is doing static dispatch, which is when the compiler knows what method you’re calling at compile time. This is opposed to dynamic dispatch, which is when the compiler can’t tell at compile time which method you’re calling. In dynamic dispatch cases, the compiler emits code that at runtime will figure out which method to call.
When we use trait objects, Rust must use dynamic dispatch. The compiler doesn’t know all the types that might be used with the code that’s using trait objects, so it doesn’t know which method implemented on which type to call. Instead, at runtime, Rust uses the pointers inside the trait object to know which method to call. This lookup incurs a runtime cost that doesn’t occur with static dispatch. Dynamic dispatch also prevents the compiler from choosing to inline a method’s code, which in turn prevents some optimizations. However, we did get extra flexibility in the code that we wrote in Listing 17-5 and were able to support in Listing 17-9, so it’s a trade-off to consider.
- tait对象编译期间无法确定对象大小,所以需要使用指针形式(引用)。
trait作为参数一般有两种写法:
- 一种是trait对象,需要运行时才能获取对象大小属于动态分发,
- 一种是trait限定,类似模板是编译器件确定属于静态分发。
五、impl使用场景:实现方法,而非函数。
impl与fn不会共存
impl <> xxx<>结构体/枚举体:定义并实现方法
impl
<struct/enum>
#![allow(unused)]
fn main() {
#[derive(Debug)]
struct Rectangle {
    width: u32,
    height: u32,
}

impl Rectangle {
    fn area(&self) -> u32 {
        self.width * self.height
    }
}
}
#![allow(unused)]
fn main() {
struct Point<T> {
    x: T,
    y: T,
}

impl<T> Point<T> {
    fn x(&self) -> &T {
        &self.x
    }
}
}
impl<> for xxx 结构体/枚举体+trait:实现接口定义的方法
impl <trait_name> for <struct/enum name>
#![allow(unused)]
fn main() {
pub trait Summary {
    fn summarize(&self) -> String;
}

pub struct NewsArticle {
    pub headline: String,
    pub location: String,
    pub author: String,
    pub content: String,
}

impl Summary for NewsArticle {
    fn summarize(&self) -> String {
        format!("{}, by {} ({})", self.headline, self.author, self.location)
    }
}
}
Rust面向对象
Struct/Enum+Trait、Reusable、Encapsulation、Inheritance
- Characteristics of Object-Oriented Languages - The Rust Programming Language
- Implementing an Object-Oriented Design Pattern - The Rust Programming Language
Object-oriented programs are made up of objects. An object packages both data and the procedures that operate on that data. The procedures are typically called methods or operations.
Using this definition, Rust is object-oriented: structs and enums have data, and impl blocks provide methods on structs and enums. Even though structs and enums with methods aren’t called objects, they provide the same functionality, according to the Gang of Four’s definition of objects.
注意:可以使用图表,对比python和rust的对应面向对象特性实现方式
属性方法
静态方法
实例方法
类方法
Encapsulation
pub(crate/super) keywords
Start from the crate root
Declaring modules
Declaring submodules
mod keyword
Paths to code in modules
Private vs public
The use keyword
Inheritance
If a language must have inheritance to be an object-oriented language, then Rust is not one. There is no way to define a struct that inherits the parent struct’s fields and method implementations without using a macro.
You would choose inheritance for two main reasons.
Reuse
One is for reuse of code: you can implement particular behavior for one type, and inheritance enables you to reuse that implementation for a different type. You can do this in a limited way in Rust code using default trait method implementations
Polymorphism
The other reason to use inheritance relates to the type system: to enable a child type to be used in the same places as the parent type. This is also called polymorphism (多态性) , which means that you can substitute multiple objects for each other at runtime if they share certain characteristics.
Polymorphism: code that can work with data of multiple types
Rust instead uses generics to abstract over different possible types and trait bounds to impose constraints on what those types must provide. This is sometimes called bounded parametric polymorphism .
六、回顾trait,联系上生命周期
借助于trait和trait约束,我们可以在使用泛型参数来消除重复代码的同时,向编译器指明自己希望泛型拥有的功能。而编译器则可以利用这些trait约束信息来确保代码中使用的具体类型提供了正确的行为。在动态语言中,尝试调用一个类型没有实现的方法会导致在运行时出现错误。但是,Rust将这些错误出现的时期转移到了编译期,并迫使我们在运行代码之前修复问题。我们无须编写那些用于在运行时检查行为的代码,因为这些工作已经在编译期完成了。这一机制在保留泛型灵活性的同时提升了代码的性能。
生命周期是另外一种你已经接触过的泛型。普通泛型可以确保类型拥有期望的行为,与之不同的是,生命周期能够确保引用在我们的使用过程中一直有效
Layer6: 生态环境
参考资源
online-book
fragment
local
学习资源
=======
RustCN


书籍整理
线上课程
博客文章
在线视频
开源项目
官方动态
社区热点
学术讨论
开源观察
底层开发
命令行工具
数据处理
嵌入式
系统开发
性能工具
网络相关
云原生
前端基建
网络基建
IPFS: 星际文件系统(InterPlanetary File System)

- IPFS: 星际文件系统(InterPlanetary File System)
IPFS介绍
1 什么是IPFS
星际文件系统(InterPlanetary File System). IPFS 是一个分布式的web, 点到点超媒体协议. 可以让我们的互联网速度更快, 更加安全, 并且更加开放. IPFS协议的目标是取代传统的互联网协议HTTP。
2 为什么有IPFS
众所周知, 互联网是建立在HTTP协议上的. HTTP协议是个伟大的发明, 让我们的互联网得以快速发展.但是互联网发展到了今天HTTP逐渐出来了不足.
HTTP的中心化是低效的, 并且成本很高
使用HTTP协议每次需要从中心化的服务器下载完整的文件(网页, 视频, 图片等), 速度慢, 效率低. 如果改用P2P的方式下载, 可以节省近60%的带宽. P2P将文件分割为小的块, 从多个服务器同时下载, 速度非常快.
Web文件经常被删除
回想一下是不是经常你收藏的某个页面, 在使用的时候浏览器返回404(无法找到页面), http的页面平均生存周期大约只有100天. Web文件经常被删除(由于存储成本太高), 无法永久保存. IPFS提供了文件的历史版本回溯功能(就像git版本控制工具一样), 可以很容易的查看文件的历史版本, 数据可以得到永久保存
中心化限制了web的成长
我们的现有互联网是一个高度中心化的网络. 互联网是人类的伟大发明, 也是科技创新的加速器. 各种管制将对这互联网的功能造成威胁, 例如: 互联网封锁, 管制, 监控等等.这些都源于互联网的中心化.而分布式的IPFS可以克服这些web的缺点.
互联网应用高度依赖主干网
主干网受制于诸多因素的影响, 战争, 自然灾害, 互联网管制, 中心化服务器宕机等等, 都可能是我们的互联网应用中断服务. IPFS可以是互联网应用极大的降低互联网应用对主干网的依赖.
3 IPFS的目标
IPFS不仅仅是为了加速web. 而是为了最终取代HTTP协议, 使互联网更加美好
4 IPFS包含哪些内容
IPFS是一个协议,类似http协议
- 定义了基于内容的寻址文件系统
- 内容分发
- 使用的技术分布式哈希、p2p传输、版本管理系统
- IPFS是一个文件系统
有文件夹和文件 可挂载文件系统
IPFS是一个web协议
- 可以像http那样查看互联网页面
- 未来浏览器可以直接支持 ipfs:/ 或者 fs:/ 协议
IPFS是模块化的协议
- 连接层:通过其他任何网络协议连接
- 路由层:寻找定位文件所在位置
- 数据块交换:采用BitTorrent技术
IPFS是一个p2p系统
- 世界范围内的p2p文件传输网络
- 分布式网络结构
- 没有单点失效问题
IPFS天生是一个CDN
- 文件添加到IPFS网络,将会在全世界进行CDN加速
- bittorrent的带宽管理
IPFS拥有命名服务
- IPNS:基于SFS(自认证系统)命名体系
- 可以和现有域名系统绑定
IPFS如何工作
- IPFS为每一个文件分配一个独一无二的哈希值(文件指纹: 根据文件的内容进行创建), 即使是两个文件内容只有1个比特的不相同, 其哈希值也是不相同的.所以IPFS是基于文件内容进行寻址, 而不像传统的HTTP协议一样基于域名寻址.
- IPFS在整个网络范围内去掉重复的文件, 并且为文件建立版本管理, 也就是说每一个文件的变更历史都将被记录(这一点类似版本控制工具git, svn等), 可以很容易个回到文件的历史版本查看数据.
- 当查询文件的时候, IPFS网络根据文件的哈希值(全网唯一)进行查找. 由于每个文件的哈希值全网唯一, 查询将很容易进行.
- 如果仅仅使用哈希值来区分文件的话, 会给传播造成困难, 因为哈希值不容易记忆, 就像ip地址一样不容易记忆, 于是人类发明的域名. IPFS利用IPNS将哈希值映射为容易记的名字
- 每个节点除了存储自己需要的数据, 还存储了一张哈希表, 用来记录文件存储所在的位置. 用来进行文件的查询下载.
IPFS如何解决中心化服务器缺点
1 下载速度快, 不再依赖主干网, 中心化服务器
整个IPFS系统是一个分布式的文件存储系统, 那么在下载相关数据的时候, 将从多个节点同时下载, 相比于HTTP从中心服务器的下载速度要快很多, 大家都用过P2P下载(比如: 迅雷, BitTorrent), IPFS下载过程跟这个类似.
2 存储空间变得非常便宜
由于IPFS使用的是区块链技术, 利用 Filecoin(也就是挖矿)来激励矿工分享自己的硬盘, 并且IFPS从全网去掉了冗余存储(从整个网络空间考虑, 这将大大节省网络存储空间), 将来的IPFS存储将会变得非常便宜(与我们现在的云盘, 各种中心化的CND相比较).
3 安全
中心化服务器目前很难抵挡DDoS攻击, 当大量的访问请求从四面八方涌来, 中心化的服务器几乎会在一瞬间瘫痪, 巨大的访问量随时可能造成服务器宕机. IPFS天生就拥有抵挡这种攻击的能力. 因为所有的访问将会被分散到不同的节点. 甚至攻击者自己也是节点之一. 某种程度上讲, IPFS甚至能抵挡量子计算的攻击.
4 开放
众所周知, 比特币是一种去中心化, 匿名的数据货币, 这些特性使得比特币无法被管制, 交易无法篡改. IPFS同样, 由于是建立在去中心化的分布式网络上的, 所以IFPS很难被中心化管理, 限制. 互联网将更加开放.
IPFS的用途
IPFS主要解决现有中心化服务器中的数据存储问题。它能够极大的降低数据存储的成本,提升数据下载速度。
那么凡是需要优化数据存储的地方几乎都可以使用IPFS来提升效率
下面是一张保存在ipfs网络的图片:
- 在 /ipfs 和 /ipns 下面挂载全球文件系统:就是说我们所有的文件都可以存到上面.
- 挂载个人同步的文件夹, 可以自动进行版本管理, 自动备份. 也就意味着未来我们将拥有无限空间的网盘, 不用担心数据丢失, 不用担心隐私泄露(非对称加密). 国外的dropbox, 跟IPFS云盘相比, 都将变得微不足道 。
- 作为加密文件和数据共享系统。IPFS天生视乎就具备这样的能力, 文件加密, 数据共享, 都是小菜一碟.
- 作为带版本控制的软件包管理系统.
- 作为虚拟机的根文件系统
- 作为利用管理程序, 把IPFS作为虚拟机的引导文件系统:在线操作系统
- 作为数据库:应用可以直接操作IPFS的Merkle DAG数据结构, 并且可以使用IPFS的版本控制, 缓存. 试想一下我们的数据库直接存在IPFS的文件系统是什么体验? 自动备份, 永不丢失, 安全加密, 无限空间, 高速连接。
- 作为加密通讯平台,谁都别想窃听消息通信
- 作为加密CDN, 作为web的CDN, CDN功能全包.
- 永久web, 不存在不能访问的链接, 跟 404 说 byebye.
IPFS的POW机制
IPFS家族
Main Projects

Contributions
Movements

IPFS 与 Filecoin
IPFS:数据的分发和定位(数据传输协议,类似HTTP协议)
- 传输:数据在节点之间进行传输
- 定位:寻址,发现数据的存储位置
- 存储:自己提供存储(可以保证存储的安全性),其它节点不保证数据存储的安全性
- 用户:下载数据免费,自己提供服务器,自己搭建节点
- 存储内容:只存储节点自己感兴趣的内容
Filecoin: 数据存储(类似一个云存储)
- 存储:付费存储,用户付费,矿工和Filecoin网络保证存储的安全性
- 下载:付费下载,用户付费,矿工负责发送数据
- 用户:不需要自己提供存储,也不需要自己提供节点
- 存储内容:收费存储一切
IPFS和Filecoin共同依赖libp2p项目。
Filecoin是IPFS的激励层,二者互补形式一对协议。为我们的互联网提供了很好的基础设施。
了解上述的基本内容后:
- 如果开发者仅仅想要的是一个安全、快速的云存储,那么选择Filecoin即可。
- 如果开发者除了数据存储需求,还需要分发数据,那么选择IPFS即可。
- 如果开发者既有数据存储需求,又有数据的分发需求,那么可以单独选择IPFS,也可以IPFS+Filecoin一起。
注意:IPFS可以做Filecoin的事情,存储,而filecoin并不能做IPFS的事情,数据传输
使用IPFS的应用
akasha: 基于以太坊和IPFS的社交网络Alexandria:去中心化的内容发布平台- Arbore:朋友之间的文件共享系统–相信很快就可以抛弃某度的云盘了
- dtube:利用IPFS作为存储的视频分享网站
- git-ipfs-rehost:可以把github上的项目存储到IPFS上
- ipfs-search:基于IFPS的搜索引擎
- ipfs-share:基于IFPS的文件分享
- ipfs.pics:基于IFPS的图片分享网站
- Orbit:基于IFPS的分布式聊天工具
- Partyshare:一个简单的文件共享系统
- http://computes.io:基于IPFS的分布式计算机(这个牛,把世界上的计算资源收集起来,构建一个巨大的分布式计算机)
- OpenBazaar:openbazaar是一个去中心化的淘宝,口号是“买卖自由/Buy and Sell Freely”,问题是一旦用户停止运行软件,商店就下线了,借助于IPFS,openbazaar2.0 打造一个离线商店。
- Ubuntu:著名的linux发行版本Ubuntu正在计算把发行版本转移到IPFS上来,目前正在讨论方案。
更多可在这里查看: Awesome IPFS
一些过期项目: IPFS Inactive repositories
IPFS网络如何运行
IPFS: NAT traversal
BitSwap
IPFS非rust实现版本
参考资源
- IPFS指南 - 知乎
- rs-ipfs/rust-ipfs: The InterPlanetary File System (IPFS), implemented in Rust.
- Rust IPFS - Open Collective
- IPFS网络是如何运行的(p2p网络) - 知乎
- IPFS: NAT traversal(NAT穿越) - 知乎
- IPFS: BitSwap协议(数据块交换) - 知乎
- IPFS非rust实现版本
利用IPFS构建自己的去中心化分布式网站
参考资源
IPFS:pubsub功能使用
参考资源
<<<<<<< HEAD
IPFS伴侣插件使用
参考资源
基于IPFS与Ngrok构建网关
参考资源
web开发
基于Rust尝试WebAssembly
参考资源
- Introduction - Rust and WebAssembly
- Rust和WebAssembly初体验
- 安装Rust和WebAssembly工具链和helloworld
- Rust Assembly之实现康威生命游戏
- 康威游戏之优化
- Web Assembly之测试康威游戏代码
- Web Assembly之调试方法
- Web Assembly康威游戏添加交互
- Web Assembly之性能分析
关于康威游戏(Conway’s Game)
- Conway’s Game of Life - Wikipedia
- Play John Conway’s Game of Life
- 学术干货 | Conway’s Game of Life 生命游戏的建筑设计应用 - 知乎
多媒体
音视频处理
游戏开发
其他
Rust与其他语言
科学艺术研究
其他工具
安全参考
商业观察
区块链
Layers
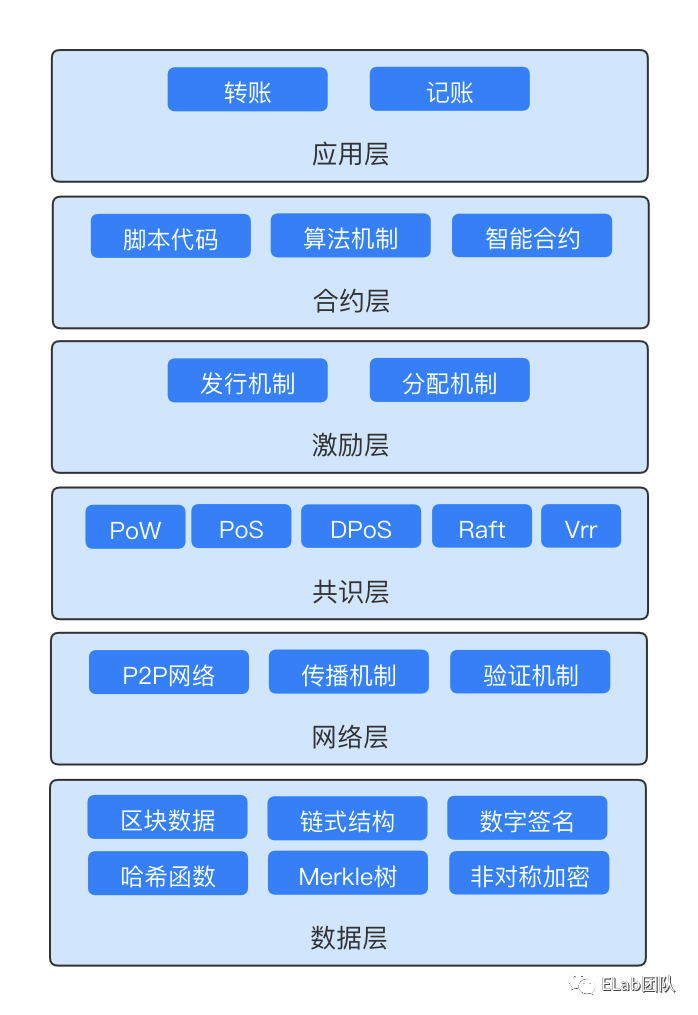
OSI网络七层模型

下图详细说明了各层作用
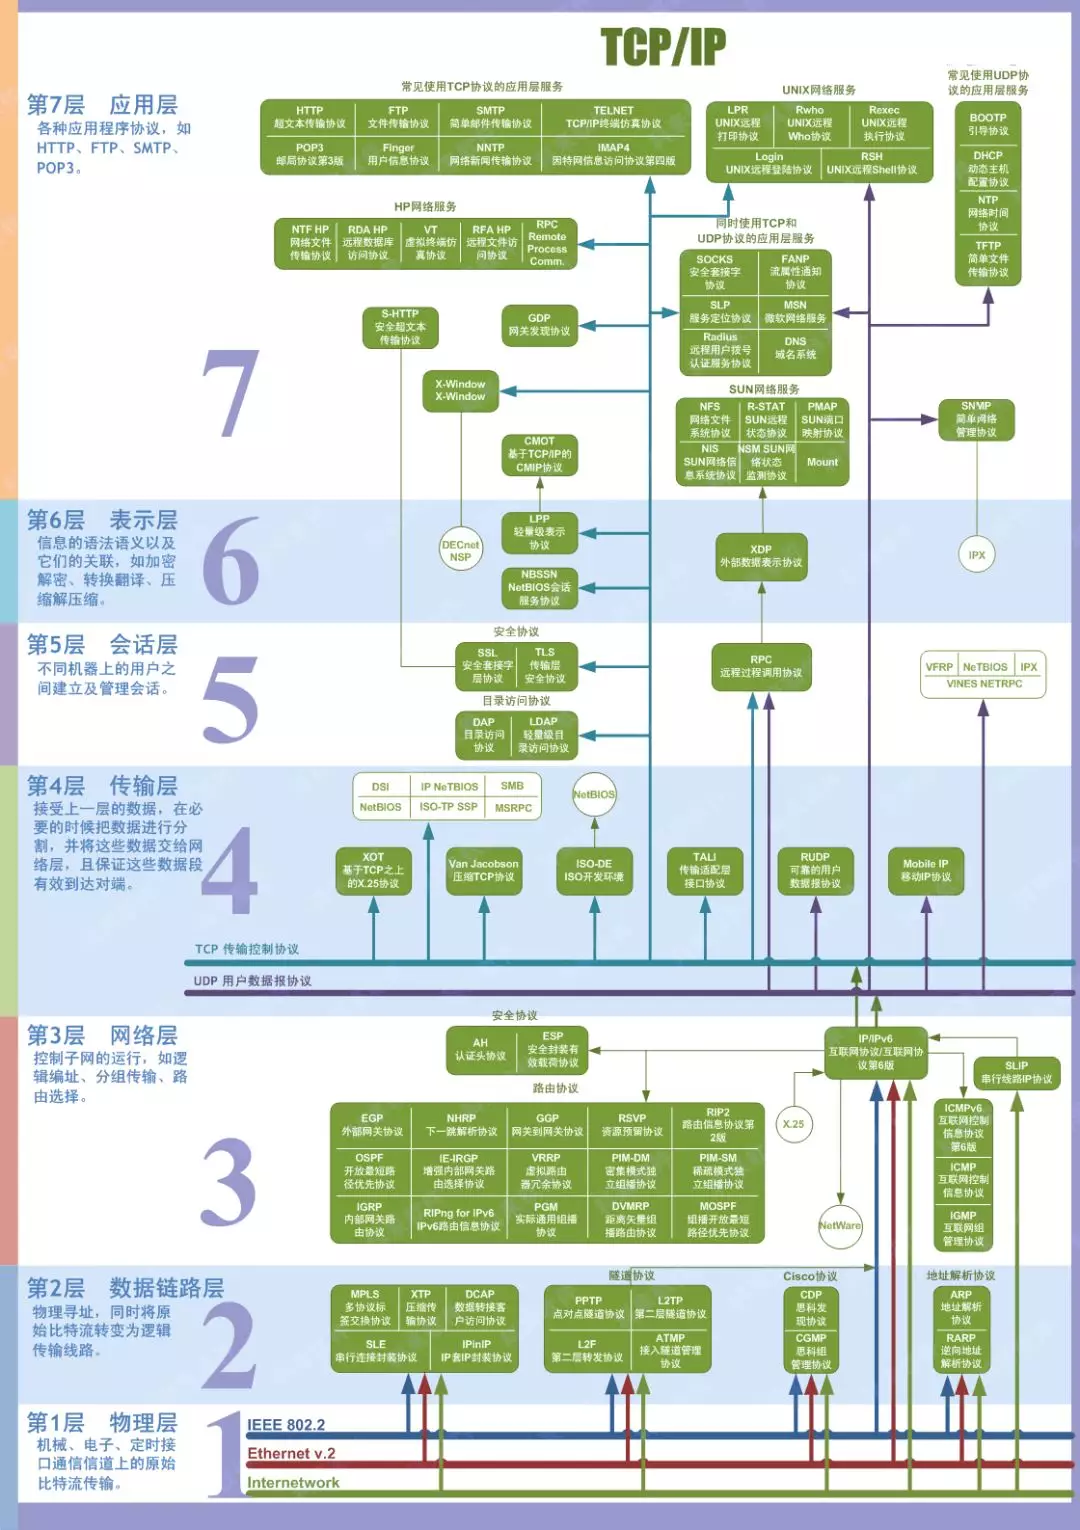
实际应用过程中,五层协议结构里面是没有表示层和会话层的。应该说它们和应用层合并了。
数据层
区块链是通过区块(block)存储数据,每个数据节点之间都包含所有数据,即分布式账本。每个区块都包括了区块的大小、区块头、区块所包含的交易数量及部分或所有的近期新交易。
数据层主要是解决这些数据以什么样的形式组合在一起,形成一个有意义的区块。
区块链的数据结构中包括两种哈希指针,它们均是不可篡改特性的数据结构基础。
-
一个是形成“区块+链”(block+chain)的链状数据结构
-
另一个是哈希指针形成的梅克尔树(如下图所示)。
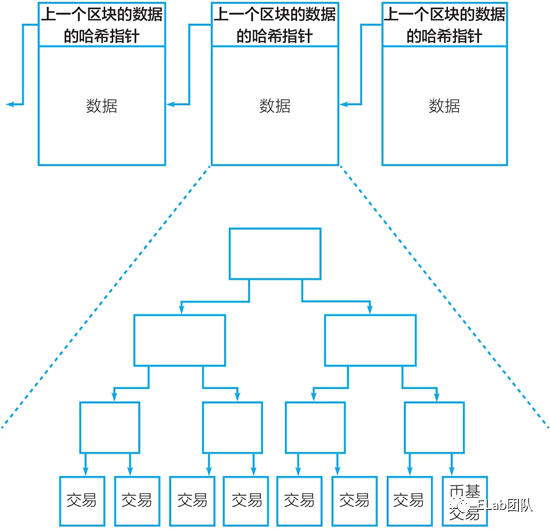
网络层
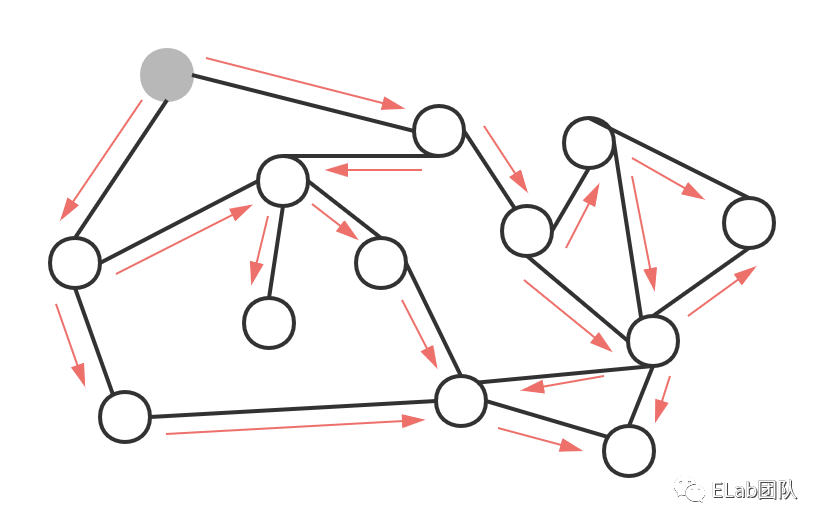
区块链使用的是去中心化的网络架构,没有中心化服务器,依靠用户点对点交换信息,主要包括 P2P 组网机制、数据传播和验证机制。
节点指的是区块链客户端软件(比如比特币客户端、以太坊客户端),一般分为全节点和轻节点,全节点包含了所有区块链的区块数据,轻节点仅包括与自己相关的数据。
共识层
共识层的功能是让高度分散的节点在 P2P 网络中,针对区块数据的有效性达成共识,决定了谁可以将新的区块添加到主链中(挖矿机制)。
工作量证明共识机制( PoW )
矿工需要将网络中未确认的交易按梅克尔树组装成候选区块,在候选区块的头部有一个 32位的随机数区域,矿工需要反复调整随机数并计算,目标是让整个区块的哈希值小于一个“目标值”,谁先完成这个目标谁就有权力将交易记录到区块链分布式账本中并获得一定的奖励。
挖矿的过程比拼的就是各个矿工节点的算力,可以变相认为谁的算力高谁的工作量就高,就有权力记账和获得奖励。
- 比特币使用的是 PoW 机制;
- 以太坊开始使用的是 PoW 机制,后来改成了 PoS 机制,原因是该机制交易速度更快、资源消耗更低。
这种挖矿计算是非对称的,挖矿可能需要经过许多次哈希计算,而要验证的确找到有效的随机数,只需要一次计算就可以,因此其他节点能够很快验证交易是否已经被记入账本。
激励层
激励层的功能主要是提供一些激励措施,鼓励节点参与记账,保证整个网络的安全运行。通过共识机制胜出取得记账权的节点能获得一定的奖励。
目前比特币的激励措施是新区块产生时系统会奖励矿工一定的比特币(系统产生的新比特币,也会记录在分布式账本,来源地址是 0,因此整个过程叫挖矿),奖励最初是 50 个比特币,每四年减半一次,分别为 25 个、12.5 个,以此类推。当比特币数量达到 2100 万枚的上限后(2140 年),激励就全靠交易的手续费了。以太坊交易是靠 gas 手续费来激励矿工。
合约层
合约层封装了各类脚本、算法和智能合约,使得区块链具有可编程能力。例如,比特币的脚本中就规定了比特币的交易方式和过程中的种种细节,不过这种脚本使用不够便捷且不是图灵完备的。
以太坊提出了智能合约的解决方案,提供了一种图灵完备的高级编程语言来编写智能合约,并使智能合约能够运行在分布式的以太坊虚拟机 EVM 上。
区块链系统(比特币、以太坊)可以认为是一个分布式状态机,通过交易触发合约(脚本、智能合约)运行来改变状态机的状态。
应用层
应用层封装了区块链的各种应用场景,具体应用可参见90+ #Ethereum Apps You Can Use Right Now。
以下为一笔比特币转账交易的过程
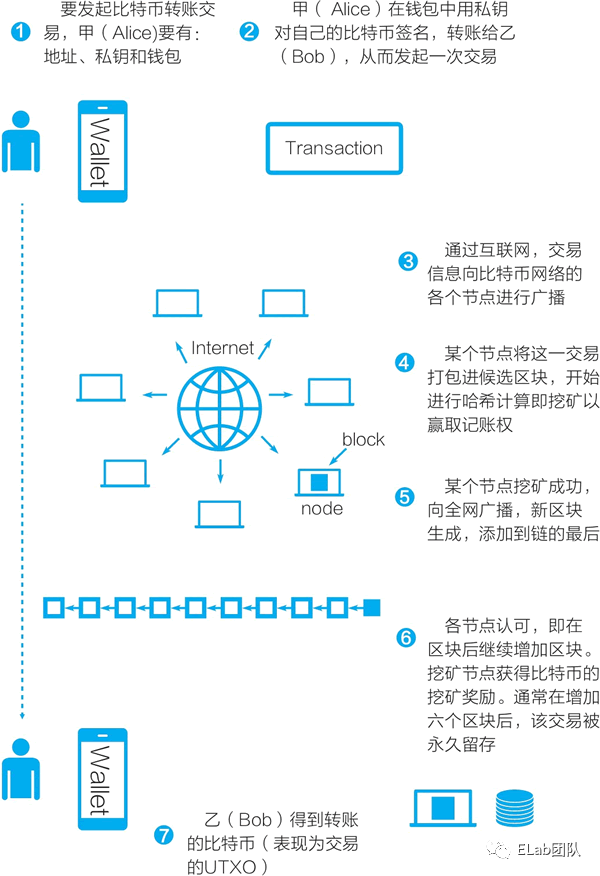
Blockchains
- Aleo. Leo is a rust flavoured zk language.
- Aleph Zero. DAG, PoS, snark smart contracts (substrate based).
- Anoma.network. PoS blockchain with privacy.
- Bitcoin Cash. A library for creating and parsing Bitcoin Cash trasactions.
- CITA. A high performance blockchain kernel for enterprise users.
- CodeChain. Programmable multi-asset chain.
- Concordium. Privacy centric (zk) PoS chain, yet with built in identities and rust smart contracts.
- Conflux. The Rust implementation of Conflux protocol.
- Darwinia. Relay chain of Darwinia Network, can connect to Polkadot as parachain in Polkadot Model.
- Dusk.network. Privacy PoS using zk (plonk).
- Enigma secures the decentralized web.
- Elrond. Elrond (EGOLD( - scalable and usable blockchain, written is Rust and has smart contracts in Rust.
- Exonum. An extensible open-source framework for creating private/permissioned blockchain applications.
- Forest. An implementation of Filecoin written in Rust.
- Fuel. Rust full node implementation of the Fuel v2 protocol.
- Gear. Computational component of Polkadot network.
- Grin. Minimal implementation of the MimbleWimble protocol.
- Holochain. The core Holochain framework written in rust, a container, and hdk-rust library for writing Zomes.
- Huobi Chain. The next generation high performance public chain for financial infrastructure.
- Interledger. An easy-to-use, high-performance Interledger implementation written in Rust.
- Internet of People. Decentralized software stack that provides the building blocks and tools to support a decentralized society.
- Libra. Global currency and financial infrastructure that empowers billions of people.
- Lighthouse. Fast and secure Ethereum 2.0 client.
- NEAR. NEAR Protocol - scalable and usable blockchain.
- Nervos CKB. Nervos CKB is a public permissionless blockchain, the common knowledge layer of Nervos network.
- NYM. Selective privacy via a mixnet preventing metadata analysis.
- Nomic. Nomic is a high-performance Bitcoin sidechain which is part of the Cosmos network.
- Mina Protocol. A rust implementation of the mina succinct blockchain.
- Mir Protocol. A succinct blockchain powered by zero-knowledge proofs. (plonk based)
- OpenEthereum. The Ethereum Rust client
- Parity Bitcoin. The Parity Bitcoin client.
- Parity Ethereum. The fast, light, and robust EVM and WASM client.
- Parity Zcash. Rust implementation of Zcash protocol.
- Polkadot. Polkadot Node Implementation.
- Polymesh. The Polymesh blockchain (built on Substrate) is an identity orientated chain for the issuance, lifecycle management and settlement of regulated securities.
- QAN. Post-quantum blockchain.
- Radix. Sharded smart contract DeFi platform.
- Setheum. SETHEUM : “Secure Evergreen Truthful Heterogeneous Economically Unbiased Market” is an Ethical DeFi-friendly Blockchain (built on Substrate) working on achieving mass adoption, security, scalability, affordability, inclusivity and ethical DeFi Governance.
- Shasper. Parity Shasper beacon chain implementation using the Substrate framework.
- Solana. Blockchain Rebuilt for Scale.
- Stacks 2.0. Proof of Transfer blockchain from Blockstack.
- Tari. The Tari Digital Assets Protocol.
- Tendermint. Tendermint is a high-performance blockchain consensus engine for Byzantine fault tolerant applications.
- Witnet. Open source implementation of Witnet decentralized oracle network protocol in Rust.
- xx-network. Post-quantum blockchain, mixnet privacy preventing metadata analysis. (Substrate rust+go)
- Zebra. An ongoing Rust implementation of a Zcash node.
- Zero-chain. A privacy-preserving blockchain on Substrate.
Blockchain Frameworks
- Substrate. The platform for blockchain innovators.
- slingshot. A new blockchain architecture under active development, with a strong focus on scalability, privacy and safety.
- Tendermint ABCI. Tendermint ABCI server, written in the Rust programming language.
- Orga. A high-performance state machine engine designed for Tendermint-based blockchain applications.
Cross-Chain
- Comit is an open protocol facilitating trustless cross-blockchain applications.
- IBC. Rust implementation of Cosmos’ Interblockchain Communication Protocol (IBC).
Virtual Machines
- CKB-VM. RISC-V virtual machine.
- CosmWasm. Multi-chain smart contract platform built for the Cosmos ecosystem.
- EVM Parity. Parity implementation of EVM.
- FuelVM FuelVM interpreter in Rust.
- Lunatic. Erlang-inspired runtime for WebAssembly.
- Polygon Miden. SNARK based VM.
- SVM Spacemesh Virtual Machine.
- Wasmi. WebAssembly interpreter.
- Wasmer. A convenient Rust wrapper over WebAssembly backends.
- Wasmtime. Standalone JIT-style runtime for WebAssembly, using Cranelift.
- Zinc. Zinc zk smart contract language.
General-Purpose Consensus
- Raft. Raft distributed consensus algorithm implemented in Rust.
- Honey Badger. An implementation of the paper “Honey Badger of BFT Protocols” in Rust.
- Narwhal. The consensus layer used by Sui.
P2P Network Libraries
- chamomile. P2P library. Support build robust stable connection on p2p/distributed network.
- crust. Reliable P2P network connections in Rust with NAT traversal. One of the most needed libraries for any server-less / decentralised projects.
- rust-libp2p. The Rust Implementation of the libp2p networking stack.
- Tentacle. A multiplexed p2p network framework that supports custom protocols
- P2P NAT-Traversal. NAT Traversal techniques for p2p communication.
- qp2p. Peer-to-peer communications library for Rust based on QUIC protocol.
- sn_routing. Routing - specialised storage DHT.
Cryptography
- Awesome Cryptography Rust.
- Dalek Cryptography.
- Za!. An experimental rust zksnarks compiler with embeeded bellman-bn128 prover.
- OpenZKP. Pure Rust implementations of Zero-Knowledge Proof systems.
- Microsoft Nova. Rust recursive snark without trusted setup.
- Arkworks. An ecosystem for developing and programming with zkSNARKs
Layer2
- Arbitrum’s arb-os ArbOS is the “operating system” that runs an eth Layer 2 on an Arbitrum chain,
- Noir language. Noir is a Domain Specific Language for SNARK proving systems. ( Aztec eth L2)
- Penumbra. PoS network providing privacy to the Cosmos ecosystem.
- Rust-Lightning is a Bitcoin Lightning library written in Rust. The main crate, lightning, does not handle networking, persistence, or any other I/O. Thus, it is runtime-agnostic, but users must implement basic networking logic, chain interactions, and disk storage.
- zkSync. Matter Labs’ scaling eth L2 engine secured by zero-knowledge proofs.
Dapps
- Serum-dex. A decentralized exchange built on Solana.
- SewUp. A library to help you build your Ethereum webassembly contract with Rust and just like develop in a common backend.
Other
- abscissa. Micro-framework for CLI tools with strong focus on security.
- tesseracts. A small block explorer for geth PoAs written in rust.
- merk. High performance Merkle key/value store written in Rust, based on RocksDB.
参考资源
online-book
fragment
- Web3.0开发入门-技术圈
- rust-in-blockchain/awesome-blockchain-rust: Collect libraries and packages about blockchain/cryptography in Rust
- 有了HTTP,为什么还要RPC?
- 使用rust建立一个简单的区块链
local
使用rust建立一个简单的区块链
Substrate介绍与源码解读

Gavin Wook、Polkadot and Substrate
Gavin Wook与波卡跨链
所以对于开发人员来说,比起大家耳熟能详的v神(Vitalik Buterin),更重要的人是实际上撑起整个以太坊世界的灵魂人物Gavin Wood。更何况很多山寨币实际上就是在以太坊的模型上修修改改,所以在我看来Gavin Wood是撑起了当前半个区块链世界的人。
而Gavin Wood 离开了以太坊之后,开启的一个新项目叫做Polkadot(波卡),这个项目的目的就是跨链,为了把各个割裂的区块链孤岛能够联系一起 。虽然目前有很多的项目都号称自己在做跨链,但是目前在我看来唯一在推进,逻辑上是可推理,之后可能成功的跨链项目就只有波卡能够成功。(后半段可能存在一定误导性,Polkadot的跨链可能在大部分人理解下应该是分片的变种,也就是基于Substrate开发的区块链可以部署到Polkadot上,经过Polkadot平台互相沟通)。
从波卡到Substrate
而Gavin Wood 在开发的波卡的过程中,经过不断地思考,认为其实区块链发展这几年,大家做的很多事情都是相同的。
那么在以往的软件开发中,当大家发现大家都在做相同的事情的时候,就会将这件事情进行抽象,然后造“轮子”,将这些高层次的东西做封装,成为“开发框架”,将背后复杂的基础设施都封装起来,而使用这个“框架”的开发人员,就可以更加专注于自己的业务逻辑,而不必花费大量的精力去造“轮子”去完成那些每个链都要做的事情。
Gavin Wood 在开发波卡的中途先暂停了波卡的开发,将波卡及以太坊已有的成果进行抽象,命名为substrate作为区块链开发的基础框架,并把全部精力都转移到了substrate开发中。
跨链的重要性
另一方面,在软件开发领域或者互联网领域,大家其实都发现了占据了框架的地位实际上一定程度上占据了这个领域开发的生态,更何况对于跨链来说,当大家的链都比较同质化后,跨链会更加的方便。现在大家都把跨链当作区块链下一个引爆点,而跨链的属性界定了做“跨链”的人基本上只能一家独大,成为垄断地位。而接入跨链的链越多,这个跨链就越垄断( 因为大家使用跨链就是为了在不同的链之间兑换代币,能换的代币越多,使用这个跨链的人就越多,生态就越集中),
而Gavin Wood 提供的substrate框架又能解决大部分链都在重复解决的问题,所以大家就更倾向于使用substrate开发自己的链。
总体设计
常见区块链设计
目前所有的区块链系统几乎都是从比特币/以太坊模型演变而来。一般来说,一个区块链系统应该具有:
区块链系统基础部分
- 共识系统 (区块链分布式基石)
- p2p连接与广播系统
- 存储系统
- 交易池系统
- rpc系统(区块链与外界交互主要通道)
链的功能
链功能是区块链间相互竞争的关键部分. 与系统基础部分相比,这部分差异很大,提供的是除去区块链模型外,这条链能够提供的功能。另一方面在区块链升级中,一般来说系统基础部分改动较小,而链的功能部分改动较大,特别是许多链为了追求开发速度,一开始只能提供转账功能,在后续的版本中才慢慢升级其他功能
例如:
- 比特币的UTXO结构加上交易脚本
- 以太坊的虚拟机与智能合约
- eos的账户系统及虚拟机
- 有的山寨币特化部分智能合约或部分native层成为系统级功能:
- 提供随机数
- 提供质押对赌
- oracle数据输入
- 引入复杂密码学方案
- 等等。。。
Substrate理念
先认识一下:什么是区块链框架
简单来说,或者从本质上讲,区块链框架是一个(巨大的)工具和库的集合,用于构建一个完整的、可运行的、安全的、功能完整的(尽管是基本的)区块链。
区块链框架负责处理以下方面的大部分繁重工作:
- 共识P2P网络
- 帐户管理
- 基本的区块链逻辑(区块、交易等)
- 区块链交互的客户端
接着说说Substrate与web3
Substrate 可以被描述为一个区块链框架——具体来说,一个用于构建定制区块链的框架。这些区块链可以完全自主运行,这意味着它们不依赖任何外部技术来运行。
然而,Substrate 背后的公司 Parity(由以太坊联合创始人 Gavin Wood 共同创立)也建立了 Polkadot 网络。 Polkadot 本质上是一个分散的、基于协议的区块链平台,用于实现安全的跨区块链通信。
由于它们是由同一个人开发的,因此 Substrate 对与Polkadot的集成具有一流的支持,因此您使用Substrate创建的任何区块链都可以无缝连接到 Polkadot。
Substrate 还提供无分叉运行时升级——在不触发硬分叉的情况下升级区块链状态转换功能的能力。
用web框架、游戏引擎类比
一个更好的比较可能是一个成熟的游戏引擎(想想 Unity),它为你需要的一切功能提供基本实现,以及可能需要的许多扩展点,供自定义。
当然,这意味着已经在架构方面做出了一些决定:你将无法轻易更改。
根据你的用例,可能需要更多的可定制性,而框架可能会以某种方式对其进行限制。
这是标准的权衡:区块链框架可以节省你的时间,但代价是你不得不忍受的一些事情。
然而,正如我们将在下面更详细地探讨的那样,Substrate在这方面提供了一些灵活性。
使您能够在多个阶段在更多的技术自由和易于开发之间进行选择。
Substrate的后端是用 Rust 构建的。它(以及 Parity 通常所做的大部分工作)也是完全开源的。
因此,您不仅可以使用 Substrate,还可以通过回馈和分叉其中的一部分来改进它,以根据您自己的需求进行定制。
Substrate Architecture
Gavin Wood 作为以太坊实际核心的开发者,自然早已对这套系统的框架了然于心,所以从Substrate框架提出的开始(2018年9月),就对区块链系统作出了2个关键的区分:
┌───────────────────────────────────────────────────────────────────────────────────────────────────────┐
│                                                                                                       │
│                                                                                                       │
│      ┌─────────────────┐     ┌─────────────────┐    ┌─────────────────┐    ┌─────────────────┐        │
│      │ fund management │     │     Account     │    │    Contract     │    │   Democratic    │        │
│      │    transfer     │     │     system      │    │       VM        │    │   referendum    │        │
│      └─────────────────┘     └─────────────────┘    └─────────────────┘    └─────────────────┘        │
│                                                                                                       │
│                                                  ######  #     # #     # ####### ### #     # #######  │
│      ┌─────────────────┐     ┌─────────────────┐ #     # #     # ##    #    #     #  ##   ## #        │
│      │     Equity      │     │      etc.       │ #     # #     # # #   #    #     #  # # # # #        │
│      │   calculation   │     │                 │ ######  #     # #  #  #    #     #  #  #  # #####    │
│      └─────────────────┘     └─────────────────┘ #   #   #     # #   # #    #     #  #     # #        │
│                                                  #    #  #     # #    ##    #     #  #     # #        │
│                                                  #     #  #####  #     #    #    ### #     # #######  │
├───────────────────────────────────────────────────────────────────────────────────────────────────────┤
│                                                                                                       │
│      ┌─────────────────┐     ┌─────────────────┐     ┌─────────────────┐    ┌─────────────────┐       │
│      │    Consensus    │     │ Network system  │     │     Trading     │    │                 │       │
│      │    mechanism    │     │      (p2p)      │     │      Pool       │    │       RPC       │       │
│      └─────────────────┘     └─────────────────┘     └─────────────────┘    │                 │       │
│                                                                             └─────────────────┘       │
│                                                             #####  ####### ######  #######            │
│      ┌─────────────────┐                                   #     # #     # #     # #                  │
│      │      etc.       │                                   #       #     # #     # #                  │
│      │                 │                                   #       #     # ######  #####              │
│      └─────────────────┘                                   #       #     # #   #   #                  │
│                                                            #     # #     # #    #  #                  │
│                                                             #####  ####### #     # #######            │
│                                                                                                       │
└───────────────────────────────────────────────────────────────────────────────────────────────────────┘
从Rust看Substrate
开发者只需要关注Runtime(链功能)
根据这样的划分,当开发者使用Substrate框架的时候,无需关心区块链基础功能也就是Core部分的工作,而只需关心自己链能够提供的功能,也就是Runtime部分的工作。
明晰Runtime
这里一直强调Runtime是“链的功能”有一些通俗与不严谨,这里使用一个更抽象的描述:
这个定义比较抽象,且由于需要对“世界状态”或类似概念有比较深入的了解才好解释,故不展开讲解。更严格来说,“需要对运行结果进行共识的功能组件”是“链的功能”的一个子集。
判断标准
这里有一个简单的判定标准判断某个功能是否应该放在Runtime内:
对于某个功能,若只改动一个节点的代码对于所有的逻辑运行的结果与其他不改动的节点运行的结果相同,则认为这个部分应该放在Runtime之外,如果运行结果不同,则认为应该放在Runtime之内。
举个例子:比如我改变了交易池的排序代码,使得对某个账户有利的交易能优先打包。这个改动会令自己这个节点产出的区块不公平的打包交易,但是只要打包出来的区块大家都可以认可,则所有节点共识的“状态的变化”仍然是一致的。很明显,这个功能组件不应该是Runtime的功能,因为它不会改变对于验证一个区块时的“状态变化”的验证。比如我改变了转账功能的代码,能给某个账户凭空增加钱,那么显然,这种改动对于这个改动过的节点执行的结果将会与其他节点不同,则共识不会通过。所以转账这个功能就应该放在Runtime当中,让所有节点执行的都是一致的。
这部分结合native与wasm后会容易理解
所以到底什么是Runtime,我认为使用“链上功能”来描述最为恰当,因为其隐含了对于执行结果的共识问题。
Substrate的Runtime
Substrate的Runtime当然没有止步于仅将区块链系统做了模块化划分,提供框架功能这一步,事实上,由于抽象出了Runtime,Substrate实现了以往所有区块链都无法实现的一个功能:区块链系统升级。
中心化升级流程
┌────────────────────────────────Centralized System Upgrading(Internet App)────────────────────────────────┐
│                                                                                                          │
│                                                                                                          │
│                         ┌───────────────────┐      ┌─────────────┐    ┌─────────────┐    ┌─────────────┐ │
│                     ┌──▶│    Update Code    │      │   Deploy    │    │   Upgrade   │    │ Centralized │ │
│     .─────────.     │   │(Backend/Frontend)─┼──────▶   Server    │───▶│  Sucessful  │────▶Upgrade Easy │ │
│    ╱           ╲    │   └───────────────────┘      └─────────────┘    └─────────────┘    └─────────────┘ │
│   ( Bug/Upgrade )───┤                                                 ┌─────────────┐                    │
│    `.         ,'    │                                                 │  Somebody   │                    │
│      `───────'      │                                              ┌─▶│   Upgrade   ├─┐                  │
│                     │   ┌───────────────────┐      ┌─────────────┐ │  └─────────────┘ │  ┌─────────────┐ │
│                     └──▶│    Update Code    │      │   Publish   │ │                  │  │ Fragmented  │ │
│                         │       (App)      ─┼──────▶  App Store  │─┤  ┌─────────────┐ ├─▶│   version   │ │
│                         └───────────────────┘      └─────────────┘ │  │  Somebody   │ │  └─────────────┘ │
│                                                                    └─▶│   Reject    │─┘                  │
│                                                                       └─────────────┘                    │
│                                                                                                          │
│                                                                                                          │
└──────────────────────────────────────────────────────────────────────────────────────────────────────────┘
对于中心化的互联网系统而言,由于代码与数据的控制权在自己手上,所以可以随时进行版本的升级与修改。但是即便如此,也只有网页H5,后台代码可以做到随时升级,在移动互联网中,app还是需要用户自行更新。其中android生态尤为突出,apk版本的碎片化一度是困扰开发者的难题。为了应对app应用的碎片化,推出了许多功能各异的框架能够用户在不更新app的情况下进行“热更新”,一度成为技术的热门追捧。这些热更新的框架本质上都是允许从后台下载一段更新代码,通过各种方式加载运行新的代码来完成。一般情况下通过这种热更新提供的功能都会带来一定的性能损耗以运行最新的热更新代码。但是即便是热更新,更新代码的控制权也同样处于中心化组织的手中。
无央化升级流程(原先)
┌───────────────────────────────────Decentralized System Upgrading(Blockchain Dapp)────────────────────────────────────┐
│                                                                                                 ┌─────────────┐      │
│                                                                                                 │   Upgrade   │      │
│                                                                                  ┌───Yes───────▶│  Sucessful  │      │
│                                                                                  │              └─────────────┘      │
│                                                                                  Λ                                   │
│                                                                                 ╱ ╲                                  │
│                                                                                ╱   ╲                                 │
│                                                                               ╱     ╲                                │
│                                                          ┌────────┐          ╱       ╲                               │
│                                                          │ Deploy │      Most deployments                            │
│                                              ┌──Support─▶│  Node  │─────▶(Under Byzantine                            │
│                                              │           └────────┘      Fault Tolerance)                            │
│                                              │                               ╲       ╱                               │
│                                              Λ                                ╲     ╱                                │
│                                             ╱ ╲                                ╲   ╱                                 │
│                                            ╱   ╲                                ╲ ╱                                  │
│                                           ╱     ╲                                V              ┌──────────────────┐ │
│     .─────────.      ┌─────────────┐     ╱       ╲                               │              │   Upgrade Fail   │ │
│    ╱           ╲     │ Update Node │    ╱ Running ╲                              └───No────────▶│(Cause Fragmented)│ │
│   ( Bug/Upgrade ─────▶    Code     ├────▶  Node    ▏                                            └──────────────────┘ │
│    `.         ,'     └─────────────┘    ╲ (Minner ╱                                                       ▲          │
│      `───────'                           ╲       ╱                                                        │          │
│                                           ╲     ╱                                                         │          │
│                                            ╲   ╱                                                          │          │
│     .─────────.                             ╲ ╱                                                           │          │
│  ,─'           '─.                           V                                                            │          │
│ ;    Community    :                          │           ┌────────┐                                       │          │
│ :    proposal     ;                          │           │ Reject │                                       │          │
│  ╲   (BIP/EIP)   ╱                           └───Reject─▶│ Deploy │───────────────────────────────────────┘          │
│   '─.         ,─'                                        └────────┘                                                  │
│      `───────'                                                                                                       │
└──────────────────────────────────────────────────────────────────────────────────────────────────────────────────────┘
区块链领域就大大不同了。 即便代码更新的权力在某个组织的手上,但是运行这些代码的人可不一定会听这个组织的指挥,无法容易的命令分散节点统一的进行新代码的部署更新。
比特币社区就是这个领域下的一个典型,由于比特币社区的分裂,部分人并不认同不更改区块大小而是采用隔离见证的方案,分裂出了BCH,对BTC的生态产生的极大的损害。ETH的升级同样也困难重重,每次升级都需要进行长时间的等待以防有节点未升级而产生的分叉。
EOS由于其中心化的特点使得升级稍微简单一些,但仍然出现了由于升级带来的分叉的恶性事件。我们可以形象把区块链下的系统升级称为“全球升级”,因为其要求分布式环境下的大部分节点都更新了代码才使得升级能够成功。相较于中心化控制的系统,区块链系统的升级困难重重且充满风险。
同时区块链的升级还有另一个问题:高度判断
一个区块链系统升级后,不得不在代码中加入许多的“高度判断”,以区分不同高度下运行的代码,保证同步能够正常执行,兼容老数据。这种做法很原始但是又无法绕开,给开发者带来极大的思维负担,且需要大量的测试来保证不出现Bug。
比如目前比特币的源码中就有许多的区块高度判定使得在同步老区块的时候执行老代码,新区块的时候执行新代码。而中心化系统的数据控制权在自己手上,并且也不存在需要从某个数据源同步的情况,所以完全不需要担心这个问题。
Substrate的不同
Substrate横空而出,推出了目前区块链领域最完美的升级方案。其采用“链上代码”的思想,将整个Runtime都做成了可直接更新的组件,让所有节点能够强制运行最新的Runtime代码。
简单来说,Runtime在Substrate框架下,将会用同一份代码编译出两份可执行文件:
- 一份Rust的本地代码,我们一般称为native代码,native与其他代码无异,是这个执行文件中的二进制数据,直接运行。在Substrate的相关代码以native命名
- 一份wasm的链上代码,我们一般成为wasm代码,wasm被部署到链上,所有人可获取,wasm通过构建一个wasm的运行时环境执行 。在Substrate的相关代码以wasm命名 在节点启动的时候可以选择执行策略,使用native, possible,wasm或者both。不同的执行策略会执行不同的执行文件
由于这两份代码是由相同的代码编译出来的,所以其执行逻辑完全相同 (有一些很小的暗坑要注意)。其中wasm将会部署到链上,所有人都可以获取到,也就是说即使本地运行的不是最新版本的节点,只要同步了区块,一定可以获取到最新的wasm代码。
换句话说,一个写在Runtime内部的代码,也就是代表这条链功能性的代码,存在两份,分别是native与wasm。wasm代码被部署到链上,是“链上数据”,可以通过同步区块所有人统一获取并执行。这样就可以保证在区块链中所有矿工执行的都是最新的代码。
这里需要强调,代码的部署可以通过“民主提议”,“sudo控制权限”,“开发者自定一种部署条件”等方式进行,到底哪种方式“更区块链”,“更合理”,不在本文讨论范围内,这与这条链的设计目的相关。Substrate只是提供了这种“热更新”的强大机制,如何使用这种机制是这条链的问题。
以太坊合约更新策略
由于以太坊部署一个合约后,其地址已经被固定,且数据完全存储在这个合约地址下,若这个合约需要升级功能或出现Bug,将会带来许多的问题(比如许多垃圾山寨币的ERC20合约有溢出漏洞,被攻击后损失惨重,只能通过重新部署合约,** 并将老合约的数据重新导入的方式**进行合约升级,且此时的合约地址只能使用新的了)。
许多开发人员不断探索后发展出了如下的以太坊合约升级方式:

熟悉以太坊的开发人员应该很容易理解上图表达的意思。
其核心思想是将一个合约拆分成为“逻辑合约”与“数据合约”,并使用一个“核心合约”将它们串在一起,这个核心合约就是用户的入口。
由于以太坊部署后的地址是固定的,所以将逻辑合约做成一个独立的合约,并将其地址设置在核心合约当中。那么只要更改核心合约中设置的地址,就可以更改核心合约执行的逻辑了。
并且由于以太坊的合约部署后都存在于“世界状态”当中,那么在同步区块时,老数据就会自动使用老的逻辑合约执行,而新的数据使用新的逻辑合约执行。
Substrate对应‘合约更新策略’
那么将Substrate的框架对应过来,其中:
- “核心合约”的部分就是节点采用wasm执行去从“状态”存储中加载出最新的合约代码
- “逻辑合约”的部分就是这条链的Runtime
- “数据合约”的部分就是这条链自己的状态数据

由此可见,由于wasm代码的存在,可以保证即使节点没有更新到最新版本,仍然能够以最新的代码运行,保证不会因为代码的不同而分叉。同时在节点同步老数据的过程中也不会因为本地代码是最新的而导致同步出错
项目结构

客户端架构
架构图
┏━━━━━━━━━━━━━━━━━━━━━━━━━━━━━━━━━━━━━━━━━━━━━━━━━━━━━━━━━━━━━━━━━━━━━━━━━━━━━━━━━━━━━━━━━━┓
┃         ___ _   _ ___ ___ _____ ___    _ _____ ___    ___ _    ___ ___ _  _ _____        ┃
┃        / __| | | | _ ) __|_   _| _ \  /_\_   _| __|  / __| |  |_ _| __| \| |_   _|       ┃
┃        \__ \ |_| | _ \__ \ | | |   / / _ \| | | _|  | (__| |__ | || _|| .` | | |         ┃
┃        |___/\___/|___/___/ |_| |_|_\/_/ \_\_| |___|  \___|____|___|___|_|\_| |_|         ┃
┃                                                                                          ┃
┃                                                                                          ┃
┃     ┌───────────────┐     ┌──────────────────────────────────────────────────────────┐   ┃
┃     │               │     │                                                          │   ┃
┃     │               │     │                                                          │   ┃
┃     │               │     │                           RPC                            │   ┃
┃     │               │     │                                                          │   ┃
┃     │      P2P      │     │                                                          │   ┃
┃     │    NETWORK    │     └──────────────────────────────────────────────────────────┘   ┃
┃     │               │     ┌────────────────────────────────────────┐ ┌───────────────┐   ┃
┃     │               │     │                                        │ │               │   ┃
┃     │               │     │            ┌───────────────┐           │ │               │   ┃
┃     │               │     │            │               │           │ │   CONSENSUS   │   ┃
┃     └───────────────┘     │            │     Wasm      │           │ │               │   ┃
┃          .───────.        │            │    Runtime    │           │ │               │   ┃
┃       ,─'         '─.     │            │               │           │ └───────────────┘   ┃
┃      ╱               ╲░   │            └───────────────┘           │                     ┃
┃     ;     NATIVE      :░  │                                        │ ┌───────────────┐   ┃
┃     :     RUNTIME     ;░░ │                                        │ │               │   ┃
┃      ╲               ╱░░░ │                STORAGE                 │ │               │   ┃
┃       ╲             ╱░░░  │                                        │ │   TELEMETRY   │   ┃
┃        '─.       ,─'░░░   │                                        │ │               │   ┃
┃          ░`─────'░░░░░    │                                        │ │               │   ┃
┃             ░░░░░░░       └────────────────────────────────────────┘ └───────────────┘   ┃
┃                                                                                          ┃
┗━━━━━━━━━━━━━━━━━━━━━━━━━━━━━━━━━━━━━━━━━━━━━━━━━━━━━━━━━━━━━━━━━━━━━━━━━━━━━━━━━━━━━━━━━━┛
现在我们知道了 Substrate 是什么,让我们对框架、它的移动部分以及我们可以用来创建自定义区块链的扩展点进行高级概述。 由于我们在这里处理的是去中心化的点对点系统,所以我们谈论的基本单元是节点,这是我们的区块链运行的地方。 该节点在客户端内部运行,并提供系统运行所需的所有基本组件,例如p2p网络、区块链的存储、块处理和共识的逻辑,以及从外部与区块链交互的能力。
模块说明
substrate客户端是基于substrate实现的区块链的节点客户端(可以理解为全节点), 它主要由以下几个组件组成(以下也就是告诉我们实现一条链由哪几部分组成):
存储
用来维持区块链系统所呈现的状态演变。substrate提供了的存储方式是一种简单有效的key-value对存储机制的方式。
Runtime
这里就可以回答上面的问题,什么是runtime?runtime定义了区块的处理方式,主要是状态转换的逻辑。在substrate中,runtime code被编译成wasm作为区块链存储状态的一部分。
p2p网络
允许客户端和其它网络参与者进行通信。
共识
提供了一种逻辑,能使网络参与者就区块链的状态达成一致。 substrate 支持提供自定义的共识引擎。
RPC
远程过程调用。
telemetry (遥测)
通过嵌入式Prometheus服务器的方式对外展示(我理解应该是类似于区块链浏览器一样的东西,或者是提供信息给区块链浏览器展示)。
Tree Level1
首先来看看项目的整理结构:
 tree -L 1 | pbcopy                                                                                                                                                                                                                        ─╯
.
├── Cargo.lock
├── Cargo.toml
├── HEADER-APACHE2
├── HEADER-GPL3
├── LICENSE-APACHE2
├── LICENSE-GPL3
├── README.md
├── bin
├── client
├── docker
├── docs
├── frame
├── primitives
├── rustfmt.toml
├── scripts
├── shell.nix
├── test-utils
└── utils

9 directories, 9 files
用Cargo组织代码
Substrate非常明显使用Cargo来组织代码:
- 项目根目录的Cargo.toml会用workspace+members导入各子模块
[ workspace ]
  resolver = "2"

  members = [...]
- 各子模块之间也用Cargo.toml来相互导入使用
[ dependencies ]
  sc-consensus = { version = "0.10.0-dev", path = "../../client/consensus/common" }
主要部分介绍:Node、Frame、Core
Substrate Node:
我们将从 Substrate Node 开始。这是我们可以开始的最高级别;
它提供了最多的预建功能和最少的技术自由度。它是完全可运行的,包括所有基本组件的默认实现,例如:
- 账户管理
- 特权访问
- 共识
- …
我们可以自定义链的创世块(即初始状态)以开始。 在这里,我们可以运行节点并熟悉 Substrate 提供的开箱即用的功能,玩转状态并与正在运行的区块链交互以熟悉。
另一种实现相同目的的方法是使用 Substrate Playground,您可以在其中查看后端和前端模板以熟悉它们。 然而,一旦我们准备好真正构建自己的区块链,我们最好降低一层并使用 FRAME。
tree bin -L 2 | pbcopy                                                                                                                                                                                                                       ─╯
bin
├── node
│   ├── bench
│   ├── cli
│   ├── executor
│   ├── inspect
│   ├── primitives
│   ├── rpc
│   ├── runtime
│   └── testing
├── node-template: 使用Substrate写项目的基础模版
│   ├── LICENSE
│   ├── README.md
│   ├── docker-compose.yml
│   ├── docs
│   ├── node
│   ├── pallets
│   ├── runtime
│   ├── scripts
│   └── shell.nix
└── utils
    ├── chain-spec-builder
    └── subkey

18 directories, 4 files
重点说说node、pallets和runtime
│ ├── node: 链的一些基础功能的实现(或者说比较底层的实现,如网络、rpc,搭建链的最基础的code) │ ├── pallets: 放置的就是各个pallet,也就是业务相关的模块 │ ├── runtime: 可以简单理解为把所有pallet组合到一起,也就是业务相关的逻辑
三者的关系大致如下:
┏━━━━━━━━━━━━━━━━━━━━━━━━━━━━━━━━━━━━━━━━━━━━━━━━━━━━━━━━━━━━━━━━━━━━━━━━━━━━━━━━━━━━━━━━━━┓
┃             ___ _   _ ___ ___ _____ ___    _ _____ ___   _  _  ___  ___  ___             ┃
┃            / __| | | | _ ) __|_   _| _ \  /_\_   _| __| | \| |/ _ \|   \| __|            ┃
┃            \__ \ |_| | _ \__ \ | | |   / / _ \| | | _|  | .` | (_) | |) | _|             ┃
┃            |___/\___/|___/___/ |_| |_|_\/_/ \_\_| |___| |_|\_|\___/|___/|___|            ┃
┃                                                                                          ┃
┃                                                                                          ┃
┃                                                                                          ┃
┃  ┏━━━━━━━━━━━━━━━━━━━━━━━━━━━━━━━━━━━━━━━━━━━━━━━━━━━━━━━━━━━━━━━━━━━━━━━━━━━━━━━━━━━━━┓ ┃
┃  ┃                         ___ _   _ _  _ _____ ___ __  __ ___                         ┃ ┃
┃  ┃                        | _ \ | | | \| |_   _|_ _|  \/  | __|                        ┃ ┃
┃  ┃                        |   / |_| | .` | | |  | || |\/| | _|                         ┃ ┃
┃  ┃                        |_|_\\___/|_|\_| |_| |___|_|  |_|___|                        ┃ ┃
┃  ┃                                                                                     ┃ ┃
┃  ┃                                                                                     ┃ ┃
┃  ┃                                                                                     ┃ ┃
┃  ┃                                                                                     ┃ ┃
┃  ┃    ┌───────────────┐    ┌───────────────┐    ┌───────────────┐   ┌───────────────┐  ┃ ┃
┃  ┃    │               │    │               │    │               │   │               │  ┃ ┃
┃  ┃    │   pallet 1    │    │   pallet 2    │    │      ...      │   │   pallet n    │  ┃ ┃
┃  ┃    │               │    │               │    │               │   │               │  ┃ ┃
┃  ┃    └───────────────┘    └───────────────┘    └───────────────┘   └───────────────┘  ┃ ┃
┃  ┃                                                                                     ┃ ┃
┃  ┗━━━━━━━━━━━━━━━━━━━━━━━━━━━━━━━━━━━━━━━━━━━━━━━━━━━━━━━━━━━━━━━━━━━━━━━━━━━━━━━━━━━━━┛ ┃
┗━━━━━━━━━━━━━━━━━━━━━━━━━━━━━━━━━━━━━━━━━━━━━━━━━━━━━━━━━━━━━━━━━━━━━━━━━━━━━━━━━━━━━━━━━━┛
当然,对于pallets来说,在runtime中使用的pallet,有些是我们自己开发的pallet,有些是substrate中已经开发好的pallet,甚至还有些是pallet是第三方开发的pallet。
Substrate FRAME
FRAME (Framework for Runtime Aggregation of Modularized Entities) 是一个框架,用于从现有库构建 Substrate 运行时(Runtime) ,并具有高度的自由度来确定我们的区块链逻辑。
我们基本上是从 Substrate 的预构建节点模板开始,可以添加所谓的托盘(pallet, Substrate 库模块的名称)来定制和扩展我们的链。
在这个抽象级别,我们还能够完全自定义我们区块链的逻辑、状态和数据类型。这当然是大多数旨在接近 Substrate 的基本定制项目在易于开发和技术自由之间利用两全其美的地方。
我们仍然需要在它们到来时采用一些默认值——或者更确切地说,因为它们可以被配置——但是如果我们从根本上想要做不同的事情,我们可以从 Core 开始再降低一步。
The Framework for Runtime Aggregation of Modularized Entities (FRAME) is a set of modules and support libraries that simplify runtime development. In Substrate , these modules are called Pallets, each hosting domain-specific logic to include in a chain’s runtime.
FRAME also provides some helper modules to interact with important Substrate Primitives that provide the interface to the core client.
The following diagram shows the architectural overview of FRAME and its support libraries:

tree frame -L 1 | pbcopy
frame
├── alliance: The Alliance Pallet provides a collective that curates a list of accounts and URLs, deemed by the voting members to be unscrupulous actors.
├── assets: A simple, secure module for dealing with fungible assets. The Assets module provides functionality for asset management of fungible asset classes with a fixed supply
├── atomic-swap: A module for atomically sending funds.
├── aura: The Aura module extends Aura consensus by managing offline reporting.
├── authority-discovery: This module is used by the client/authority-discovery to retrieve the current set of authorities.
├── authorship
├── babe
├── bags-list
├── balances: The Balances module provides functionality for handling accounts and balances.
├── beefy
├── beefy-mmr
├── benchmarking
├── bounties
├── child-bounties
├── collective
├── contracts
├── conviction-voting
├── democracy
├── election-provider-multi-phase
├── election-provider-support
├── elections-phragmen
├── examples
├── executive
├── gilt
├── grandpa
├── identity
├── im-online
├── indices
├── lottery
├── membership
├── merkle-mountain-range
├── multisig
├── nicks
├── node-authorization
├── nomination-pools
├── offences
├── preimage
├── proxy
├── randomness-collective-flip
├── ranked-collective
├── recovery
├── referenda
├── remark
├── scheduler
├── scored-pool
├── session
├── society
├── staking
├── state-trie-migration
├── sudo
├── support
├── system
├── timestamp
├── tips
├── transaction-payment
├── transaction-storage
├── treasury
├── try-runtime
├── uniques
├── utility
├── vesting
└── whitelist

62 directories, 0 files
Substrate Core(client)
Substrate Core 本质上意味着我们可以以任何我们想要的方式实现我们的运行时,只要它以 WebAssembly 为目标并遵守 Substrate 块创建的基本法则。
然后,我们可以使用这个运行时并在 Substrate 节点中运行它。
说到 Substrate 的生态系统,有一个充满活力(充满活力)的开发者社区,他们在自己的项目中使用 Substrate,其中许多人通过共享自己的托盘(pallet)来回馈生态系统。
您可以通过使用诸如 Substrate Market 之类的站点或仅在托管 crates.io: Rust Package Registry 的任何地方找到托盘(pallet),因为 Substrate 托盘本质上是自包含的 Rust 库,您可以将其集成到您的 Substrate 项目中, 并根据需要进行配置。
与任何其他库一样,建议首先审核代码,并了解依赖外部代码与编写自己的代码之间的权衡。
在玩了一点预建节点之后,我们应该专注于 FRAME,学习如何通过在 Substrate 模板节点之上构建自定义区块链。这也是许多精彩教程的起点。
 tree client -L 1 | pbcopy                                                                                                                                                                                                                    ─╯
client
├── allocator
├── api
├── authority-discovery
├── basic-authorship
├── beefy
├── block-builder
├── chain-spec
├── cli
├── consensus
├── db
├── executor
├── finality-grandpa
├── informant
├── keystore
├── network
├── network-gossip
├── offchain
├── peerset
├── proposer-metrics
├── rpc
├── rpc-api
├── rpc-servers
├── service
├── state-db
├── sync-state-rpc
├── sysinfo
├── telemetry
├── tracing
├── transaction-pool
└── utils

30 directories, 0 files
其他
primitives
tree primitives -L 1 | pbcopy
primitives
├── api
├── application-crypto
├── arithmetic
├── authority-discovery
├── authorship
├── beefy
├── block-builder
├── blockchain
├── consensus
├── core
├── database
├── debug-derive
├── externalities
├── finality-grandpa
├── inherents
├── io
├── keyring
├── keystore
├── maybe-compressed-blob
├── merkle-mountain-range
├── npos-elections
├── offchain
├── panic-handler
├── rpc
├── runtime
├── runtime-interface
├── sandbox
├── serializer
├── session
├── staking
├── state-machine
├── std
├── storage
├── tasks
├── test-primitives
├── timestamp
├── tracing
├── transaction-pool
├── transaction-storage-proof
├── trie
├── version
└── wasm-interface

42 directories, 0 files
scripts/ci
tree scripts/ci | pbcopy
scripts/ci
├── common
│   └── lib.sh
├── deny.toml
├── docker
│   ├── subkey.Dockerfile
│   └── substrate.Dockerfile
├── github
│   ├── check_labels.sh
│   └── generate_changelog.sh
├── gitlab
│   ├── check_runtime.sh
│   ├── check_signed.sh
│   ├── ensure-deps.sh
│   ├── pipeline
│   │   ├── build.yml
│   │   ├── check.yml
│   │   ├── publish.yml
│   │   └── test.yml
│   ├── publish_draft_release.sh
│   └── skip_if_draft.sh
├── monitoring
│   ├── alerting-rules
│   │   ├── alerting-rule-tests.yaml
│   │   └── alerting-rules.yaml
│   └── grafana-dashboards
│       ├── README_dashboard.md
│       ├── substrate-networking.json
│       └── substrate-service-tasks.json
├── node-template-release
│   ├── Cargo.toml
│   └── src
│       └── main.rs
└── node-template-release.sh

10 directories, 23 files
utils
tree utils -L 1 | pbcopy
utils
├── build-script-utils
├── fork-tree
├── frame
├── prometheus
└── wasm-builder

5 directories, 0 files
功能逻辑
特色代码
参考资源
online-book
- paritytech/substrate: Substrate: The platform for blockchain innovators
- Architecture | Substrate_
- substrate轻松学
fragment
- 链块与分散的数据 - 知乎
- 区块链与substrate
- substrate 源码解析与运用 - 介绍 - 知乎
- Substrate区块链开发 - 知乎
- Substrate Ecosystem | Substrate_
- Substrate blockchain development: Core concepts - LogRocket Blog:对Substrate的简要介绍
- Playground | Substrate_
- Substrate Market
- crates.io: Rust Package Registry
- Quick start | Substrate Docs
- Tutorials | Substrate Docs
- Projects | Substrate_: 一些基于Substrate建立的项目,值得参考
- Build the Substrate Kitties Chain | Substrate_: 教你建立一个nft平台
- FRAME | Substrate_
- The Substrate Guide I Wish I Had. Fractal’s blockchain lead Shelby… | by Fractal | Fractal | Medium
- How-to quick reference guides | Substrate Docs
Runtime
- 剖析Substrate Runtime - 知乎
基于Substrate开发自己的运行时模块,会遇到一个比较大的挑战,就是理解Substrate运行时(Runtime)。 本文首先介绍了Runtime的架构,类型,常用宏,并结合一个实际的演示项目,做了具体代码分析,以帮助大家更好地理解在Substrate中它们是如何一起工作的。
local
Substrate官方教程梳理与练习
- Substrate官方教程梳理与练习
- 总览
- Get Started
- Work with pallets
- Develop smart contracts
- Connect with other chains
- 参考资源
总览
Get Started
Build a local blockchain
这里主要使用官方提供的默认模版启动节点。
New Substrate documentation released · Issue #1132 · substrate-developer-hub/substrate-docs
另外,substrate官方文档也一直处在更新状态中。
设置开发环境
使用rustup设置rust环境
# 1.安装预编译包
sudo apt update && sudo apt install -y git clang curl libssl-dev llvm libudev-dev

# 2.安装Rust编译环境
curl https://sh.rustup.rs -sSf | sh
source ~/.cargo/env
rustup default stable
rustup update
rustup update nightly
rustup target add wasm32-unknown-unknown --toolchain nightly
检查环境
rustc --version
rustup show
启动链节点
node-template实际上是官方提供的使用substrate开发的模板链,可以理解为substrate官方提供的样例,后续任何人想使用substrate可以在这个样例的基础上进行修改,这样开发链就更方便。
这就好比以前的好多山寨链,在btc的源码上改下创世区块的配置,就是一条新链。那么substrate其实也一样,提供了node-template这样一个模板,后续根据需求在这个上面改吧改吧,就能产生一条新链。
下载node-template
git clone https://github.com/substrate-developer-hub/substrate-node-template
cd substrate-node-template
git checkout latest
node-templeate项目结构
tree -L 2                                                                                                                                                                                                                              ─╯
.
├── Cargo.lock
├── Cargo.toml
├── LICENSE
├── README.md
├── docker-compose.yml
├── docs
│   └── rust-setup.md
├── node
│   ├── Cargo.toml
│   ├── build.rs
│   └── src
├── pallets
│   └── template
├── runtime
│   ├── Cargo.toml
│   ├── build.rs
│   └── src
├── rustfmt.toml
├── scripts
│   ├── docker_run.sh
│   └── init.sh
├── shell.nix
└── target
    ├── CACHEDIR.TAG
    └── release

10 directories, 15 files
Cargo.toml
[workspace]
members = [
    "node",
    "pallets/template",
    "runtime",
]
[profile.release]
panic = "unwind"
可见node-template主要包含三部分:node、pallets/template、runtime
编译前的检查
cargo check -p node-template-runtime
Output JSON to stdout containing information about the workspace members and resolved dependencies of the current package.
It is recommended to include the –format-version flag to future-proof your code to ensure the output is in the format you are expecting.
编译
cargo build --release
这个过程比较慢,会下载并编译上面三部分内的Cargo.toml列出的所有包
可能遇到的问题
- 安装cmake
brew install cmake
本地运行节点
./target/release/node-template --dev
docker运行节点
前端访问
Build a local blockchain | Substrate_ Docs
使用前端模版
node --version
yarn --version
npm install -g yarn
git clone https://github.com/substrate-developer-hub/substrate-front-end-template
cd substrate-front-end-template
yarn install
yarn start
启动后访问本地:http://localhost:8000
使用polkadot-js访问节点
在substrate官方的教程中,是使用了substrate的前端模板来访问刚才启动的节点。但是在实际的开发中,后端人员其实更多的使用polkadot-js-app来访问我们的节点,所以这里我们也使用它来访问我们的节点。
- 在浏览器中输入https://polkadot.js.org/apps, 点击左上角会展开;
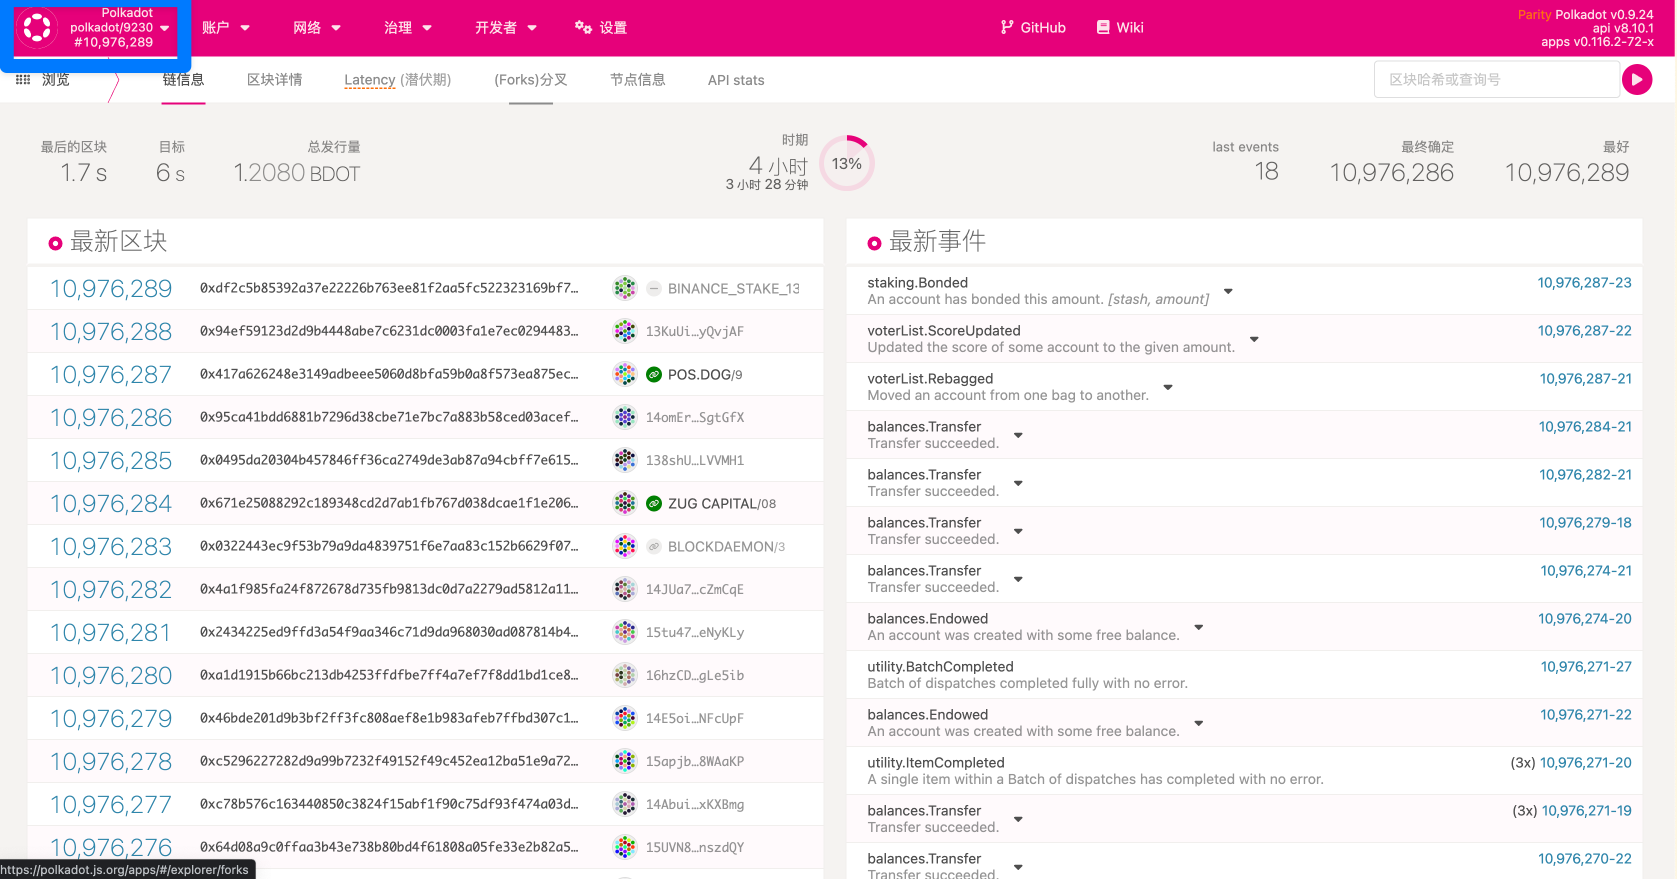
-
在展开的菜单中点击DEVELOPMENT;
-
点击Local Node;
-
点击switch。
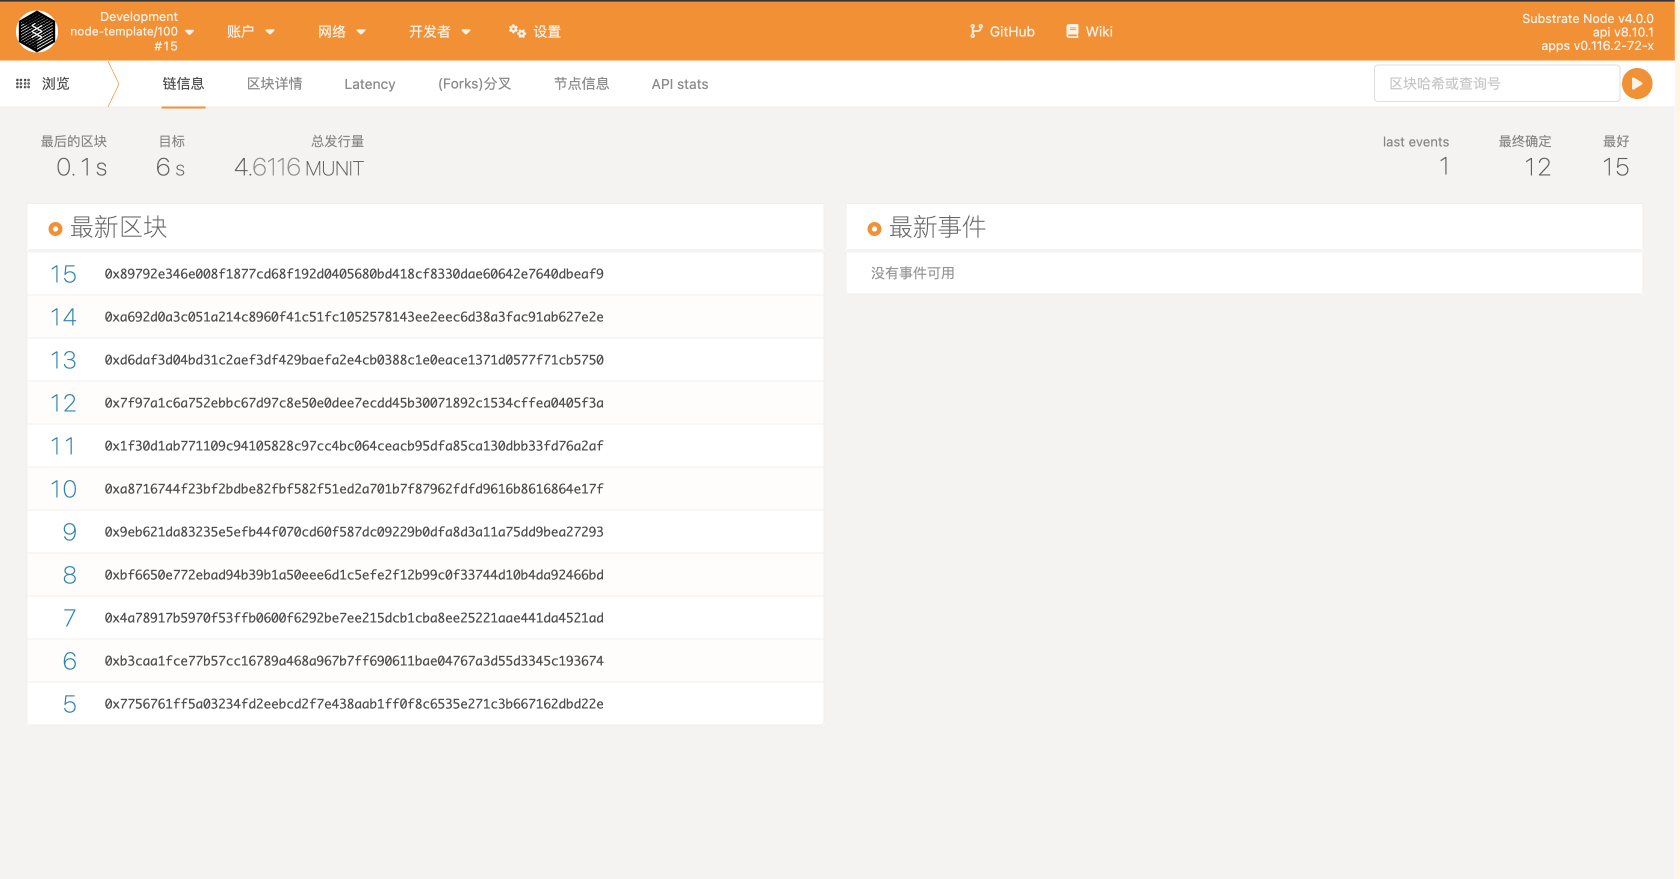
Substrate使用方式
使用substrate的方式主要有以下几种:
使用subtrate node
开发者可以运行已经设计好的substrate节点,并配置genesis区块,在此方式下只需要提供一个json文件就可以启动自己的区块链。其实我们上一节的substrate初体验,也可以看成是使用此种方式的一个例子。
使用substrate frame
frame其实是一组模块(pallet)和支持库。使用substrate frame可以轻松的创建自己的自定义运行时,因为frame是用来构建底层节点的。使用frame还可以配置数据类型,也可以从模块库中选择甚至是添加自己定义的模块。
使用substrate core
使用substrate code运行开发者完全从头开始设计运行时(runtime,问题:什么是runtime?),当然此种方式也是使用substrate自由度最大的方式。
Simulate a network
Add trusted nodes
加密方式梳理
- substrate支持三种签名方案:sr25519、ed25519、secp256k1
- Cryptography Explainer · Polkadot Wiki
- EdDSA - Wikipedia
- Secp256k1 - Bitcoin Wiki
Sr25519
用于使用 aura 为一个节点生成块。
Ed25519
用于使用 grapdpa 为一个节点生成块。
SS58: 对应公钥/地址格式
- pub use ss58_registry-substrate/crypto.rs at 0ba251c9388452c879bfcca425ada66f1f9bc802 · paritytech/substrate
- Glossary | Substrate_ Docs
步骤:
- 使用Sr25519 -> 一个助记词和对应SS58公钥 -> aura
- 使用Ed25519+前面的助记词 -> Ed25519 公钥 -> grandpa
actdiag
Authorize specific nodes
Alice授权Charlie过程
- 使用polkadot-js-app打开并切换到本地网络,开发者>超级管理(sudo)>nodeAuthorization
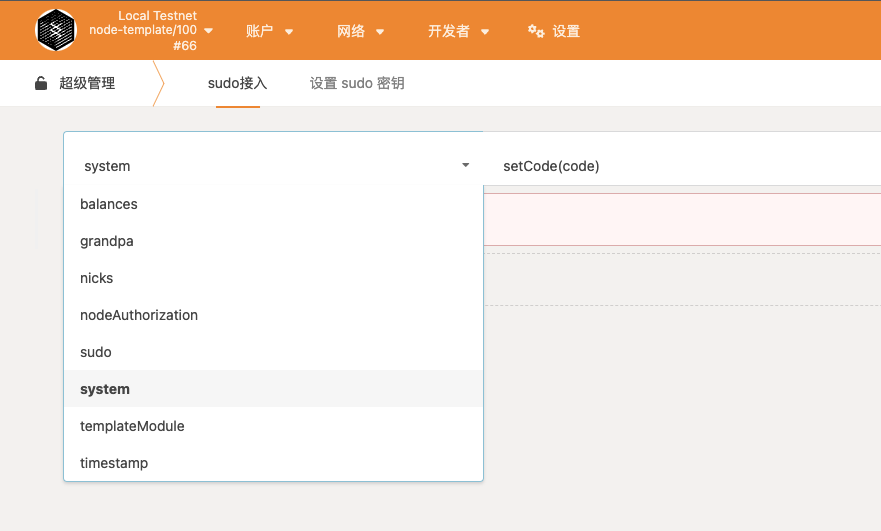
- 切换到nodeAuthorization
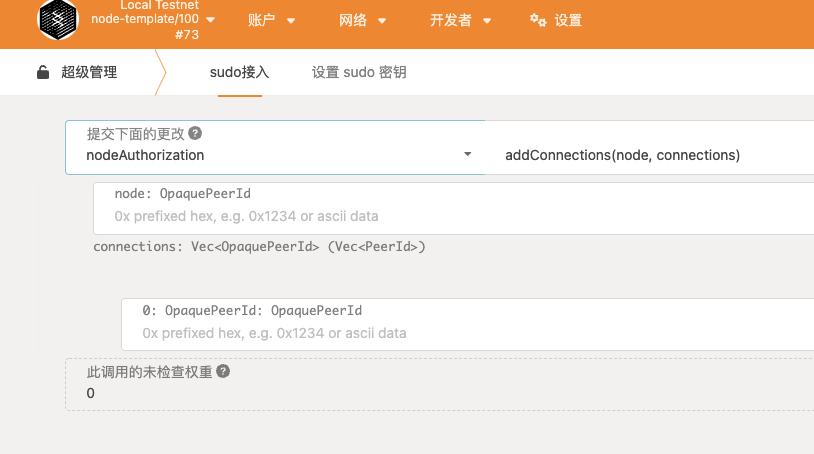
- 切换addConnections(node, owner)
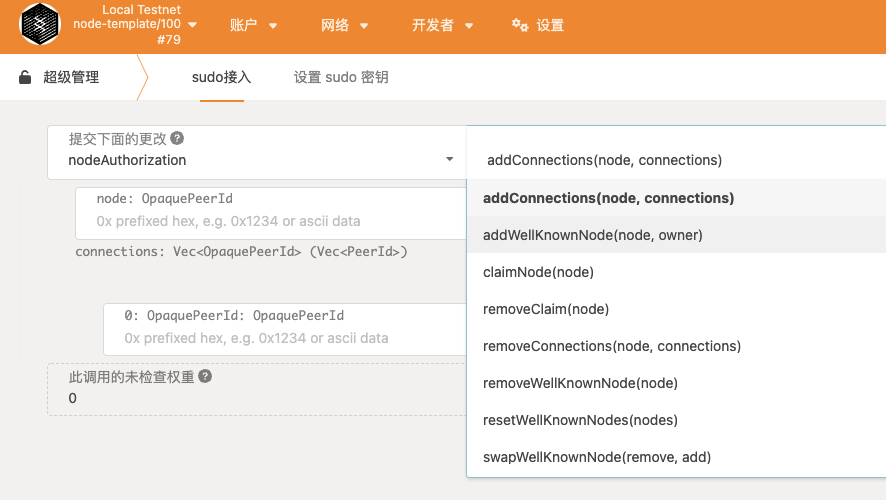
- 选择CHARLIE节点进行授权
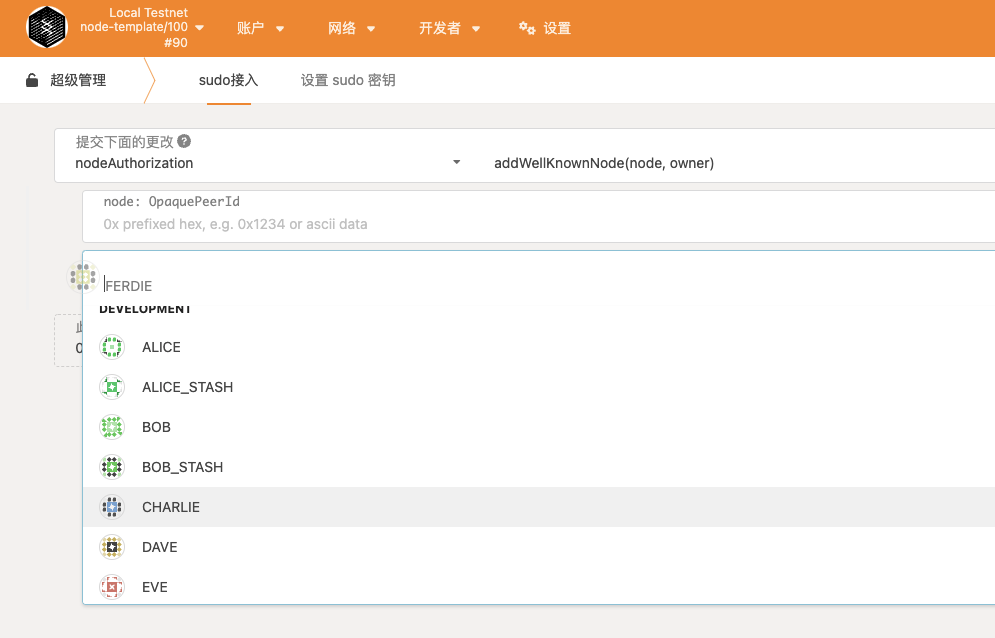
- 注意填写charlie的peerid
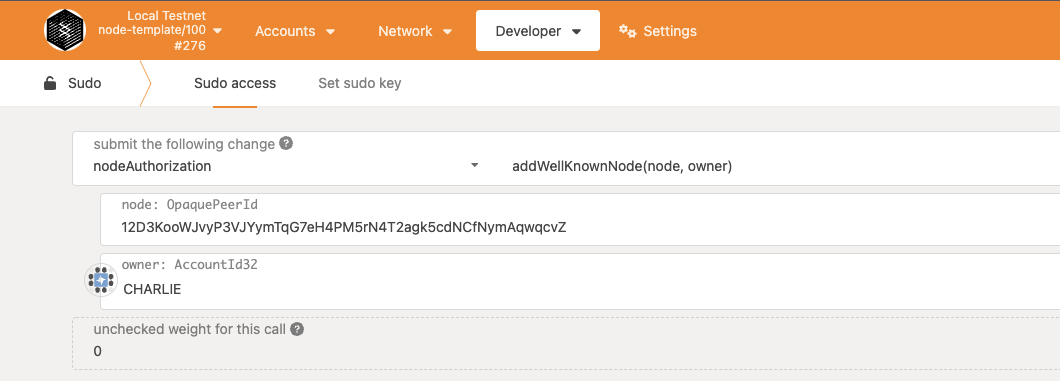
- 签名并提交
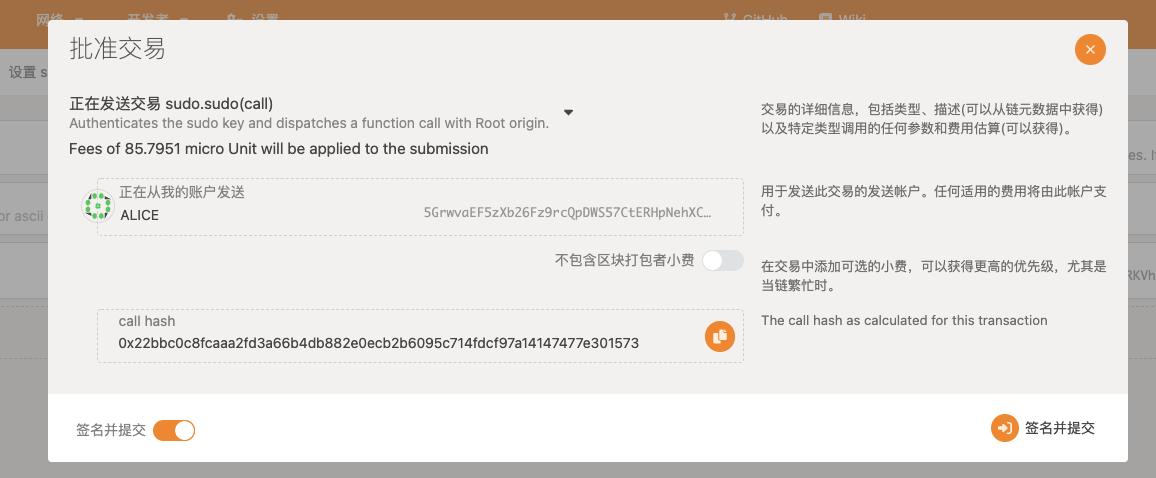
交易包含在区块中后,您应该看到 charlie 节点连接到 alice 和 bob 节点,并开始同步区块。这三个节点可以使用本地网络中默认启用的 mDNS 发现机制找到彼此。 如果您的节点不在同一个本地网络上,您应该使用命令行选项 –no-mdns 来禁用它。
Charlie连接Dave过程
- 切换Charlie账户,执行addConnections(node, connections)操作
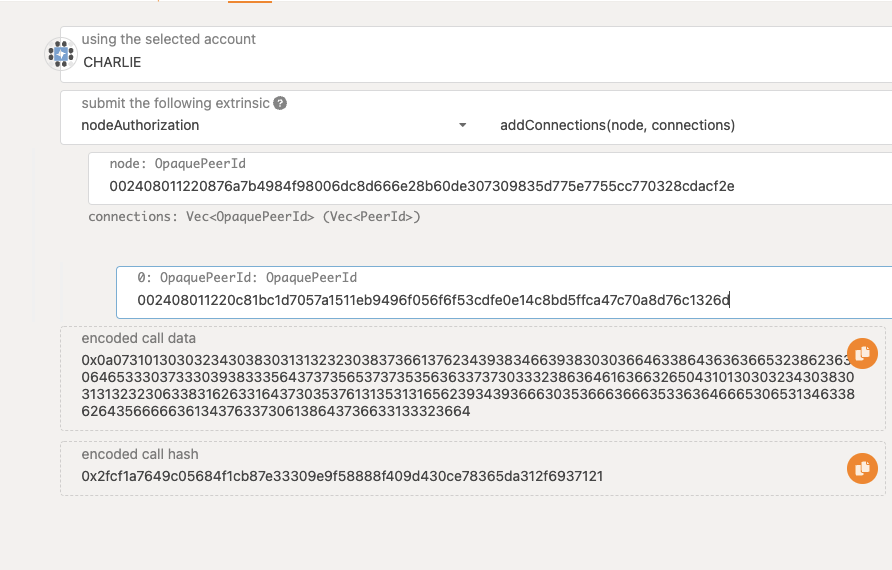
注意:第一个填Chalie的peerid in hex,第二个填Dave的peer id in hex
- 切换Dave账户,执行claimNode(node)操作
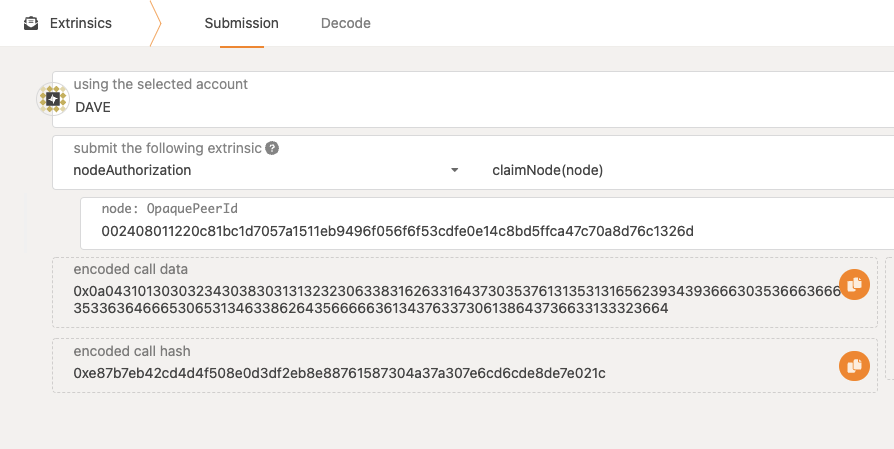
- 提示,操作成功后右侧会出现弹窗
您现在应该看到 Dave 正在捕获区块,并且只有一个属于 Charlie 的节点!重新启动 Dave 的节点,以防它没有立即与 Charlie 连接
流程图
sequenceDiagram
    actor terminal as 终端
    participant runtime as 运行时:添加pallet
    participant node as 节点:修改链规范
    participant pkjs as polkadot-js-app
    terminal->>terminal: git chekout latest & cargo build --release
    terminal->>+runtime: 开始修改运行时cargo文件,添加pallet依赖与feature
    rect rgb(200, 150, 255)
    runtime->>runtime: runtime/Cargo.toml:depencies添加pallet-node-authorization
    runtime->>runtime: runtime/Cargo.toml:features添加pallet-node-authorization/std
    end
    runtime->>-terminal: prepare to check
    terminal->>terminal: cargo check -p node-template-runtime
    terminal->>+runtime: 开始给节点node添加pallet用到的参数类型、实现块、构建运行时配置
    rect rgb(200, 150, 255)
    runtime->>runtime: runtime/src/runtime.rs:add parameter_types
    runtime->>runtime: runtime/src/runtime.rs:add impl section
    runtime->>runtime: runtime/src/runtime.rs:add the pallet to the construct_runtime macro
    end
    runtime->>-terminal: 开始检查
    terminal->>terminal: cargo check -p node-template-runtime
    terminal->>+node: 开始给授权节点添加创始区块存储功能
    node->>node: node/Cargo.toml:add bs58 dependency
    rect rgb(200, 150, 255)
    node->>+node: 添加创始区块存储功能
    node->>node: node/src/node.rs:add genesis storage for nodes
    node->>node: node/src/node.rs:locate the testnet_genesis function
    node->>node: node/src/node.rs:add GenesisConfig declaration
    end
    node->>-terminal: cargo check & start nodes
    terminal->>terminal: cargo check -p node-template-runtime
    rect rgb(200, 150, 255)
    terminal->>terminal: start alice node
    terminal->>terminal: start bob node
    terminal->>terminal: start Charlie node
    terminal->>terminal: start Dave node
    end
    terminal->>pkjs: 开始进行授权与建立连接操作
    rect rgb(200, 150, 255)
    pkjs->>pkjs: 使用alice账号给Charlie授权
    pkjs->>pkjs: 使用Charlie账号连接Dave节点
    pkjs->>pkjs: Dave对外claimNode
    end
`
总结
任何节点都可以发出影响其他节点行为的交易(extrinsics),只要它位于用于参考的链数据上,并且您在密钥库中拥有可用于所需来源的相关帐户的密钥。此演示中的所有节点都可以访问开发人员签名密钥,因此能够代表 Charlie 从网络上的任何连接节点发出影响 charlie 子节点的命令。
在现实世界的应用程序中,节点操作员只能访问他们的节点密钥,并且是唯一能够正确签署和提交外部信息的人,很可能来自他们自己的节点,他们可以控制密钥的安全性。
Monitor node metrics
Failed with: TOML parsing error: expected an equals, found an identifier at line 1 column 5
Original markdown input:
```admonish tip info title='承接关系:需要基于上一节课'
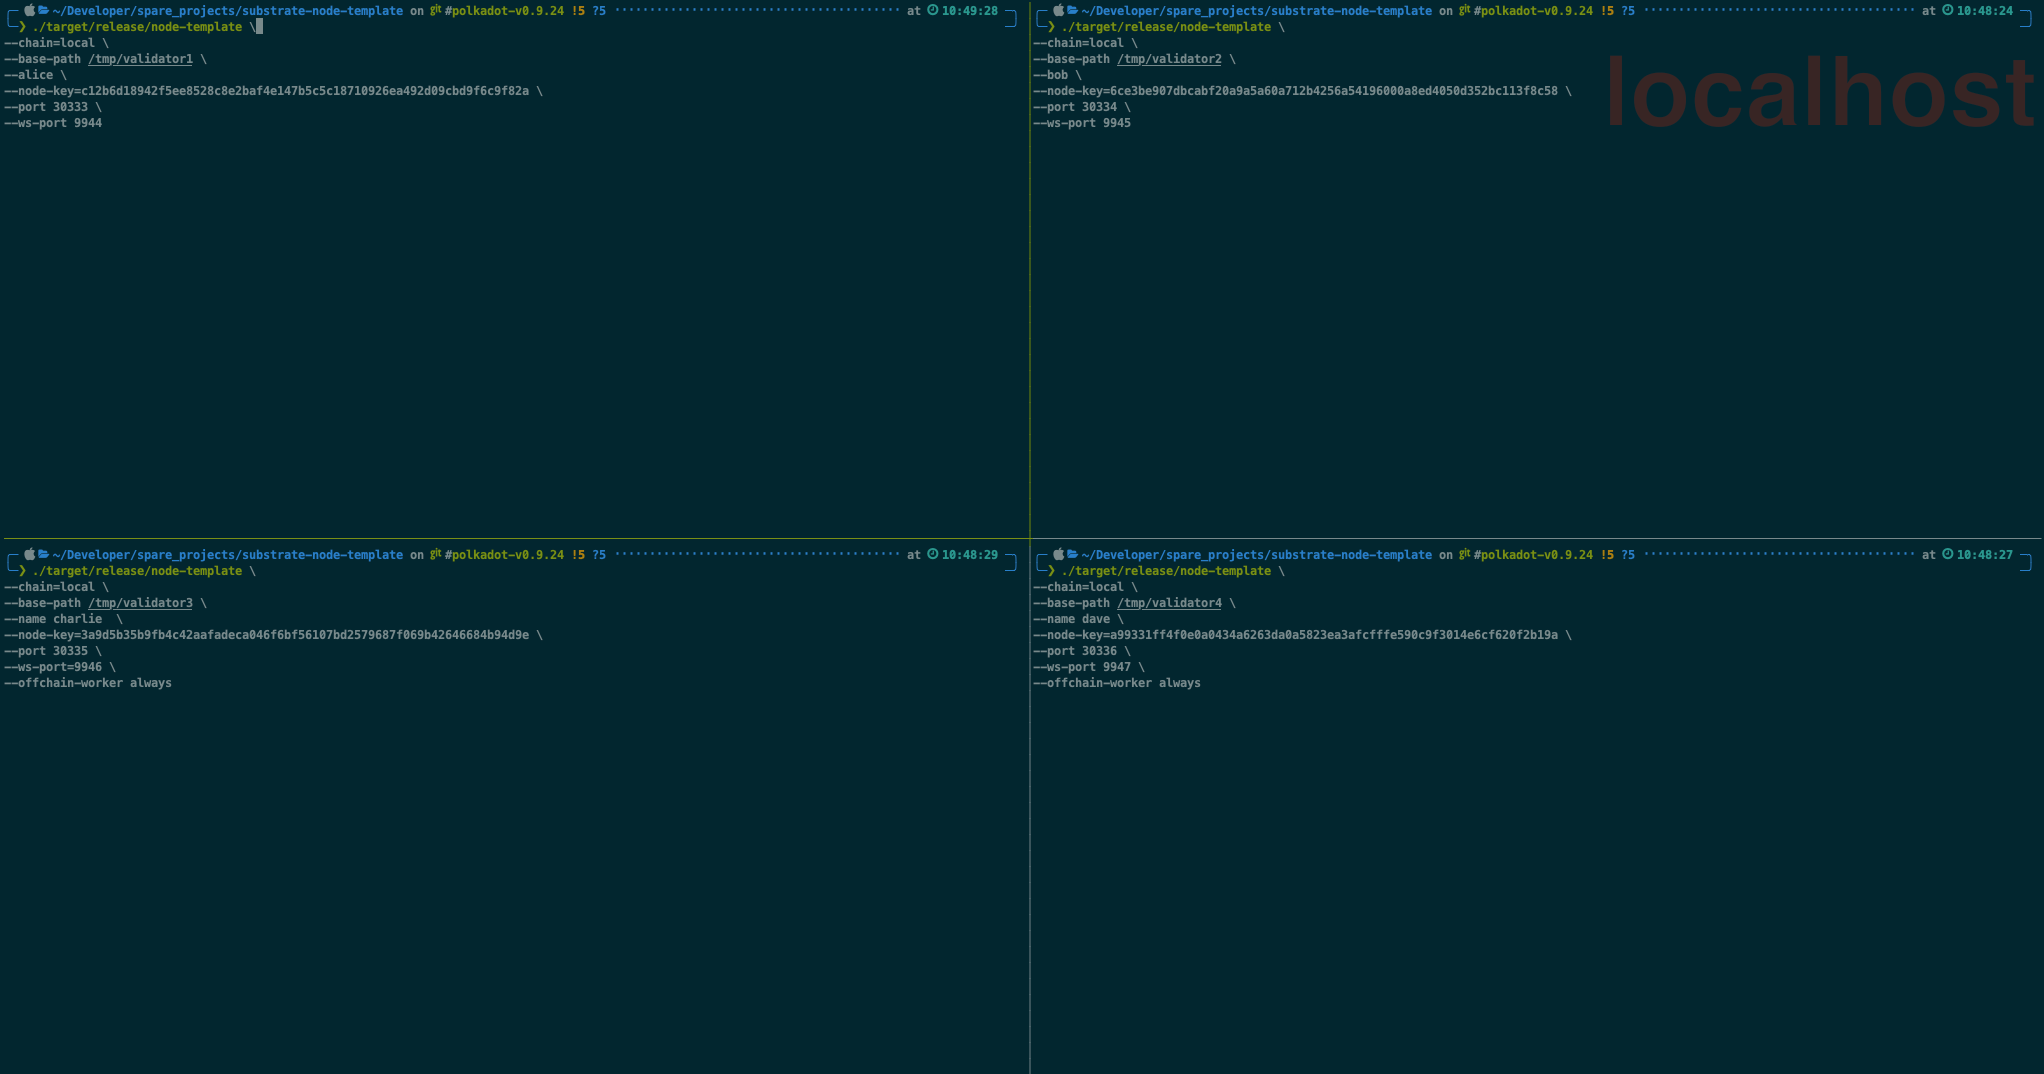
```
本节大概的架构
+-----------+                     +-------------+                                                              +---------+
| Substrate |                     | Prometheus  |                                                              | Grafana |
+-----------+                     +-------------+                                                              +---------+
      |               -----------------\ |                                                                          |
      |               | Every 1 minute |-|                                                                          |
      |               |----------------| |                                                                          |
      |                                  |                                                                          |
      |        GET current metric values |                                                                          |
      |<---------------------------------|                                                                          |
      |                                  |                                                                          |
      | `substrate_peers_count 5`        |                                                                          |
      |--------------------------------->|                                                                          |
      |                                  | --------------------------------------------------------------------\    |
      |                                  |-| Save metric value with corresponding time stamp in local database |    |
      |                                  | |-------------------------------------------------------------------|    |
      |                                  |                                         -------------------------------\ |
      |                                  |                                         | Every time user opens graphs |-|
      |                                  |                                         |------------------------------| |
      |                                  |                                                                          |
      |                                  |       GET values of metric `substrate_peers_count` from time-X to time-Y |
      |                                  |<-------------------------------------------------------------------------|
      |                                  |                                                                          |
      |                                  | `substrate_peers_count (1582023828, 5), (1582023847, 4) [...]`           |
      |                                  |------------------------------------------------------------------------->|
      |                                  |                                                                          |
安装Prometheus和grafana
gunzip prometheus-<version>.darwin-amd64.tar.gz && tar -xvf prometheus-2.35.0.darwin-amd64.tar
brew update && brew install grafana
==> Downloading https://ghcr.io/v2/homebrew/core/grafana/manifests/9.0.2
######################################################################## 100.0%
==> Downloading https://ghcr.io/v2/homebrew/core/grafana/blobs/sha256:6022dd955d971d2d34d70f29e56335610108c84b75081020092e29f3ec641724
==> Downloading from https://pkg-containers.githubusercontent.com/ghcr1/blobs/sha256:6022dd955d971d2d34d70f29e56335610108c84b75081020092e29f3ec64
######################################################################## 100.0%
==> Pouring grafana--9.0.2.monterey.bottle.tar.gz
==> Caveats
To restart grafana after an upgrade:
  brew services restart grafana
Or, if you don't want/need a background service you can just run:
  /usr/local/opt/grafana/bin/grafana-server --config /usr/local/etc/grafana/grafana.ini --homepath /usr/local/opt/grafana/share/grafana --packaging=brew cfg:default.paths.logs=/usr/local/var/log/grafana cfg:default.paths.data=/usr/local/var/lib/grafana cfg:default.paths.plugins=/usr/local/var/lib/grafana/plugins
==> Summary
🍺  /usr/local/Cellar/grafana/9.0.2: 6,007 files, 247.3MB
==> Running `brew cleanup grafana`...
Disable this behaviour by setting HOMEBREW_NO_INSTALL_CLEANUP.
Hide these hints with HOMEBREW_NO_ENV_HINTS (see `man brew`).
配置Prometheus.yml
# --snip--

# A scrape configuration containing exactly one endpoint to scrape:
# Here it's Prometheus itself.
scrape_configs:
  # The job name is added as a label `job=<job_name>` to any timeseries scraped from this config.
  - job_name: "substrate_node"

    # metrics_path defaults to '/metrics'
    # scheme defaults to 'http'.

    # Override the global default and scrape targets from this job every 5 seconds.
    # ** NOTE: you want to have this *LESS THAN* the block time in order to ensure
    # ** that you have a data point for every block!
    scrape_interval: 5s

    static_configs:
      - targets: [ "localhost:9615" ]
# specify a custom config file instead if you made one here:
./prometheus --config.file substrate_prometheus.yml
curl localhost:9615/metrics
启动grafana
# 后台运行
brew services restart grafana
# 指定运行
/usr/local/opt/grafana/bin/grafana-server --config /usr/local/etc/grafana/grafana.ini --homepath /usr/local/opt/grafana/share/grafana --packaging=brew cfg:default.paths.logs=/usr/local/var/log/grafana cfg:default.paths.data=/usr/local/var/lib/grafana cfg:default.paths.plugins=/usr/local/var/lib/grafana/plugins
- http://localhost:3000/
然后需要选择 Prometheus 数据源类型并指定 Grafana 需要查找它的位置。
Grafana 需要的 Prometheus 端口不是在 prometheus.yml 文件 (http://localhost:9615) 中为节点发布其数据的位置设置的端口。
在同时运行 Substrate 节点和 Prometheus 的情况下,配置 Grafana 以在其默认端口 http://localhost:9090 或配置的端口(如果自定义它)上查找 Prometheus。
配置数据源
导入看板模版
Export and import | Grafana documentation
Substrate Node Template Metrics dashboard for Grafana | Grafana Labs
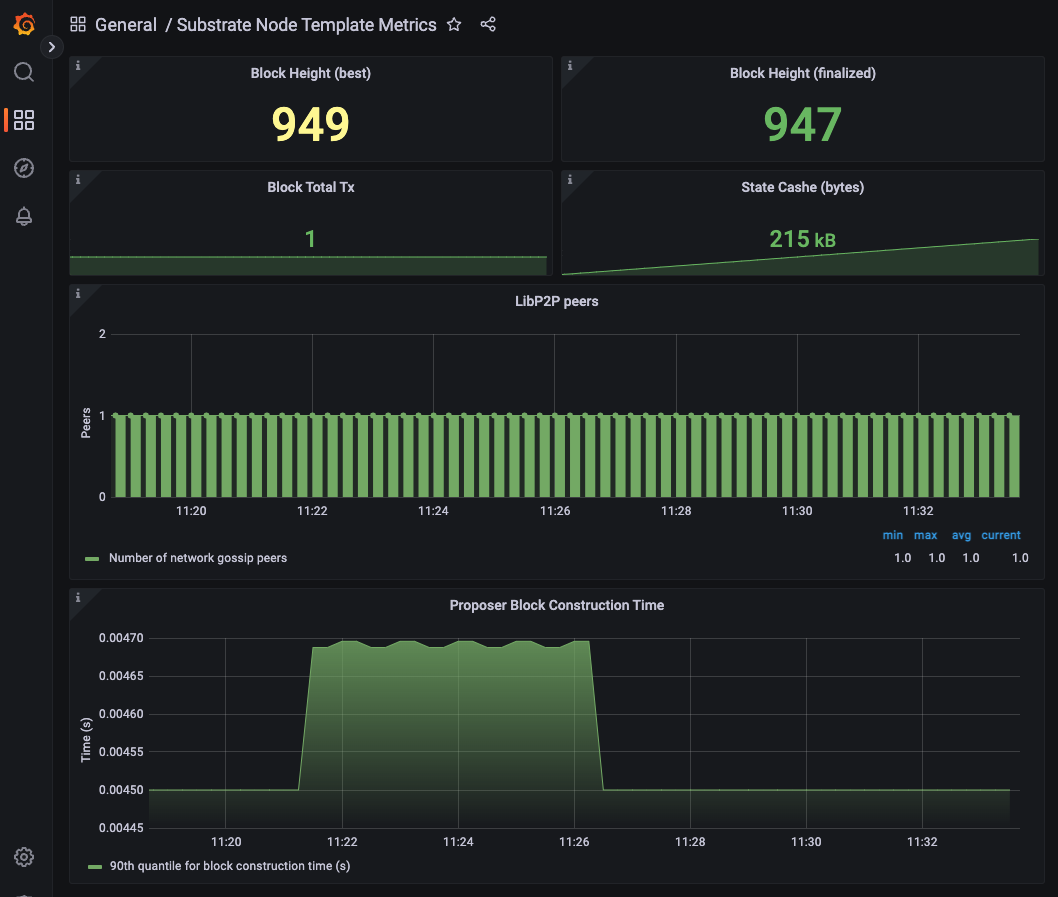
Upgrade a running network
时序图
第一次更新运行时
- 使用alice账户上传wasm文件
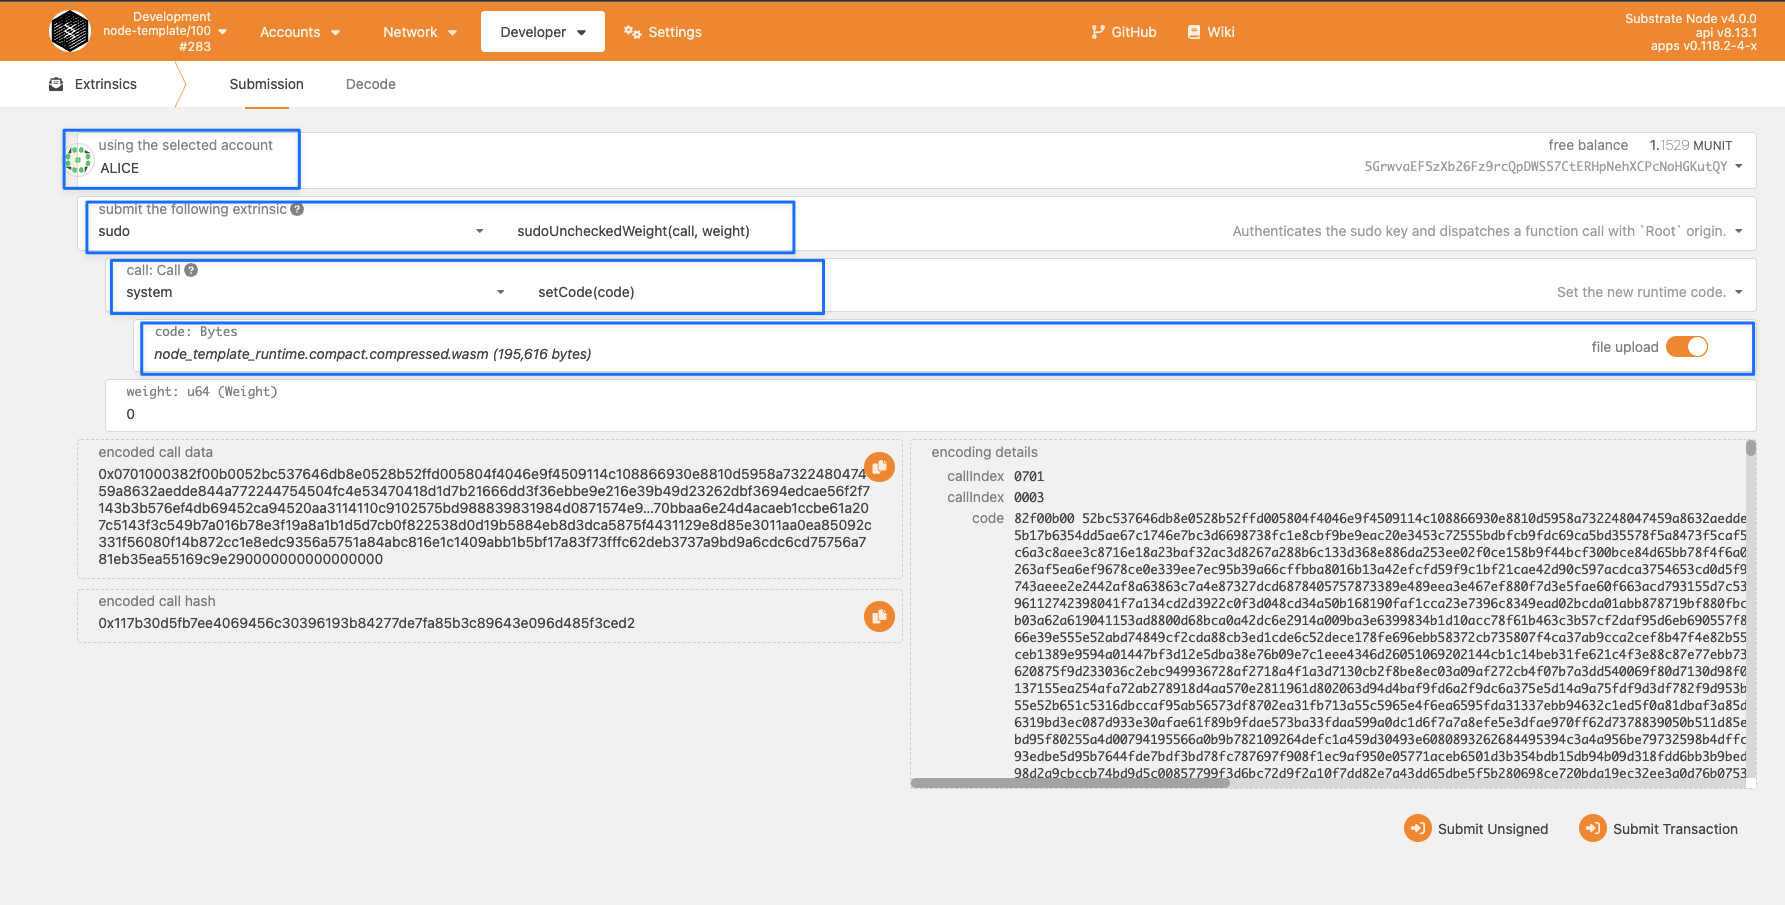
- node-template版本更新
- 已经添加新的交易函数scheduler
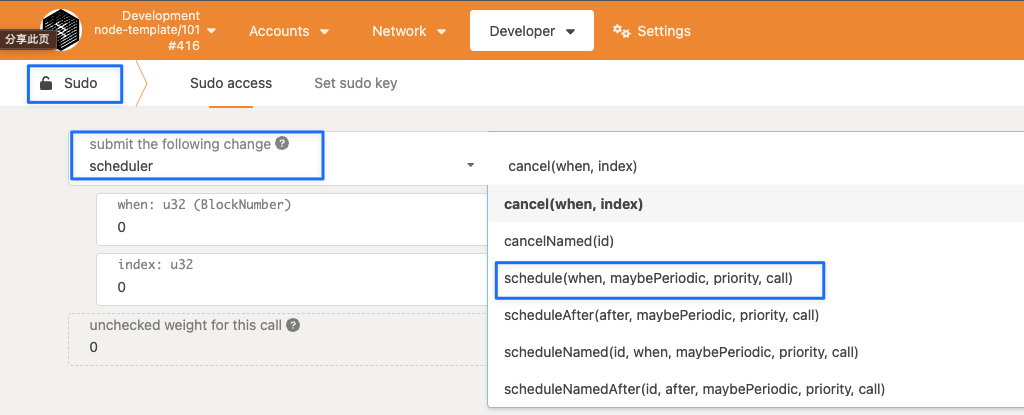
第二次上传文件设置自动执行条件
- 使用scheduler函数
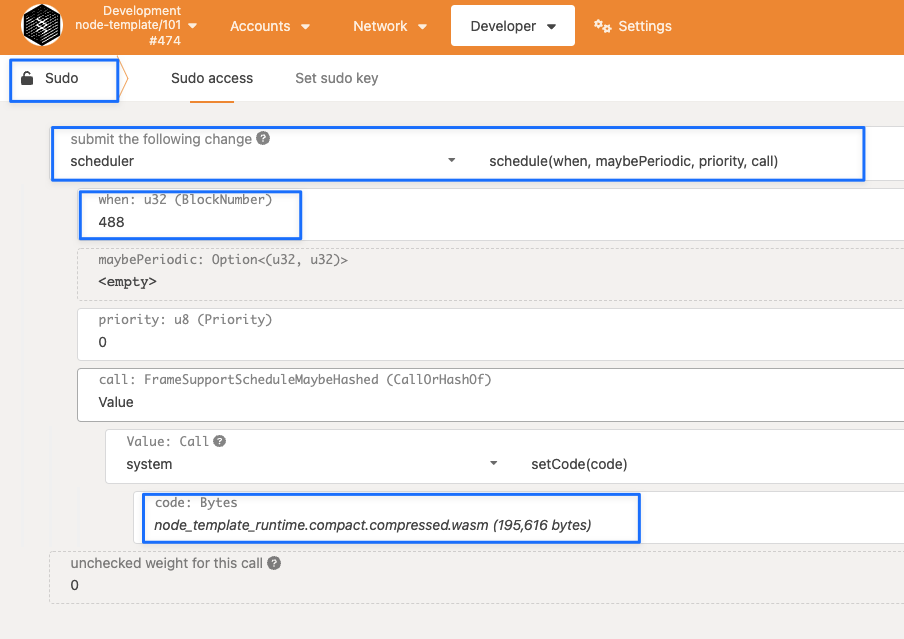
- 达到条件自动触发
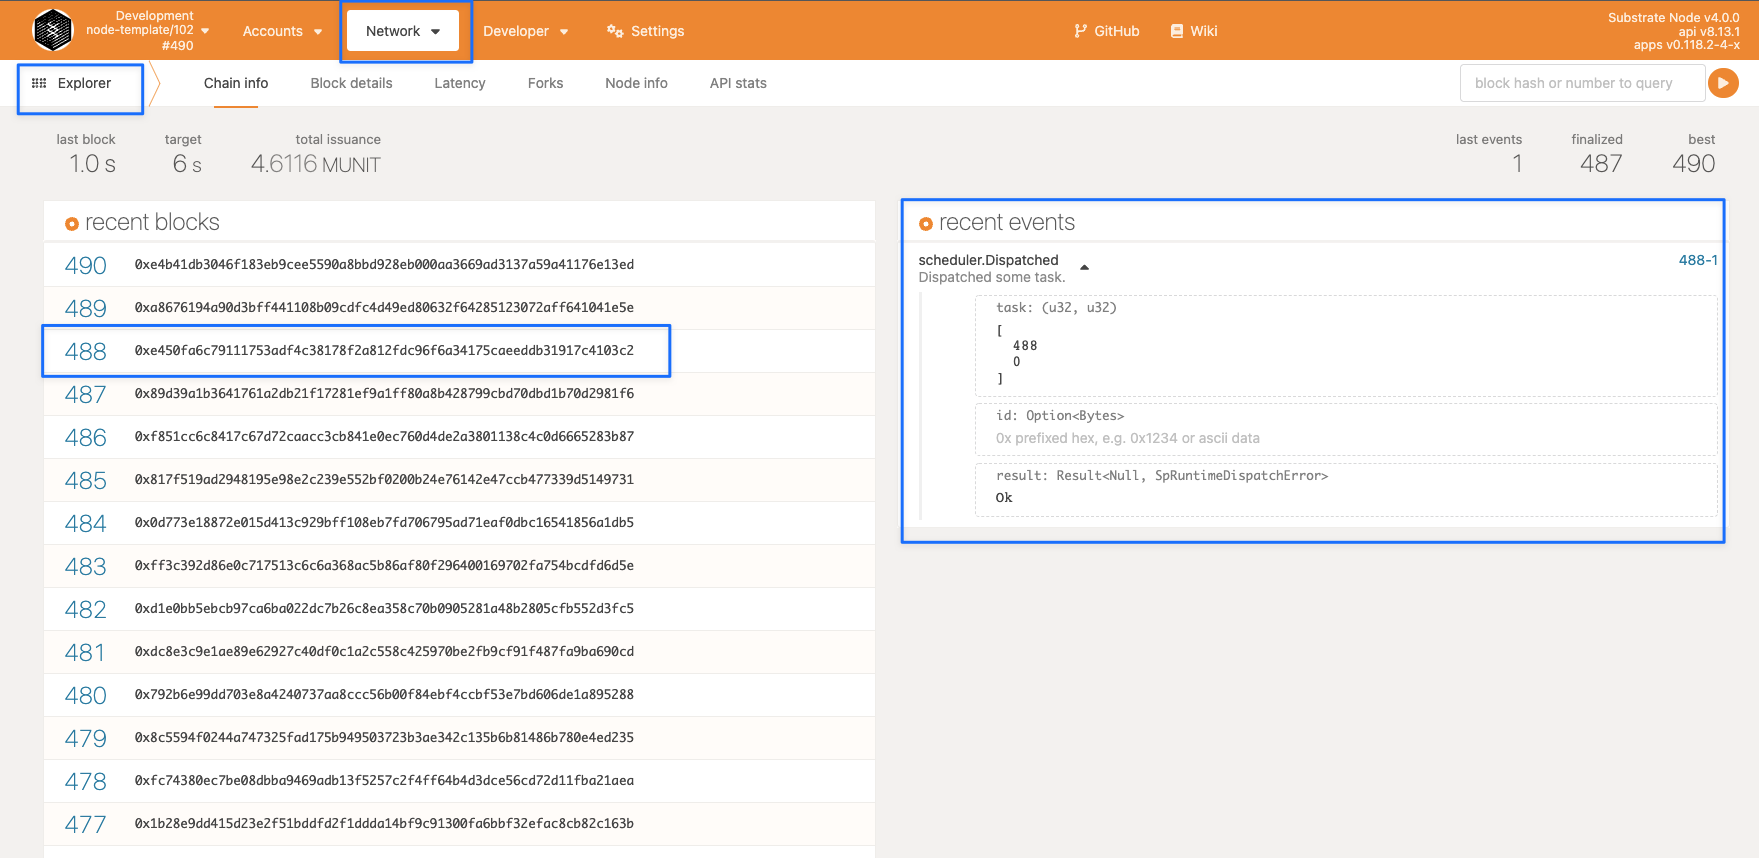
Work with pallets
文档/代码更新问题
由于目前substrate的源码和文档都在快速更新,所以可能出现一些未曾说过的问题。 比如链接找不到、目录里面不存在对应文章链接、编译时依赖包版本冲突。 这些都需要对文档的熟悉、对rust编程的熟悉才能轻松越过。
由于官方文档和代码一直都在更新,可能会出现问题,这里就需要根据默认依赖的substrate分支进行更换
[dependencies]
sp-std = { version = "4.0.0-dev", default-features = false, git = "https://github.com/paritytech/substrate.git", branch = "polkadot-v0.9.24" }
如上所示,对应的分支为:branch = “polkadot-v0.9.24”, 所以需要改成:
[dependencies.pallet-nicks]
default-features = false
git = 'https://github.com/paritytech/substrate.git'
#tag = 'monthly-2021-10'
#tag = 'monthly-2022-04'
branch = "polkadot-v0.9.24"
version = '4.0.0-dev'
详见: cargo 与 git
Pallet前置Rust知识
Add a pallet to the runtime
设置昵称:添加第一个Pallet到Runtime
substrate node template提供了一个最小的可工作的运行时,但是为了保持精炼,它并不包括Frame中的大多数的Pallet
接下来接着使用前面的node template
runtime结构分析
tree -L 2 runtime                                                                                               ─╯
runtime
├── Cargo.toml
├── build.rs
└── src
    └── lib.rs

1 directory, 3 files
时序图
Specify the origin for a call
此小节接着上节内容进行修改,主要是强化权限
为帐户设置昵称
- 检查帐户选择列表以验证当前选择了 Alice 帐户。
- 在 Pallet Interactor 组件中,确认选择了 Extrinsic。
- 从可调用的托盘列表中选择nicks。
- 选择 settName 作为要从 nicks palette 调用的函数。
- 键入一个长于 MinNickLength(8 个字符)且不长于 MaxNickLength(32 个字符)的名称。
- 单击Signed以执行该功能。
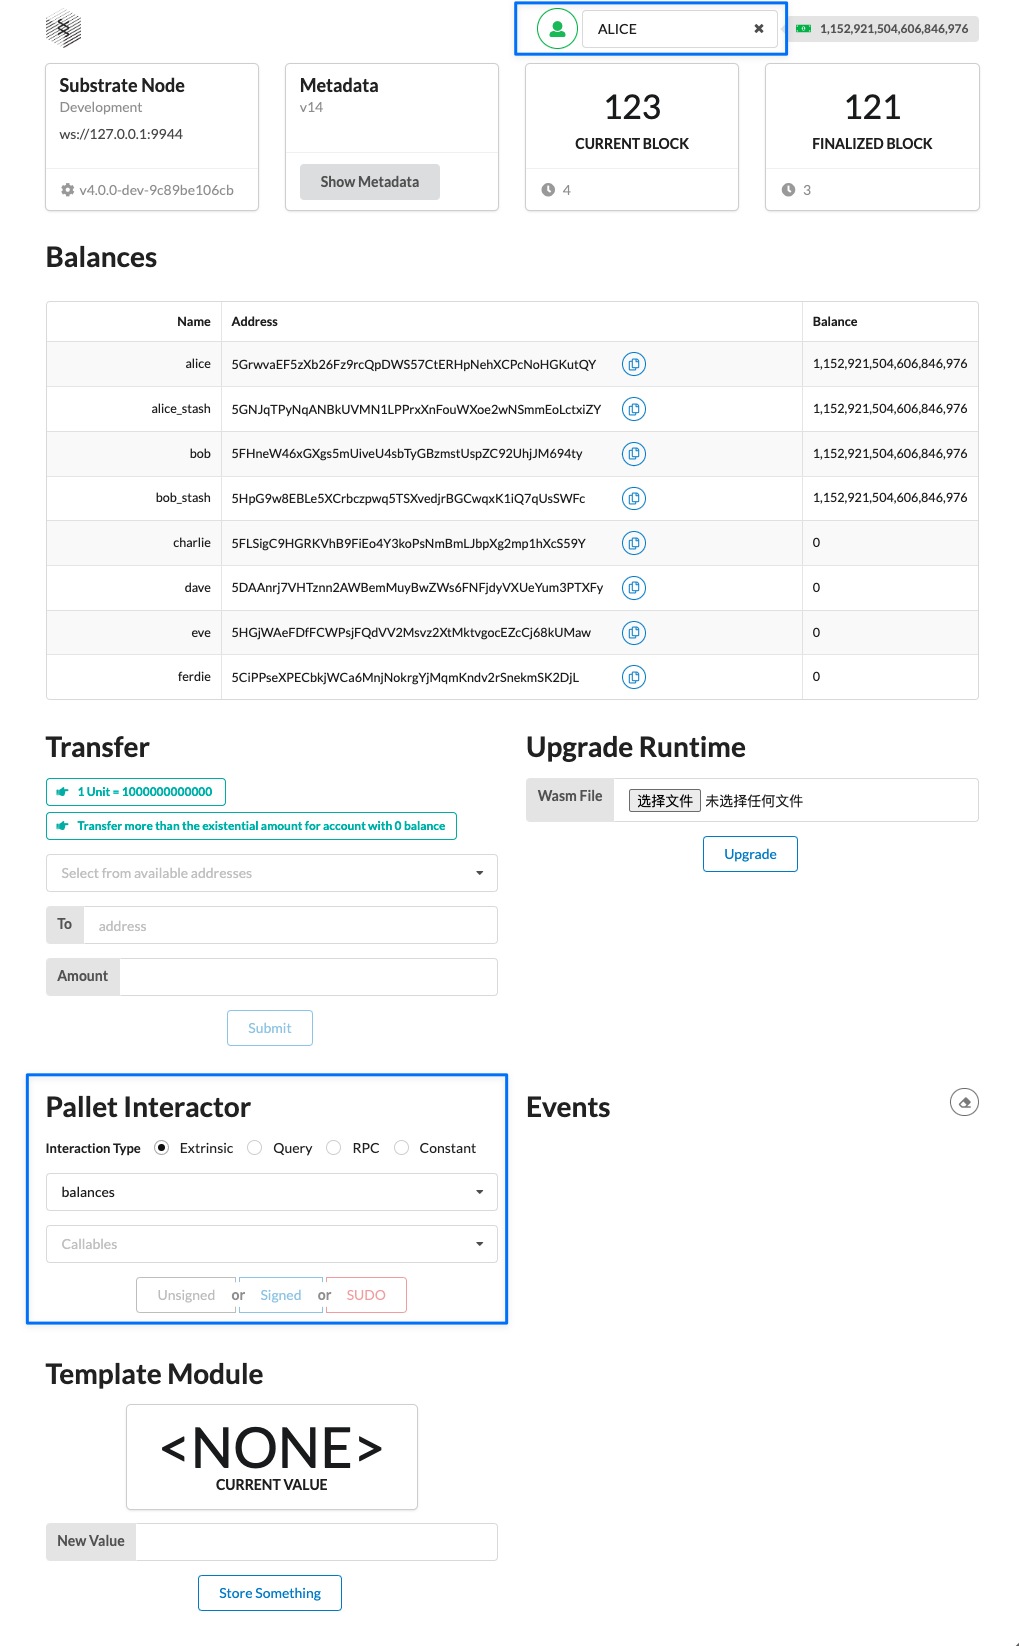
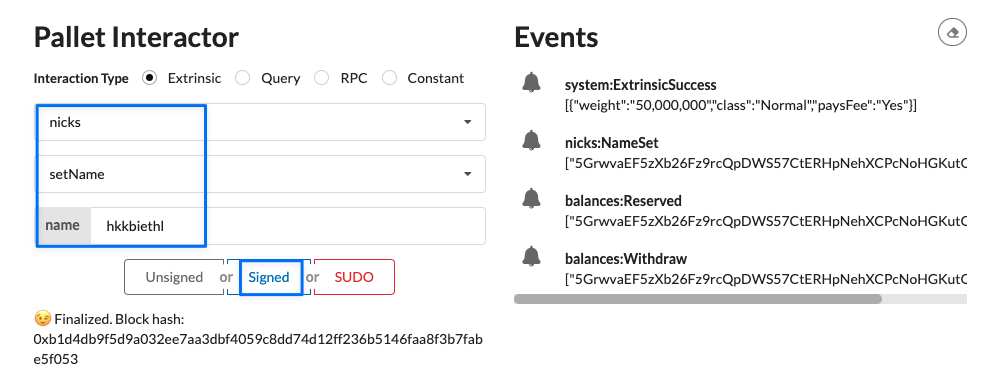
使用Nicks pallet查询账户信息
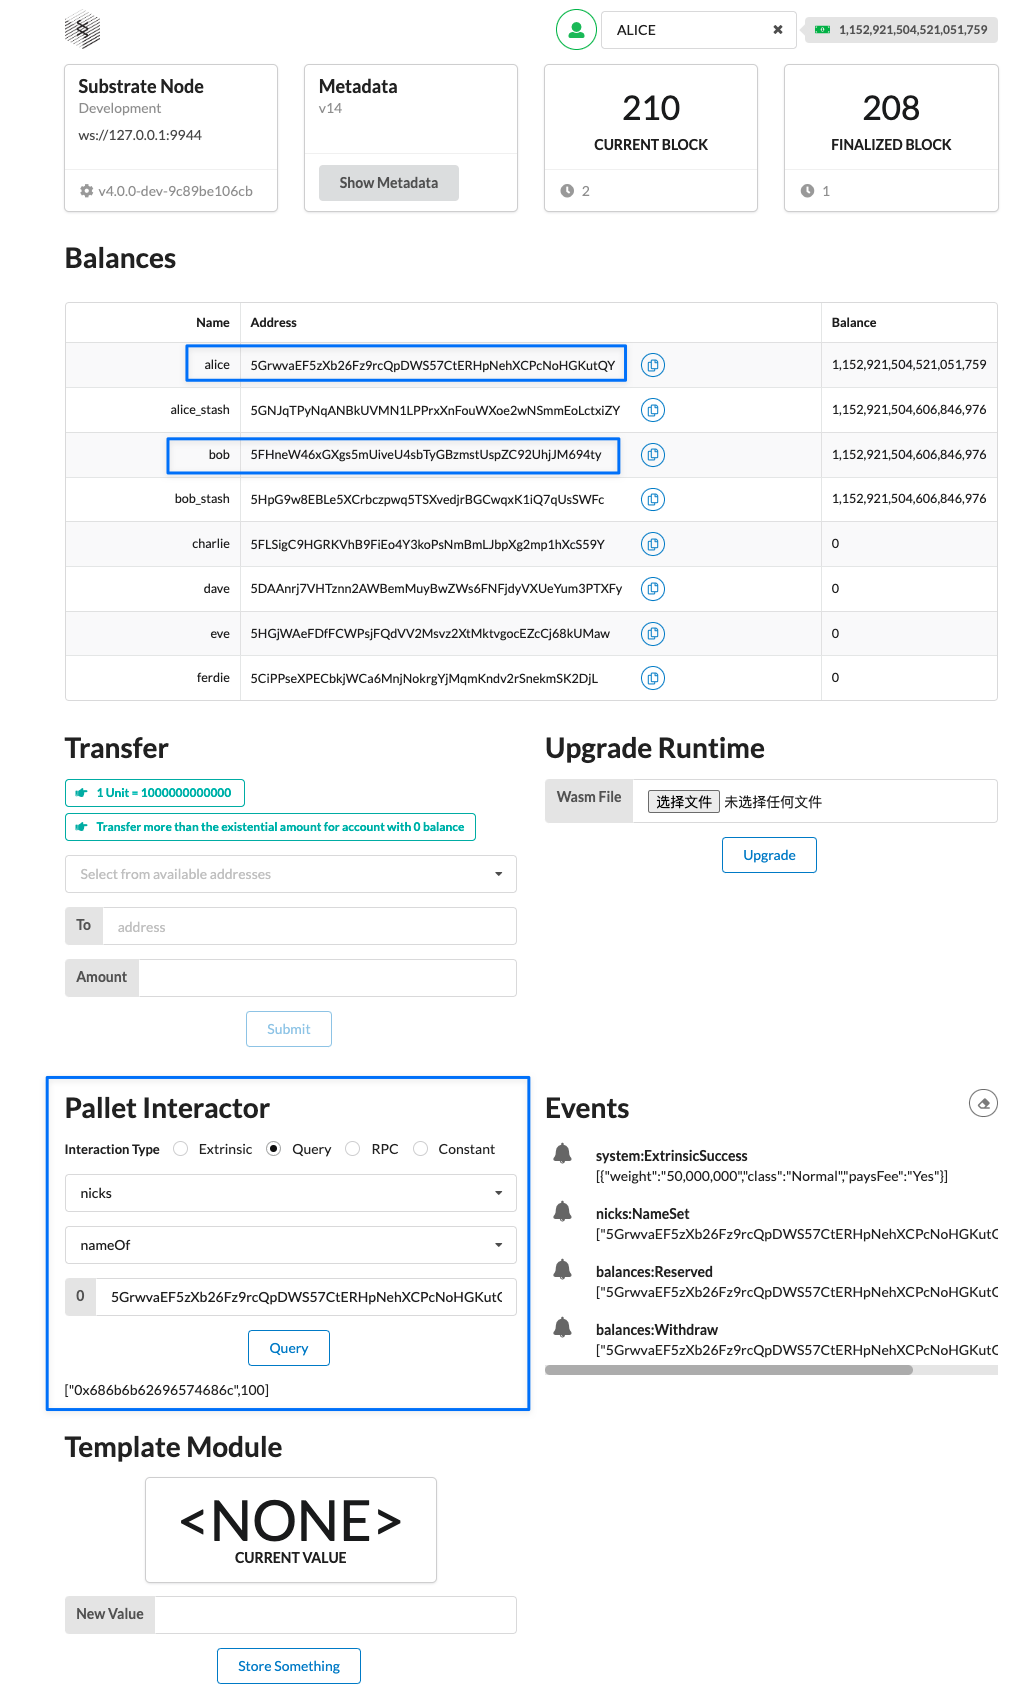
-
按图所示进行设置,查询,复制Alice的地址进行查询会返回一个元组,里面的两个值分别指:
- Alice 帐户的十六进制编码昵称。
- 为保护昵称而从 Alice 的账户中保留的金额。
如果使用Bob的地址,会返回None,因为没有给他设置昵称。
可能出现的问题
- Conflicts when adding pallet to substrate-node-template · Issue #9 · substrate-developer-hub/pallet-did
- substrate node template - “error: failed to select a version for
parity-util-mem” - Substrate and Polkadot Stack Exchange
指定调用源头unsigned, signed or sudo
前面已经介绍用Alice的地址来设置并查询nickname(setName),里面还有其他函数(killName、forceName、clearName)这里将会进行调用验证
signed与sudo有不同权限。
点击Sudo按钮将会发出一个 Sudid 事件以通知节点参与者 Root 源发送了一个呼叫。 但是,内部调度会因 DispatchError 而失败(Sudo 按钮的 sudo 函数是“外部”调度)。
特别是,这是 DispatchError::Module 变体的一个实例,它会提供两个元数据:一个索引号和一个错误号。
- 索引号与产生错误的pallet有关;它对应于construct_runtime!中pallet的索引(位置)!。
- 错误编号与该托盘的错误枚举中相关变体的索引相对应。
使用这些数字查找托盘错误时,请记住索引是从零开始。
比如:
- 索引为 9(第十个托盘),对应nicks,
- 错误为 2(第三个错误), 对应substrate源码中定义的第三个错误
#![allow(unused)]
fn main() {
/// Error for the nicks pallet.
#[pallet::error]
pub enum Error<T> {
    /// A name is too short.
    TooShort,
    /// A name is too long.
    TooLong,
    /// An account isn't named.
    Unnamed,
}
}
- 取决于您的construct_runtime中尼克斯托盘的位置!宏,您可能会看到不同的索引编号。不管 index 的值如何,你应该看到错误值是 2,它对应于 Nick 的 Pallet 的 Error 枚举的第三个变体,Unnamed 变体。这应该不足为奇,因为 Bob 尚未保留昵称,因此无法清除!
Configure the contracts pallet
Use macros in a custom pallet
- 了解Substrate Runtime development: Runtime development | Substrate_ Docs
- 尤其要理解FRAME和pallets的关系。
- 掌握自定义pallet的步骤,其实已经准备好模版:substrate-node-template/pallets/template
- 更多详细内容:how-to-guides: pallet-design
时序图
Publish Custom pallets
内置pallets
发布pallets
Develop smart contracts
Prepare your first contract
Develop a smart contract
Use maps for storing values
Buid a token contract
Troubleshoot smart contracts
Connect with other chains
Start a local relay chain
波卡架构
parachains
注意版本匹配
您必须使用本教程中规定的确切版本。
平行链与它们连接的中继链代码库紧密耦合,因为它们共享许多共同的依赖关系。 在处理整个 Substrate 文档中的任何示例时,请务必将相应版本的 Polkadot 与任何其他软件一起使用。您必须与中继链升级保持同步,您的平行链才能继续成 功运行。如果你不跟上中继链升级,你的网络很可能会停止生产区块。
时序图
Connect a local parachain
Common Good Parachains
Conver a solo chain
Parachain Slots Autcion
跨链用到的信息格式
时序图
Connect to Rococo testnet
substrate预置账户和密钥
wallets
polkadot-js/extension
SS58地址格式
Rococo faucet martic channel
时序图
Access EVM accounts
Ethereum core concepts and terminology
Ethereum Virtual Machine (EVM) basics
Decentralized applications and smart contracts
Pallet design principles
Truffle
Remix IDE
时序图
参考资源
substrate文档练习
-
substrate官方教程里面的第一课名称叫做创建我们的第一条链, 实际上我觉得应该叫做启动substrate默认模板链的节点更贴切,因为这个教程里面实际上就是把一个用substrate已经开发好的模板链的代码拉下来,然后编译一下,然后再启动起来。 这个过程实际上和我们拉一个比特币的代码,然后编译下然后再启动 ,并没有太大的不同。
-
substrate 开发环境
- 启动链的节点: > 这里要用到node-template的代码。node-template实际上是官方提供的使用substrate开发的模板链, > 可以理解为substrate官方提供的样例,后续任何人想使用substrate可以在这个样例的基础上进行修改,这样开发链就更方便。 > 这就好比以前的好多山寨链,在btc的源码上改下创世区块的配置,就是一条新链。 那么substrate其实也一样,提供了node-template这样一个模板,后续根据需求在这个上面改吧改吧,就能产生一条新链。
-
使用polkadot-js访问节点: 在substrate官方的教程中,是使用了substrate的前端模板来访问刚才启动的节点。但是在实际的开发中,后端人员其实更多的使用polkadot-js-app来访问我们的节点,所以这里我们也使用它来访问我们的节点。
-
-
substrate采用模块化的方法进行开发,它定义了一组丰富的原语,给开发人员提供了强大的、熟悉的编程方法。
-
使用方式介绍:
-
使用substrate node: 使用json文件启动
-
使用substrate frame: 业务逻辑自由
frame其实是一组模块(pallet)和支持库。使用substrate frame可以轻松的创建自己的自定义运行时,因为frame是用来构建底层节点的。使用frame还可以配置数据类型,也可以从模块库中选择甚至是添加自己定义的模块。
-
使用substrate core: runtime自由
使用substrate code运行开发者完全从头开始设计运行时(runtime,问题:什么是runtime?),当然此种方式也是使用substrate自由度最大的方式。
-
-
Substrate Client:
substrate客户端是基于substrate实现的区块链的节点客户端(可以理解为全节点),它主要由以下几个组件组成(以下也就是告诉我们实现一条链由哪几部分组成):
- 存储: 用来维持区块链系统所呈现的状态演变。substrate提供了的存储方式是一种简单有效的key-value对存储机制的方式。
- Runtime: 这里就可以回答上面的问题,什么是runtime?runtime定义了区块的处理方式,主要是状态转换的逻辑。在substrate中,runtime code被编译成wasm作为区块链存储状态的一部分。
- p2p网络: 允许客户端和其它网络参与者进行通信。
- 共识: 提供了一种逻辑,能使网络参与者就区块链的状态达成一致。substrate支持提供自定义的共识引擎。
- RPC: 远程过程调用。
- telemetry: 通过嵌入式Prometheus服务器的方式对外展示(我理解应该是类似于区块链浏览器一样的东西,或者是提供信息给区块链浏览器展示)。
-
-
构建一个PoE(Prove of Existence)去中心化的应用
substrat官方手册的第三个例子,使用substrate来创建自定义的存在证明dapp。我们本节的主要内容分为以下三步:
- 基于node template启动一条substrate的链。
- 修改node template来添加我们自己定制的Poe pallet,并实现我们的PoE API。
- 修改前端模板以添加与PoE API交互的自定义用户界面。
- 接口设计
- 创建自定义pallet
node template的运行时是基于FRAME来实现的。FRAME是一个代码库,允许我们使用一系列pallet来构建底层的运行时。pallet可以看出是定义区块链功能的单个逻辑模块。subtrate为我们提供了一些已经构建好的pallet,我们在定义运行时时可以直接使用。
-
本节内容:
- 基于模板启动substrate区块链网络;
- 生成ed25519和sr25519 密钥对用于网络授权;
- 创建和编辑chainspec json文件。
-
分两部分,一是介绍如何构建kitties pallet,包括创建与kittes交互的功能;另一部分是介绍开发前端UI,与我们第一部分的链进行交互。 目标:
- 学习构建和运行substrate节点的基本模式。
- 编写自定义框架pallet并集成到运行时。
- 了解如何创建和更新存储项。
- 编写pellet相关辅助函数。
- 使用PolkadotJs API将substrate节点连接到自定义前端。
- kitties功能:
- 可以通过一些原始来源或者通过使用现有小猫进行繁殖创造。
- 以其所有者设定的价格出售。
- 从一个所有者转移到另一个所有者。
- 参考资料
-
无许可准入区块链网络我们比较常见,例如比特币、以太坊都是无准入的。那么授权准入网络在哪些地方可能出现呢?
- 专用网络或者是联盟链网络;
- 高度管控的环境;
- 大规模测试预公开网络。
目标
- 修改node-template工程添加node-authorization pallet。
- 加载部分节点并授权新节点加入网络。
pallet基础
尝试添加pallet到runtime
-
substrate node template提供了一个最小的可工作的运行时,但是为了保持精炼,它并不包括Frame中的大多数的Pallet。本节我们将学习如何将Pallet添加到runtime中。
- 安装Node Template
- 导入Pallet
- 配置Pallet
- 将Nicks添加到construct_runtime!中
智能合约
初探ink!
- 初探ink!智能合约开发
-
发展两年的波卡智能合约语言ink!将会带来什么影响? - 知乎
ink!是由Parity在这里开发智能合约语言Rust编写智能合同并编译成Wasm代码。 智能合同是在分散区块链网络上运行的计算机协议,可视为可自动执行的应用程序。 ink!它不同于其他更成熟的智能合约语言Parity的烙印。ink!最初是通过使用Rust宏系统生成自定义语法和风格,开发智能合约。 但是这种方法偏离了Rust在不牺牲易用性或开发性的前提下,开发人员熟悉和喜欢的语言诞生了ink!2.0.为开发人员提供最大的灵活性。简单来说,整合后现在ink!所有的结构和语法都是纯的Rust
-
深入ink!
-
学习智能合约的开发,主要包括:
- ink!智能合约的结构;
- 存储单个的值和hash map;
- 安全的设置或获取这些值;
- 编写public和private函数;
- 配置Rust使用安全的数学库。
总的来说,写ink!合约和直接用Rust编码没有太大的区别,只要能使用Rust都能很快的编写合约。
ERC20
-
学习写一个ERC20合约,主要包括:
- 初始token设置;
- 支持transfer;
- 通过substrate触发事件。
连接其他链
中继链连接
学习启动一个relay chain, 通过cumus来创建自己的parachain,并且在在本地测试网络中将parachain连接到relaychain。
平行链连接
-
上一节,我们启动了relaychain的节点,本节将连接parachain到relaychain节点。 主要包括以下内容:
- 启动parachain;
- parachain注册;
- 和parachain交互;
- 连接到添加的parachain节点。
测试
编写测试
-
learn-substrate-easy/9编写tests.md at main · KuanHsiaoKuo/learn-substrate-easy
-
为pallet编写benchmarking分两种情况,如下:
- 对函数进行性能测试时需要的构造条件不会涉及到本pallet以外的其它pallet;
- 在对函数进行性能测试时需要先使用其它的 pallet 构造测试的先决条件。
benchmarking
- learn-substrate-easy/10编写benchmarking.md at main · KuanHsiaoKuo/learn-substrate-easy
- learn-substrate-easy/12编写复杂的benchmarking.md at main · KuanHsiaoKuo/learn-substrate-easy
升级
-
learn-substrate-easy/11升级runtime.md at main · KuanHsiaoKuo/learn-substrate-easy
-
learn-substrate-easy/12升级substrate版本.md at main · KuanHsiaoKuo/learn-substrate-easy
-
substrate框架的特性之一就是支持无分叉运行时升级。无分叉升级时以区块链自身能力支持和保护的方式增强区块链运行时的一种手段,区块链的运行时定义了区块链可以保持的状态,还定义了改变该装填的逻辑。 substrate可以在不分叉的情况下更新runtime,因为运行时的定义本身就是substrate链中的一个元素,网络参与者可以通过交易函数,特别是set_code函数来更新该值。 由于运行时状态的更新受到区块链共识机制和加密安全的约束,网络参与者可以在不分叉的情况下使用不受信任分发的更新或者扩展的运行时逻辑,甚至不需要发布新的区块链客户端。
- 本节内容:
- 使用sudo调用将schelduler
- pallet包含到runtime中;
- 调用runtime升级。
- 本节内容:
深入substrate pallet
Pallet
Pallet到底是什么
- 框架和库的区别是什么? 框架和库本身都是一堆写好的代码和逻辑,使用起来都是先安装/下载。 但是二者最本质的区别在于“控制反转“:
- 库是用来给开发者调用的,开发者将各种库同自己的代码结合起来编程一个有特定逻辑的程序
- 框架是用来调用开发者写的业务逻辑。这里就出现’控制反转’,是框架来控制开发者编写的代码的使用时机
- 结合这个使用时机,就出现了生命周期这个概念,这点不展开论述
- Substrate是一个框架,所以pallet其实就是它预留出来的“空格“ 开发者可以很方便地只实现业务相关的代码,整理成pallet,供substrate这个框架使用
Pallet基础组成
#![allow(unused)]
fn main() {
// 1. Imports and Dependencies
pub use pallet::*;

#[frame_support::pallet]
pub mod pallet {
    use frame_support::pallet_prelude::*;
    use frame_system::pallet_prelude::*;

    // 2. Declaration of the Pallet type
    // This is a placeholder to implement traits and methods.
    #[pallet::pallet]
    #[pallet::generate_store(pub (super) trait Store)]
    pub struct Pallet<T>(_);

    // 3. Runtime Configuration Trait
    // All types and constants go here.
    // Use #[pallet::constant] and #[pallet::extra_constants]
    // to pass in values to metadata.
    #[pallet::config]
    pub trait Config: frame_system::Config { ... }

    // 4. Runtime Storage
    // Use to declare storage items.
    [pallet::storage]
    [pallet::getter(fn something)]
    pub MyStorage<T: Config> = StorageValue<_, u32>;

    // 5. Runtime Events
    // Can stringify event types to metadata.
    #[pallet::event]
    #[pallet::generate_deposit(pub (super) fn deposit_event)]
    pub enum Event<T: Config> {...
}

// 6. Hooks
// Define some logic that should be executed
// regularly in some context, for e.g. on_initialize.
#[pallet::hooks]
impl<T: Config> Hooks<BlockNumberFor<T>> for Pallet<T> { ... }

// 7. Extrinsics
// Functions that are callable from outside the runtime.
#[pallet::call]
impl<T: Config> Pallet<T> { ... }

}
}
Pallet组件深入
1. Pallet Hooks
2. Pallet Extrinsics
3. Pallet Errors
4. Pallet Config
5. Pallet Use Other Pallet
6. Pallet Extension
7. Pallet Debug
8. Pallet RPC
9. Pallet Benchmarking
参考资源
官方资料
pallet
编写pallet到rust前置知识
-
learn-substrate-easy/5编写pallet的Rust前置知识.md at main · KuanHsiaoKuo/learn-substrate-easy
- trait的孤儿规则
- trait对象
- trait的继承
- 关联类型
- 定义Config trait,然后为Pallet实现相应的trait,最后在main函数中使用它
编写简单到pallet
- learn-substrate-easy/6编写简单的pallet.md at main · KuanHsiaoKuo/learn-substrate-easy
-
node-template的结构
-
编写pallet的一般格式, 整理出7个部分, 1和2基本上是固定的写法,而对于后面的3-7部分,则是根据实际需要写或者不写。关于模板中每部分的解释,可以参考文档.
- 依赖;
- pallet类型声明;
- config trait;
- 定义要使用的链上存储;
- 事件;
- 钩子函数;
- 交易调用函数;
-
举例编写simple-pallet
功能介绍: simple-pallet是一个存证的pallet,简单说就是提供一个存取一段hash到链上的功能,和从链上读取的功能。
-
将pallet添加到runtime中
-
编译运行
-
调试使用pallet中的功能
-
pallet的组成
-
learn-substrate-easy/7Pallet的组成.md at main · KuanHsiaoKuo/learn-substrate-easy
要想熟练的开发pallet,我们必须得把pallet中的各个组成部分弄清楚。本节,我们就按照模板中的各个部分的顺序来讲解pallet的组成
- 导出和依赖:Pub mod pallet{}就是将我们的pallet暴露出来, pub use pallet::*;是可以使用pallet中的所有类型,函数,数据等
- pallet类型声明:它是一系列trait和方法的拥有者,实际的作用类似于占位符,这里举例rust程序
- config trait: 这部分是指定Runtime的配置trait,Pallet中使用的一些类型和常量在此trait中进行配置。
- Storage-定义要使用的链上存储: 存储(Storage)允许我们在链上存储数据,使用它存储的数据可以通过Runtime进行访问。substrate提供了四种存储方式,分别是:
- Storage Value: 存储单个的值, 无键
- Storage Map: 以map方式存储,单键,key-value
- Storage Double Map: 以双键方式存储,(key1, key2)-value
- Storage N Map: 以多键方式存储,(key1, key2, …, keyn)-value
- Event-事件:当pallet需要把运行时上的更改或变化通知给外部主体时,就需要用到事件。事件是一个枚举类型
- hooks-钩子函数:钩子函数,是在区块链运行过程中希望固定执行的函数,例如我们希望在每个区块构建之前、之后的时候执行某些逻辑等,就可以把这些逻辑放在钩子函数中
- Extrinsic-调度函数,交易调用函数: Extrinsic则是可以从runtime外部可以调用的函数,也是pallet对外提供的逻辑功能。比如交易
Pallet技巧细节
storage(链上)各个类型使用
- learn-substrate-easy/8.1storage使用介绍.md at main · KuanHsiaoKuo/learn-substrate-easy
- Runtime storage | Substrate_ Docs
在pallet中要使用的storage更多的其实是一个应用层的概念,如果用城市建造来类比,持久化存储就像是整个城市的马路或者是管道,而我们谈论的storage则是某个具体建筑或者房屋里面的水管会小路,至于这些小水管(或小路)是怎么和整个城市的大路联系起来的,不是我们讨论的范围。
#![allow(unused)]
fn main() {
// 表示下面定义一个pallet storage
#[pallet::storage]
// 自动为storage生成一个getter函数,名字叫some_value
// 后续可以在pallet使用some_value()函数来获取该Storage中存储的值
#[pallet::getter(fn some_value)]
pub(super) type SomeValue = StorageValue<_, u64, ValueQuery>;
}
Error类型的使用
- pallet中Error类型的使用
>
在runtime代码执行时,代码必须是“非抛出的”,或者说不应该panic,应该是优雅的处理错误,所以在写pallet代码时,允许我们自定义错误类型,当错误发生时,可以返回我们定义的错误类型。这里的Error类型是指运行时在执行调度函数(也就是交易函数)时返回的错误。因为在调度函数执行时,返回的结果为DispatchResult类型,当执行结果错误时,返回DispatchError。
- 错误类型的定义
- 在函数中返回错误
- 简单示例
写调度函数的套路
-
调度函数在substrate官方文档里面叫做Extrinsics(外部调用),详细的Extrinsics介绍可以参考这里. 在substrate中共有三种Extrinsics,分别是Inherents、Signed transactions和Unsigned transactions。 而在我们开发pallet的过程中,比较常用到的是后两种,所以我们这里也主要介绍后两种,对于Inherents有兴趣的小伙伴可以自己看官方文档研究下。
- Signed transactions
- Unsigned transactions
- 通常写法:调度函数的位置->函数体的写法->权重->transactional
- 示例
hooks的使用
- 用户通过钱包发起交易;
- 和钱包相连的全节点收到交易后会把交易广播到网络中;
- 然后根据共识算法打包区块,某个全节点获得了打包权(图中画的是节点4), 然后将交易打包到区块中;
- 打包好区块后,将区块广播到网络中;
- 其它每个节点收到区块后验证,然后执行区块里面的交易,更新自己本地的账本。
- substrate中的执行过程
    1. 初始化区块(Initializes the block)
    2. 执行区块(Executes extrinsics)
    3. 确认区块( Finalizes the block).
- hooks介绍:
    1. on_finalize: 在区块 finalize 的时候调用。
    2. on_idle:区块finalize的时候调用,不过比on_finalize先调用。
    3. on_initialize:区块初始化的时候调用。
    4. on_runtime_upgrade:执行模块升级的时候调用。
    5. pre_upgrade:升级之前的检查。
    6. post_upgrade:升级之后的处理。
    7. offchain_worker:在一个 pallet 上实现此函数后可以在此函数中长时间的执行需要链下执行的功能。该函数会在每次区块导入的时候调用。后续我们讲ocw使用的时候就需要和这个函数打交道。
    8. integrity_test:运行集成测试。
- 示例
- [资料](https://docs.substrate.io/v3/concepts/execution/)
- [substrate源码](https://paritytech.github.io/substrate/master/frame_support/traits/trait.Hooks.html)
pallet中的Config
- learn-substrate-easy/8.5pallet中的Config.md at main · KuanHsiaoKuo/learn-substrate-easy
- pallet中的config
- 好好理解rust中关于trait和关联类型相关的知识
- pallet 简单示例: 介绍一个存储学生信息的pallet,其中存储逻辑写在extrinsic中
- 在Config中定义配置类型:主要使用trait约束和关联类型改写
- 在runtime中指定具体的类型
- 构建、交互与调试
- 参考资料
在pallet中使用其它pallet
- learn-substrate-easy/8.6在pallet中使用其它pallet.md at main · KuanHsiaoKuo/learn-substrate-easy
- 在pallet中使用其他pallet
-
在自己的pallet中使用其它的pallet主要有以下几种情况:
- 指定某个现成的pallet: 在pallet的config中定义类型,然后runtime中使用时指定这个类型为frame中指定某个现成的pallet;
- 指定某个自定义的pallet: 在pallet的config中定义类型,然后runtime中使用时指定这个类型为frame中指定某个自定义的pallet;
- 封装和扩展现有的 pallet 。
-
在runtime中直接指定某个类型为其它的pallet
这种方式比较常见的就是在pallet中定义currency类型,然后用指定currency类型为balances pallet。详细的可以看substrate中node中的使用,在pallet_assets中使用了pallet_balances,就是通过指定前者的currency类型为后者
-
pallet中使用其它pallet的storage
自定义两个pallet,分别叫做pallet-use-other-pallet1和pallet-storage-provider,然后我们在前一个pallet中读取和存储后一个pallet
-
封装和扩展现有pallet
- learn-substrate-easy/8.7封装和扩展现有pallet.md at main · KuanHsiaoKuo/learn-substrate-easy
- 封装和扩展现有的pallet
-
这里使用substrate提供的contracts pallet,然后对其中的功能进行封装。
在我们的封装中,将contracts pallet的call函数封装成sudo_call,即需要root权限才能调用。同时,我们在runtime中加载contracts时,去掉直接调用contracts函数的方式。
-
整个方式我们分成两大步骤,如下:
- 编写extend-pallet;
- 在runtime配置extend- pallet 和contracts pallet。
-
调试
- learn-substrate-easy/8.8调试.md at main · KuanHsiaoKuo/learn-substrate-easy
- 调试pallet
- 在pallet开发时主要有以下几种调试方式:
- logging uilities;
- printable trait;
- print函数;
- if_std.
- 使用logging uilities
- 使用 printable trait
- 使用print函数
- 使用 if_std
- 文档资料
- 在pallet开发时主要有以下几种调试方式:
pallet中的类型转换;
在pallet中使用链下工作者(Offchain worker)
- learn-substrate-easy/8.9使用OCW提交签名交易.md at main · KuanHsiaoKuo/learn-substrate-easy
- learn-substrate-easy/8.10在ocw中提交未签名交易.md at main · KuanHsiaoKuo/learn-substrate-easy
- learn-substrate-easy/8.11在ocw中提交具有签名payload的未签名交易.md at main · KuanHsiaoKuo/learn-substrate-easy
- learn-substrate-easy/8.12在ocw中使用链下存储.md at main · KuanHsiaoKuo/learn-substrate-easy
- learn-substrate-easy/8.14在ocw中发送http请求.md at main · KuanHsiaoKuo/learn-substrate-easy
在pallet中链上写本地存储(offchain index);
在pallet的ocw中使用链下存储(offchain storage);
在pallet中使用其它pallet(使用其它pallet的存储);
在pallet中添加rpc接口
-
learn-substrate-easy/8.15在pallet中添加rpc接口.md at main · KuanHsiaoKuo/learn-substrate-easy
-
pallet写好后需要通过runtime加载到链上(就是runtime/src/lib.rs中的construct_runtime宏包含的部分)。 那么对应到我们的测试,如果对pallet进行测试,我们也需要构建一个runtime测试环境,然后在这个环境中加载pallet,对pallet进行测试。 所以,编写pallet的测试就分为以下几部分:
- 编写 mock runtime;
- 编写pallet的genesis config;
- 编写测试。
为某些trait提供默认实现。
深入substrate runtime
参考资源
Runtime总览
阅读某个特定宏的文档 运行cargo expand命令去查看宏扩展后的代码 阅读宏定义。 如能很好地掌握 表达式模式匹配的宏规则是非常有帮助的。
Runtim元数据就是用来RPC调用的。这里还说明了,各种语言如何通过RPC调用与链端交互
-
Runtime 存储 · Substrate Developer Hub
- Substrate 提供了分层的模块化存储API,使runtime开发人员能根据自身情况作出合适的存储决策。 但同时请记住,区块链runtime存储的基本原则是尽可能少的使用链上存储。
- substrate/frame/support/src/storage at master · paritytech/substrate
-
Runtime 来源 · Substrate Developer Hub: Root\Signed\None
-
Runtime 执行流程 · Substrate Developer Hub
- substrate/README.md at master · paritytech/substrate
- 主要完成三种区块操作:初始化区块 执行Extrinsics 完结区块
-
Runtime事件 · Substrate Developer Hub
- Substrate runtime模块通过触发事件,以向外部实体(例如用户,区块链链浏览器或dApps)通知runtime中的变化或状况。
- 模块所能触发的事件类型、事件中包含的信息,以及事件触发的时间都能被自定义。
在用于 runtime 开发的 FRAME 系统中,System 库定义了 set_code 函数 来更新 runtime 的定义。
在 升级一条链 的教程里详细介绍了 FRAME runtime 的升级过程,并演示了两种不同的升级机制。
该教程演示的两种升级方法严格意义上都是 累加型 的,这意味着它们通过 扩展,
而不是 更新 现有的 runtime 状态来修改 runtime 逻辑。
如果 runtime 升级时对现时的状态有所更改,则可能有必要执行 “存储迁移”。
Runtime与Smart Contracts
- 总览 · Substrate Developer Hub
- Substrate Runtime 开发和 Substrate 智能合约是使用 Substrate 框架来构建 “去中心化应用” 的两种不同途径。
Substrate FRAME深入
FRAME是缩写
Framework for Runtime Aggregation of Modularized Entities (FRAME) 是一组可简化 runtime 开发的模块(称为 pallets )和支持库
参考资源
FRAME与Runtime
这里还有对FRAME主要pallets的介绍
- FRAME 与 Runtime
Framework for Runtime Aggregation of Modularized Entities (FRAME) 是一组可简化 runtime 开发的模块(称为 pallets )和支持库。
- FRAME 与 Runtime
其中 pallets 指的是 FRAME 中那些单一功能模块,承载着特定业务逻辑。
- FRAME 不止 Runtime
FRAME 提供了一些与 Substrate Primitives 交互的帮助模块,还有智能合约宏展开 而 Substrate Primitives 则提供了与核心客户端的交互接口。
(点击链接直达源码)
它可用于定义和配置 runtime 里所含的模块 ( pallet ), 使模块之间得以联动来实现最终 runtime 的整体功能。 当 runtime 接收到外部调用消息时,它会通过 Executive 模块 来将这些调用分派给相应的 pallets 进行处理。
Substrate备忘录📕
参考资源
Substrate市场交流
这里可以看作是自由竞技分享场,从Runtimes、Pallets和Projects三个方面学习和分享 Home | Substrate_ Marketplace
- Substrate市场交流
- Runtimes
- Pallets
- Projects
Runtimes
Pallets
Projects
Case Study
这里主要重点看几个案例学习项目。
Acala Network: Defi

Acala is a decentralized stablecoin platform that powers cross-blockchain open finance applications.
Case Study
Acala Network Case Study | Substrate_
Astar Network: Smart Contracts

Astar Network is a scaling dapps platform on Substrate compatible with Ethereum Virtual Machine (EVM) and connected to Polkadot.
Case Study
Astar Network Case Study | Substrate_
Equilibrium

Equilibrium introduces a cross-chain money market that combines pooled lending with synthetic asset generation and trading
Case Study
Equilibrium Case Study | Substrate_
Moonbeam: Smart Contracts

Decentralized and permissionless, Moonbeam provides an Ethereum-compatible smart contract platform that makes it easy to build natively interoperable applications.
Case Study
Moonbeam Case Study | Substrate_
Polkadex: DeFi, Infrastructure

Polkadex is a Open Source, Decentralized Exchange Platform that features feeless trades, Market Order, AMM and full focus on UI.
Case Study
Polkadex Case Study | Substrate_
Unique Network: NFTs

Unique Network is an infrastructure for the next generation NFTs, offering developers independence from network-wide transaction fees and upgrades.
Case Study
Unique Network Case Study | Substrate_
分类介绍: 144
这里主要学习网站上面的分类方法,首先分成DeFi、Wallet、Identity、Social、Smart Contracts、File Storage、IoT、Gaming、Bridge、Infrastructure、Relay Chain、NFTs这些类别,然后再加上是否企业级别的标记.
DeFi: 35
Wallet: 16
Identity: 14
Social: 5
Smart Contracts: 10
File Storage: 5
Bluzelle

The Bluzelle project enables dapps to store their data in a place that is both decentralized and mutable
Cere
Delivers fast-tracked consumer enterprise adoption through decentralized data clouds, data interoperability and SaaS DeFi.
Crust Network

Crust Network implements a decentralized cloud blockchain based on Polkadot. It is designed to build a decentralized cloud ecosystem that values data privacy and ownership.
DatDot

DatDot is a Distributed (peer-to-peer ) File Hosting Network, leveraging on the Dat Protocol and Substrate.
Equilibrium.co
Equillibrium is building a Rust-based implementation of the InterPlanetary File System (IPFS) Protocol.
IoT: 4
Data Highway

DataHighway is a DAO that incentivizes the community to run a sophisticated IoT parachain based on Polkadot using the DHX token.
Nodle

Nodle is the world’s largest ecosystem of connected devices, providing infrastructure, software and access to data for the Internet of Things.
Origin Trail
OriginTrail is an ecosystem dedicated to making global supply chains work together by enabling a universal, collaborative and trusted data exchange.
Robonomics(Airalabs)
.png)
Robonomics Network is a set of open-source packages for Robotics, Smart Cities and Industry 4.0 developers.
Gaming: 7
Ajuna Network

Ajuna Network is an infrastructure for Blockhain Games, featureing a full featured UnitySDK and UnrealSDK built on Substrate.
Bit.Country

Bit.Country is a decentralized world where everyone can start their own metaverse with the token economy and DAO.
Celer Network

Celer Network enables fast, easy and secure off-chain transactions for payment transactions and generalized off-chain smart contract.
Everdream Soft

Since 2014 is pinoneer in the integration and use of blockchain tools in the domain of gaming and digital collectibles.
GameDAO

GameDAO is democratic and transparent crowdfunding for video game creators, publishers, investors and gamers.
Sensorium Corporation

Sensorium Galaxy leverages state-of-the-art blockchain technologies to make the future of content distribution safe for both the public and artists.
Bridge: 4
Infrastructure: 39
Relay Chain: 2
NFTs: 1
Unique Network

Unique Network is an infrastructure for the next generation NFTs, offering developers independence from network-wide transaction fees and upgrades.
参考资源
Substrate惊奇资源
Resources
- DotJobs - A job board for the Substrate and Polkadot ecosystem projects, maintained by Stateless.Money.
- Developer Hub GitHub - Substrate Developer Hub repositories.
- Ecosystem Projects - Projects and teams building with Substrate.
- Polkadot Stack - An
awesome listmaintained by our friends at Web3 Foundation. - Official Homepage - Vision, ecosystem, opportunities, and much more.
- Docs - Developer documentation.
- Tutorials - Guided exercises to get you started.
- How-to guides - Workflows outlined to achieve a specific goal.
- Reference Docs - Versioned API documentation.
- Technical Papers
Support
- Builders Program - White-glove solutions and dedicated support team for visionary teams using Substrate.
- Stack Exchange - The best place for all technical questions.
- Web3 Foundation Grants - Funding for ecosystem development.
Social
- Substrate Devs Chat (Telegram) - Chat with other Substrate developers, also bridged to matrix.
- Twitter - Follow us to stay up-to-date.
Events
- Sub0 Developer Conference - Semiannual, online and in-person for all things Substrate.
- Substrate Seminar - Bi-weekly collaborative learning sessions.
Blogs
Videos
- Parity YouTube
- Polkadot Network Technical Explainers
- Seminar Crowdcast - Upcoming events and latest recordings.
- Old Seminar Crowdcast - Archive only.
- Substrate: A Rustic Vision for Polkadot by Gavin Wood at Web3 Summit 2018
Templates
- Base - Minimal FRAME-based node, derived from upstream.
- Frontier - Fronter enabled EVM and Ethereum RPC compatible Substrate node, ready for hacking.
- Front-End - Polkadot-JS API and React app to build front-ends for Substrate-based chains.
- Parachain - Cumulus enabled Substrate node, derived from upstream.
substrate-stencil- A template for a Substrate node that includes staking and governance capabilities.
FRAME Pallets
- Chainlink Feed Pallet - Chainlink feed token interface.
- Official in Substrate - Large collection, Parity maintained.
- Open Runtime Module Library (ORML) - Community maintained collection of Substrate runtime modules.
- Sunshine Bounty - Distributed autonomous organization (DAO) for administering a bounty program.
- Sunshine Identity - Keybase-inspired identity management.
- Sunshine Faucet - Dispense resources for a development chain.
- RMRK Pallets - Nested, conditional & Multi-resourced NFTs.
Framework Extensions
- Bridges - A collection of tools for cross-chain communication.
- Cumulus - A set of tools for writing Substrate-based Polkadot parachains.
- FRAME - A system for building Substrate runtimes.
- Frontier - End-to-end Ethereum emulation for Substrate chains.
- ink! - Rust smart contract language for Substrate chains.
- IntegriTEE - Trusted off-chain execution framework that uses Intel SGX trusted execution environments.
- Polkadot-JS - Rich JavaScript API framework for front-end development.
Client Libraries
- .Net API - Maintained by Usetech.
- .NET Standard API - Used in nuget, and Unity 3D integration example; Maintained by DOTMog.
go-substrate-gen- Generate go (de)serialization/client code from substrate metadata.sube- Lightweight Rust client library and CLI with support for type information.subxt- Official Rust client.- C++ API - Maintained by Usetech.
- Go RPC Client - Maintained by Centrifuge.
- Kotlin Client - Maintained by Nodle.io.
- Polkadot-JS API - Semi-official JavaScript library for Substrate-based chains.
- Python Interface - Maintained by Polkascan Foundation.
- Rust API Client - Rust client maintained by Supercomputing Systems AG.
- Subscan Go Utilities - SS58 and more, developed by Subscan.
Mobile
- Fearless Utils Android - Android Substrate tools.
- Fearless Utils iOS - iOS Substrate tools.
- Polkadot-Dart - Dart Substrate API.
- PolkaWallet SDK - Flutter SDK for Substrate-based App.
- React-Native-Substrate-Sign - Rust library for React Native.
Tools
offline-election, which is a tool
that is used to predict nominated proof-of-stake elections.
offchain::ipfs- Substrate infused with IPFS.polkadot-js-bundle- A standalone JS bundle that contains Polkadot{JS} libraries.polkadot-launch- Simple CLI tool to launch a local Polkadot test network.polkadot-runtime-prom-exporter- A Prometheus exporter for Polkadot runtime metrics (modifiable for Substrate use).polkadot-scripts- A collection of scripts Parity uses to diagnose Polkadot/Kusama.polkadot-starship- Another tool to launch a local Polkadot test network, with emphasis on the ability to run big testnets.srtool-actions- GitHub actions to easily use thesrtoolDocker image to build your own runtime.srtool-cli- CLI frontend for thesrtoolDocker image.srtool- Docker image to deterministically build a runtime.subsee- CLI to inspect metadata of a Substrate node as JSON.substrate-balance-calculator- Breakdown the balances of your Substrate account.substrate-balance-graph- Create a graph of the token balance over time of a Substrate address.substrate-graph-benchmarks- Graph the benchmark output of FRAME pallets.substrate-js-utils- A set of useful JavaScript utilities for Substrate that uses the Polkadot{JS} API; Also deployed as a website.substrate-society- A basic front-end for the FRAME Society pallet.substrate-toml-lint- A toml parser and checker to avoid common errors in Substrate projects.subwasm- CLI to inspect a runtime WASM blob offline. It shows information, metadata and can compare runtimes. It can also help you fetch a runtime directly from a node.sup- Command line tool for generating or upgrading a Substrate node.- Aleph.im - Scalable, decentralized database, file storage, and computation services for Substrate chains and more.
- Archive - Indexing engine for Substrate chains.
- Dev Hub Utils - Unofficial utilities for working with official Substrate Developer Hub resources.
- Europa - A sandbox for the Substrate runtime execution environment.
- Fork Off Substrate - Script to help bootstrap a new chain with the state of a running chain.
- fudge - Core lib for accessing and (arbitrarily) manipulating substrate databases, including the building and importing of local blocks.
- Gantree Library - A suite of technologies for managing Substrate-powered parachain networks via rapid spin-up & tear-down.
- Halva - A toolchain for improving the experience of developing on Substrate.
- Hydra - A GraphQL framework for Substrate nodes.
- Jupiter - Testnet for smart contracts written for the FRAME Contracts pallet and ink!.
- Megaclite - Zero-knowledge tools for the Polkadot ecosystem.
- Parity Signer - Upcycle an unused mobile phone into an air-gapped hardware wallet.
- Polkadot PANIC - Monitoring and alerting solution for Polkadot nodes by Simply VC, compatible with many Substrate chains.
- Polkadot Tool Index - List of tools available for your development with Polkadot and any Substrate chain including Block Explorers, Wallets, Network Monitoring & Reporting, Clients, Benchmarking, Fuzzing, Forking, SCALE Codec, CLI Tools and much more.
- Polkadot-JS Apps UI - Semi-official block explorer & front-end for Substrate-based chains.
- Polkadot-JS Extension - Browser extension for interacting with Substrate-based chains.
- Polkascan - Multi-chain block explorer maintained by Polkascan Foundation.
- Proxy Hot Wallet Demo - A demonstration of a secure, convenient, and flexible hot wallet architecture built on Substrate primitives.
- Redspot - A Truffle-like toolkit for smart contracts for the FRAME Contracts pallet and ink!.
- Sidecar - REST service that runs alongside Substrate nodes.
- SS58 Transform - Display key’s addressees with all SS58 prefixes.
- Staking Rewards Collector - A script to parse and output staking rewards for a given Kusama or Polkadot address and cross-reference them with daily price data.
- Subkey - Command line utility for working with cryptographic keys.
- SubQuery - A GraphQL indexer and query service that allows users to easily create indexed data sources and host them online for free.
- Subscan - Multi-network explorer for Substrate-based chains.
- Subsquid - An indexing framework (SDK + infrastructure) to quickly and easily turn Substrate and EVM on-chain data into APIs and host them.
- Substate - 100% no-std/wasm compatible Substrate storage key generator library for Rust.
- Substrate debug-kit - A collection of tools and libraries for debugging Substrate-based chains.
- Substrate Docker Builders - A set of Dockerfiles and GitHub Actions to auto-build and push a Docker image for Substrate-based chains.
- Substrate Faucet Bot - Python-based faucet for development purposes.
- Substrate Graph - GraphQL indexer for Substrate-based chains.
- TxWrapper - Helpful library for offline transaction creation.
- VSCode Substrate - Plugin for Visual Studio Code.
Products and Services
- OnFinality - Free and paid services to shared Substrate based nodes.
Alternative Implementations
- Gossamer - A Polkadot client implemented in Go; from ChainSafe.
- Kagome - A C++17 implementation of the Polkadot client; from Soramitsu.
- LimeChain AssemblyScript Runtime - An account-based Substrate proof-of-concept runtime written in AssemblyScript; from LimeChain.
SCALE Codec
- AssemblyScript - Maintained by LimeChain.
- C - Maintained by Matthew Darnell.
- C++ - Maintained by Soramitsu.
- Codec Definition - Official codec documentation.
- Go - Maintained by Itering.
- Haskell - Maintained by Robonomics Network.
- Java - Maintained by Emerald .
- Parity SCALE Codec - Reference implementation written in Rust.
- Python - Maintained by Polkascan Foundation.
- Ruby - Maintained by Itering.
- Scales - Serializing SCALE using type information from a type registry.
- JavaScript / TypeScript implementations:
- paritytech/parity-scale-codec-ts - Maintained by Parity Technologies.
- polkadot-js/api - Maintained by Polkadot-JS.
- scale-ts - Maintained by Josep M Sobrepere.
- soramitsu/scale-codec-js-library - Maintained by Soramitsu.
参考资源
- awesome-substrate/README.md at master · substrate-developer-hub/awesome-substrate
an awesome list is a list of awesome things curated by the Substrate community.
nervos/ckb
参考资源
online-book
fragment
local
Solana
参考资源
online-book
fragment
local
生产实践
优秀产品
awesome series
rust-unofficial/awesome-rust
rust-embedded/asesome-embedded-rust
rust-in-blockchain/awesome-blockchain-rust
TaKO8Ki/awesome-alternatives-in-rust
RustBegginers/awesome-rust-mentors
awesome-rust-com/awesome-rust
基础库
框架引擎
Checklist
-
总览:
- [ ] This is an important note (Note-1)
-
所有权三件套:
- [ ] 借用情况内存示意图 (borrow)
-
Substrate教程梳理:
- [ ] pallet 前置Rust知识 (Pallet-Preset)
-
深入Substrate Pallet:
- [ ] pallet extrinsics 使用 (Pallet-Extrinsics)
- [ ] pallet errors 使用 (Pallet-Errors)
- [ ] pallet config 使用 (Pallet-Config)
- [ ] pallet 使用其他 Pallet (Pallet-Use-Other-Pallet)
- [ ] pallet 扩展 使用 (Pallet-Extension)
- [ ] pallet 调试 (Pallet-Debug)
- [ ] pallet rpc 使用 (Pallet-RPC)
- [ ] pallet 基准测试 (Pallet-Benchmarking)


